Creating Labels Using Internal Batch Software
Allegro2 33
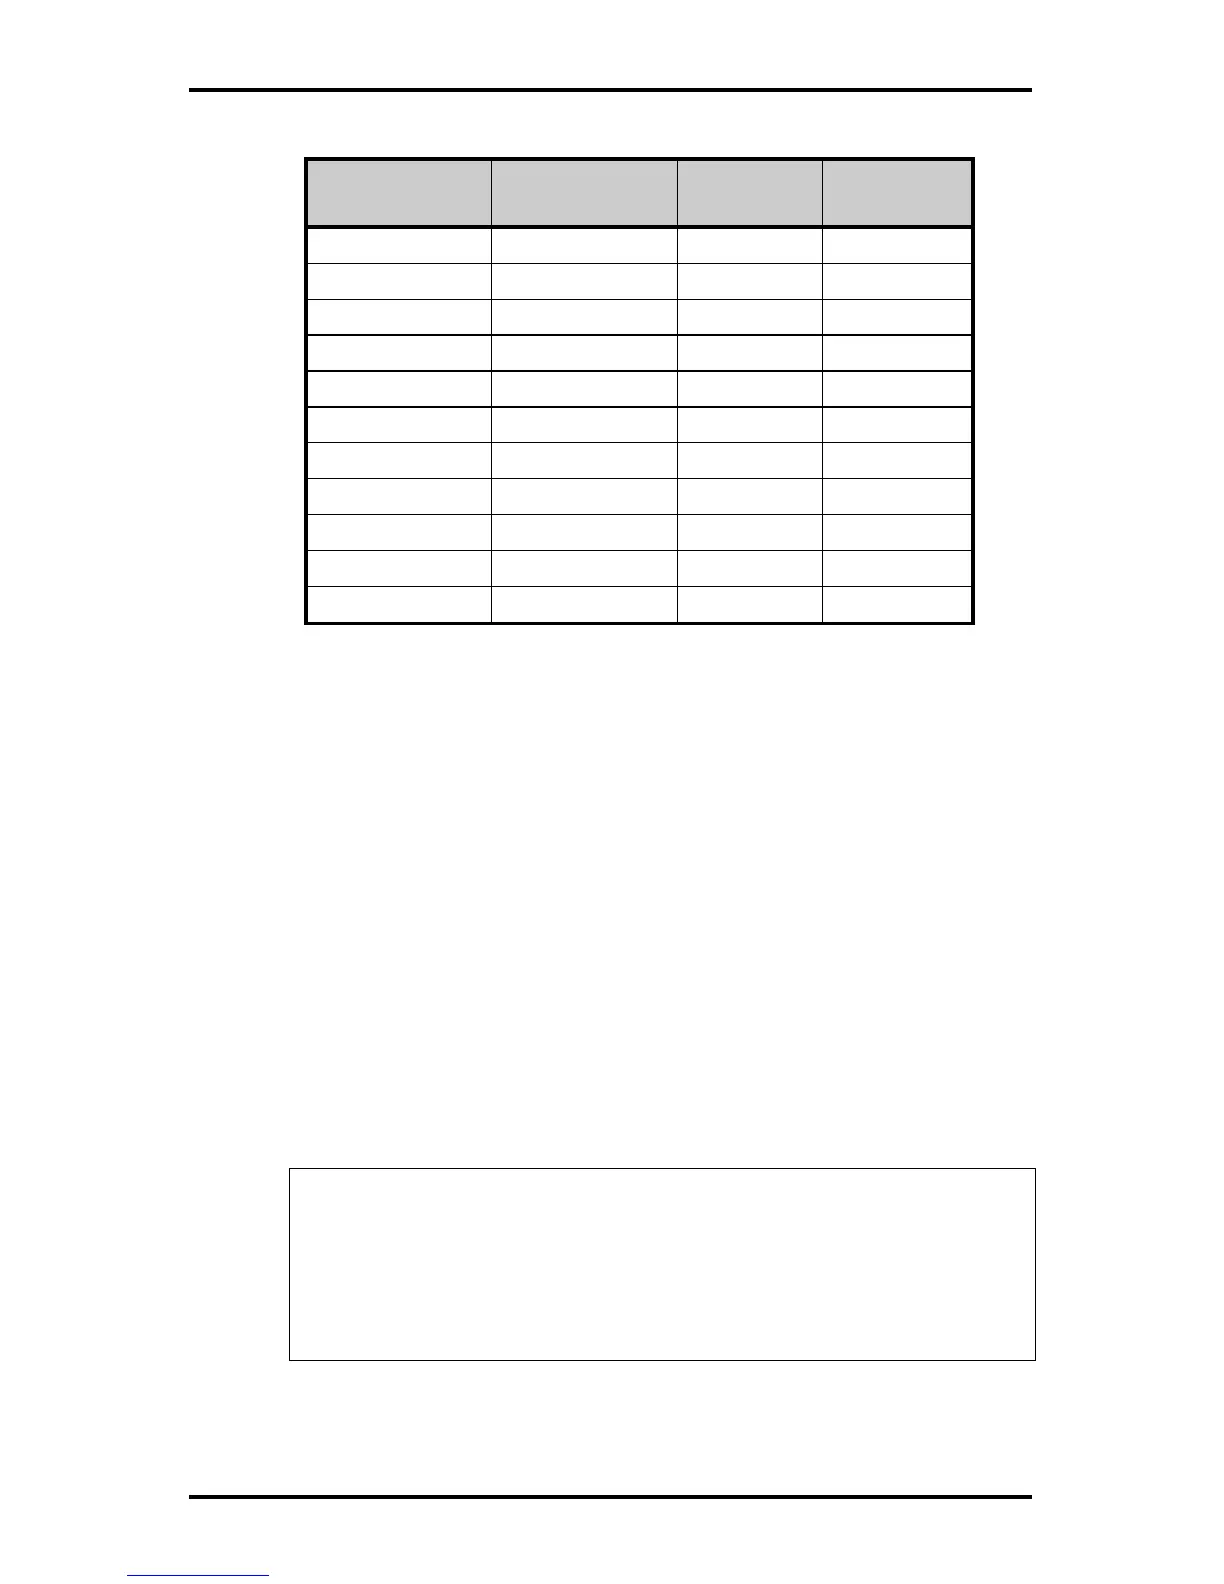
Function Default
Settings
Function Settings
Handshake: none F1 CTRL W
Mode: FDX F2 CTRL X
Data Bits: 8 F3 CTRL Y
Stop Bits: 1 F4 CTRL Z
Parity: none F5 ALT S
Baud Rate: 9600 F6 ALT P
Keys: US F7 ALT I
Blk End: US/CR F8 ALT X
Auto NL: on F9 ALT F
CR: CR
Compatible: LINK MC 2
Table 3-1 LINK CRT Default Settings
3. Select Stand-Alone Labeling Software Mode
The Printer is shipped in the RS-232 mode for use with PCs. To
use the CRT, turn Dip Switch S1-7 to the ‘on’ position and
insert the 256K Flash Module into the Printer before turning the
power on. Plug the module into the module slot as described in
Section 1.6. Ensure that the lettering is facing toward the front
of the Printer. When the Printer is turned on it will recognize
that the module has been formatted as an Internal Batch
Software Module and will run the Internal Batch Program. If the
module has not been formatted, the following screen will
appear:
BATCH SYSTEM INITIALIZATION
INSERT Flash MEMORY MODULE AND PRESS:
I: INITIALIZE NEW MODULE.
ENTER: ENTER BATCH SYSTEM.
Esc: EXIT TO RS-232 MODE.

 Loading...