 Loading...
Do you have a question about the Dell Latitude 7290 and is the answer not in the manual?
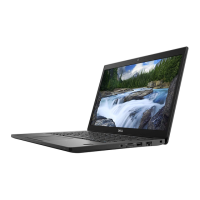
| Color | gray |
|---|---|
| Date of Release | 2021 |
| Optical Drive | none |
| OS | windows 10 pro |
| Numeric Keypad | no |
| Touch Screen | no |
| Screen Size | 12.5 inches |
| Screen Resolution | 1366 x 768 (hd) |
| Processor Brand | intel |
| Processor Model | intel 8th generation core i7 |
| Processor Model Number | 8650u |
| Storage Type | ssd |
| Storage Capacity | 512 gigabytes |
| SSD Capacity | 512 gigabytes |
| Type of Memory | ddr4 |
| System Memory | 16 gigabytes |
| System Memory Speed | 2400 megahertz |
| Number Of Memory Slots | 1 |
| System Memory Expansion | 16 gigabytes |
| GPU | intel uhd graphics 620 |
| GPU Brand | intel |
| Graphics Type | integrated |
| Front Facing Camera | yes |
| Front Facing Camera Resolution | 0.92 megapixels |
| Front Facing Camera Video Resolution | 720p |
| Audio Type | four-channel high-definition audio |
| Speakers Type | stereo speakers |
| Built In Microphone | yes |
| Backlit Keyboard | no |
| Card Reader | yes |
| Security | cable lock slot |
| Wireless Connectivity | bluetooth |
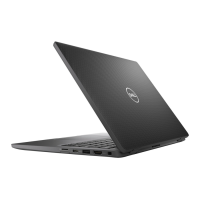
| HDMI Outputs | 1 |
| Number of USB Ports | 3 |
| Ethernet Ports | 1 |
| Headphones Output | yes |
| Battery Type | lithium-ion |
| Depth | 8.7 inches |
|---|---|
| Height | 0.7 inches |
| Width | 13 inches |
| Net Weight | 3.09 pounds |
Important safety steps before disassembly.
Precautions to prevent damage from static electricity.
Steps to prepare the system before internal access.
Steps to complete after internal work is done.
Tools required for component removal and installation.
Procedure for removing and installing the computer's base cover.
Steps to remove and install the system battery.
Detailed steps for removing and installing the system board.
Details on DDR4 memory, its features, and differences from DDR3.
Overview of USB Type-C connector and USB 3.1 standards.
Information on Thunderbolt 3 connectivity via USB Type-C.
Detailed hardware specifications for the system.
Comprehensive specifications for the computer's display.
List of function key combinations and their actions.
How to access and use the system's boot menu.
Options for setting system security and passwords.
Instructions for updating the BIOS from within Windows.
Method for updating BIOS via F12 boot menu.
List of operating systems supported by the computer.
Steps to download and install necessary drivers.
Guide to using the ePSA diagnostic tool.
Procedure to reset the system's Real Time Clock.