60 | Troubleshooting
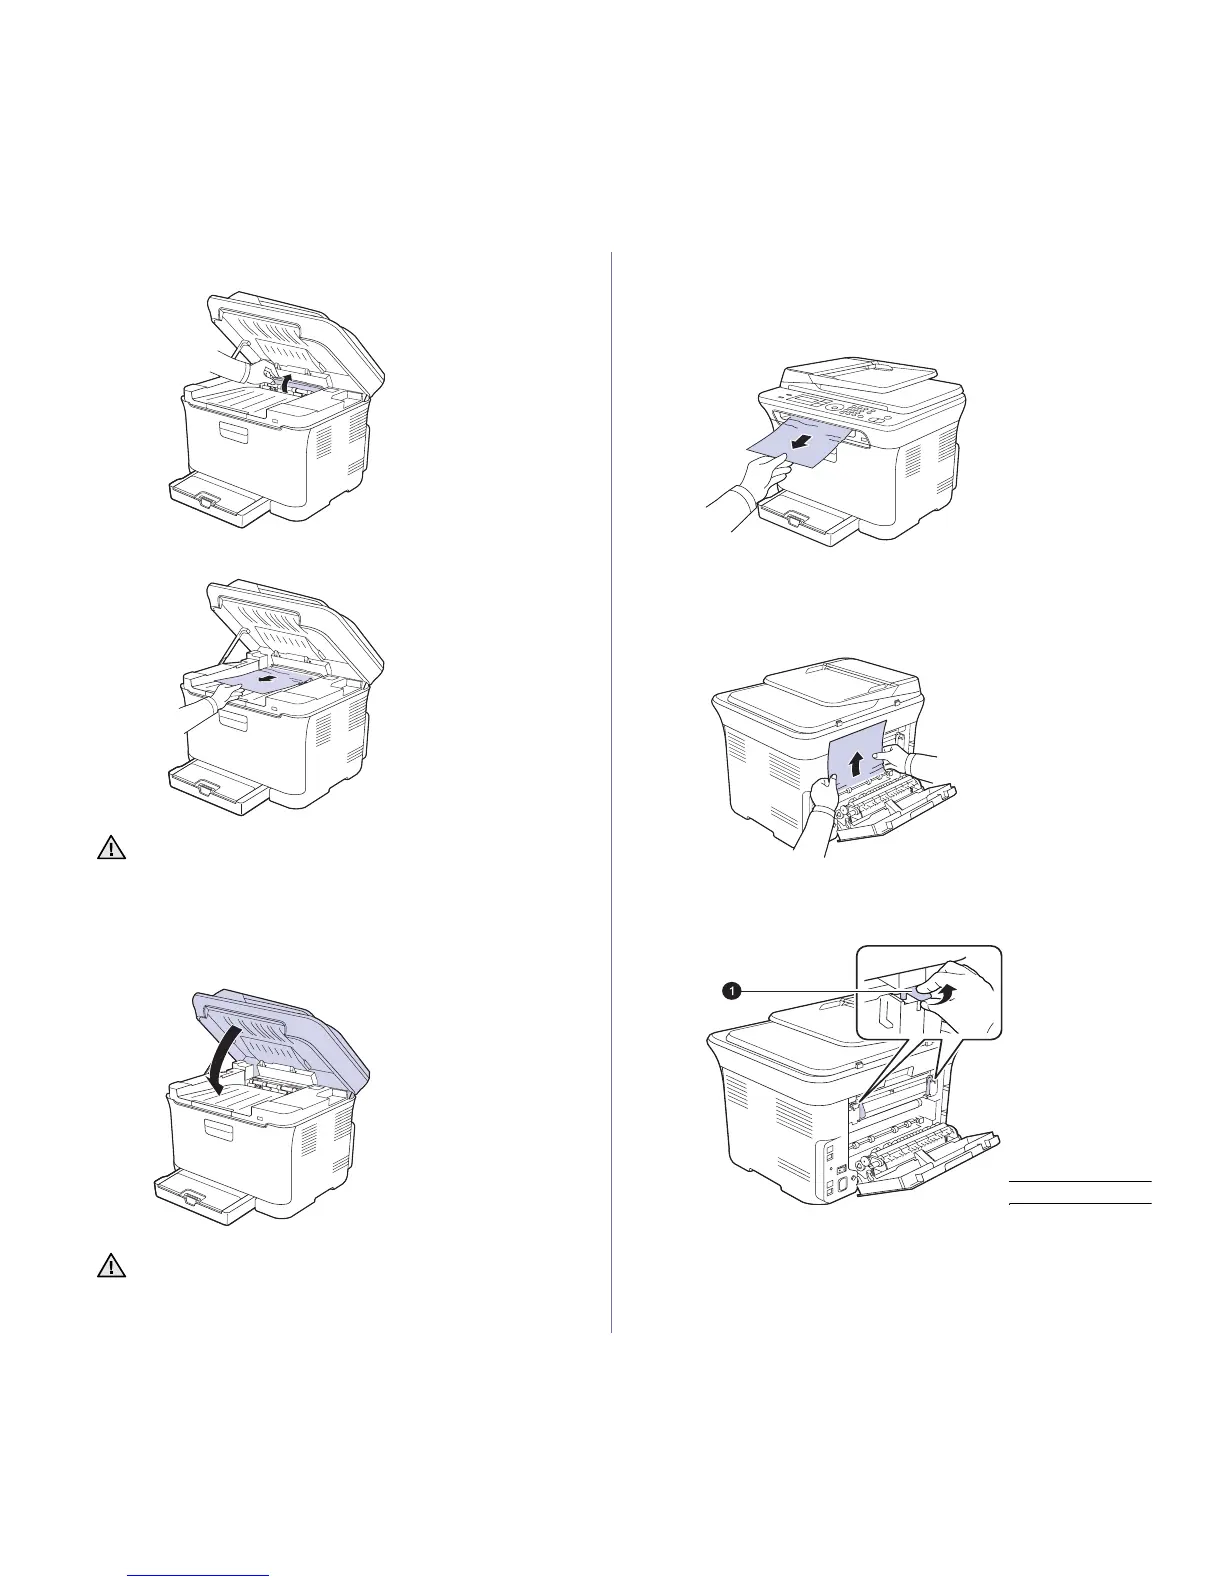
2. Open the inner cover.
3. Carefully take the jammed paper out of the printer.
4. Close the inner cover.
5. Lower down the scan unit gently and slowly until it is completely closed.
Ensure that it is securely latched.
Be careful not to pinch your fingers!
In the paper exit area
1. Open and close the front cover. The jammed paper is automatically
ejected from the printer.
2. Gently pull the paper out of the output tray.
If you do not see the jammed paper or if there is any resistance when
you pull, stop and go to the next step.
3. Open the rear cover.
4. If you see the jammed paper, pull it straight up. Skip to step 8.
If you still do not see the paper, go to the next step.
5. Pull up the fuser lever.
Do not touch the fuser inside the inner cover. It is hot and could
cause burns! The fuser's operating temperature is 180
°
C (356
°
F).
Take care when removing paper from the printer.
If the scan unit is not completely closed, the printer will not
operate.
1 fuser lever

 Loading...