20
14.1 Installing the lter
42
1. Remove the lter (C4)
from the packaging.
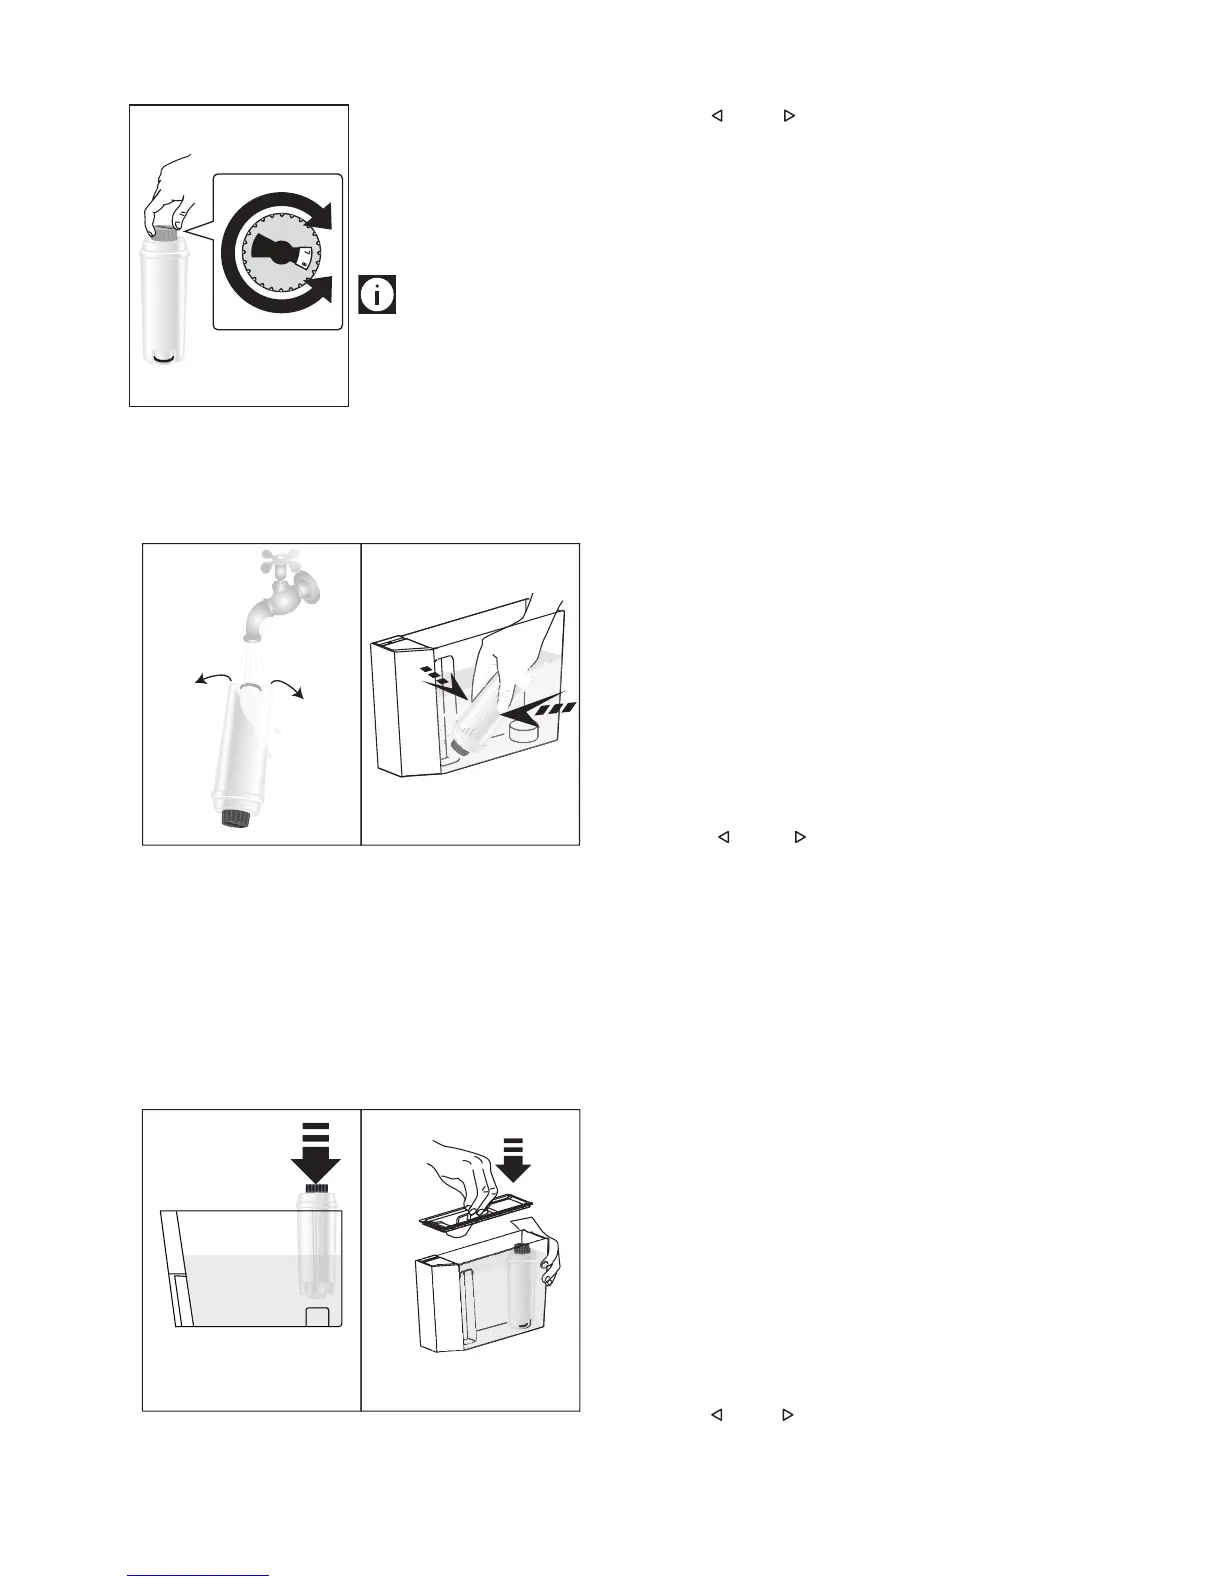
2. Turn the date indicator
disk (see g. 42) until the
next two months of use
are displayed.
Please note
The lter lasts about two
months if the appliance is used
normally. If the coee machine
is left unused with the lter in-
stalled, it will last a maximum of three weeks.
3. To activate the lter, run tap water through the hole in the
lter as shown in the gure until water comes out of the
openings at the side for more than a minute (g. 43).
4443
17 fl. oz
0,5 l
4. Extract the tank (A16) from the appliance and ll with
water.
5. Insert the lter in the water tank and immerse it complete-
ly for about ten seconds, sloping it and pressing it lightly to
enable the air bubbles to escape (g. 44).
6. Insert the lter in the lter housing (A17 - g. 45A) and
press as far as it will go.
7. Close the tank with the lid (A18 - g. 45B), then replace the
tank in the machine.
45A 45B
When you install the lter, you must notify the appliance of its
presence.
8. Press the MENU/ESC button (B2) to enter the menu;
9. Press (B9) or (B10) (g. 6) until “Install lter” appears
on the display (B4);
10. Press the OK button (B3) (g. 7);
11. “Enable?” is displayed;
12. Press the OK button to conrm the selection. “HOT WATER
Press OK” is displayed;
13. Position a container under the hot water spout (C6) (min.
capacity: 17 .oz/500 ml);
14. Press the OK button to conrm the selection. The appliance
begins hot water delivery and the message “Please wait” is
displayed;
15. After the ow of hot water stops, the appliance automatically
resets to “Ready for coee” status.
The lter is now active and you can use the coee machine.
14.2 Replacing the lter
When “REPLACE FILTER” appears on the display (B4), after two
months (see date indicator) or when the appliance has not been
used for 3 weeks, you should replace the lter:
1. Extract the tank (A16) and exhausted lter (C4);
2. Take the new lter out of its packet and proceed as illus-
trated in points 2, 3, 4, 5, 6 and 7 in the previous section;
3. Position a container under the hot water spout (C6) (min.
capacity: 17 .oz/500 ml);
4. Press the MENU/ESC button (B2) to enter the menu;
5. Press (B9) or (B10) (g. 6) until “Replace lter” ap-
pears on the display;
6. Press the OK button (B3 - g. 7);
7. The message “Conrm?” is now displayed;
8. Press the OK button to conrm the selection;
9. “HOT WATER Press OK” is displayed;
10. Press the OK button to conrm the selection. The appliance
begins hot water delivery and the message “Please wait” is
displayed;
11. After the ow of hot water stops, the appliance automatically
resets to “Ready for coee” status.
The new lter is now active and you can use the coee machine.
14.3 Removing the lter
If you want to use the appliance without the lter (C4), you
must remove it and notify the appliance of its removal. Proceed
as follows:
1. Remove the tank (A16), remove the lter and put the tank
back in the appliance;
2. Press the MENU/ESC button (B2) to enter the menu;
3. Press (B9) or (B10) (g. 6) until “Install lter, Enabled”
appears on the display (B4);
4. Press the OK button (B3 - g. 7);
5. “Disable?” is displayed;
 Loading...