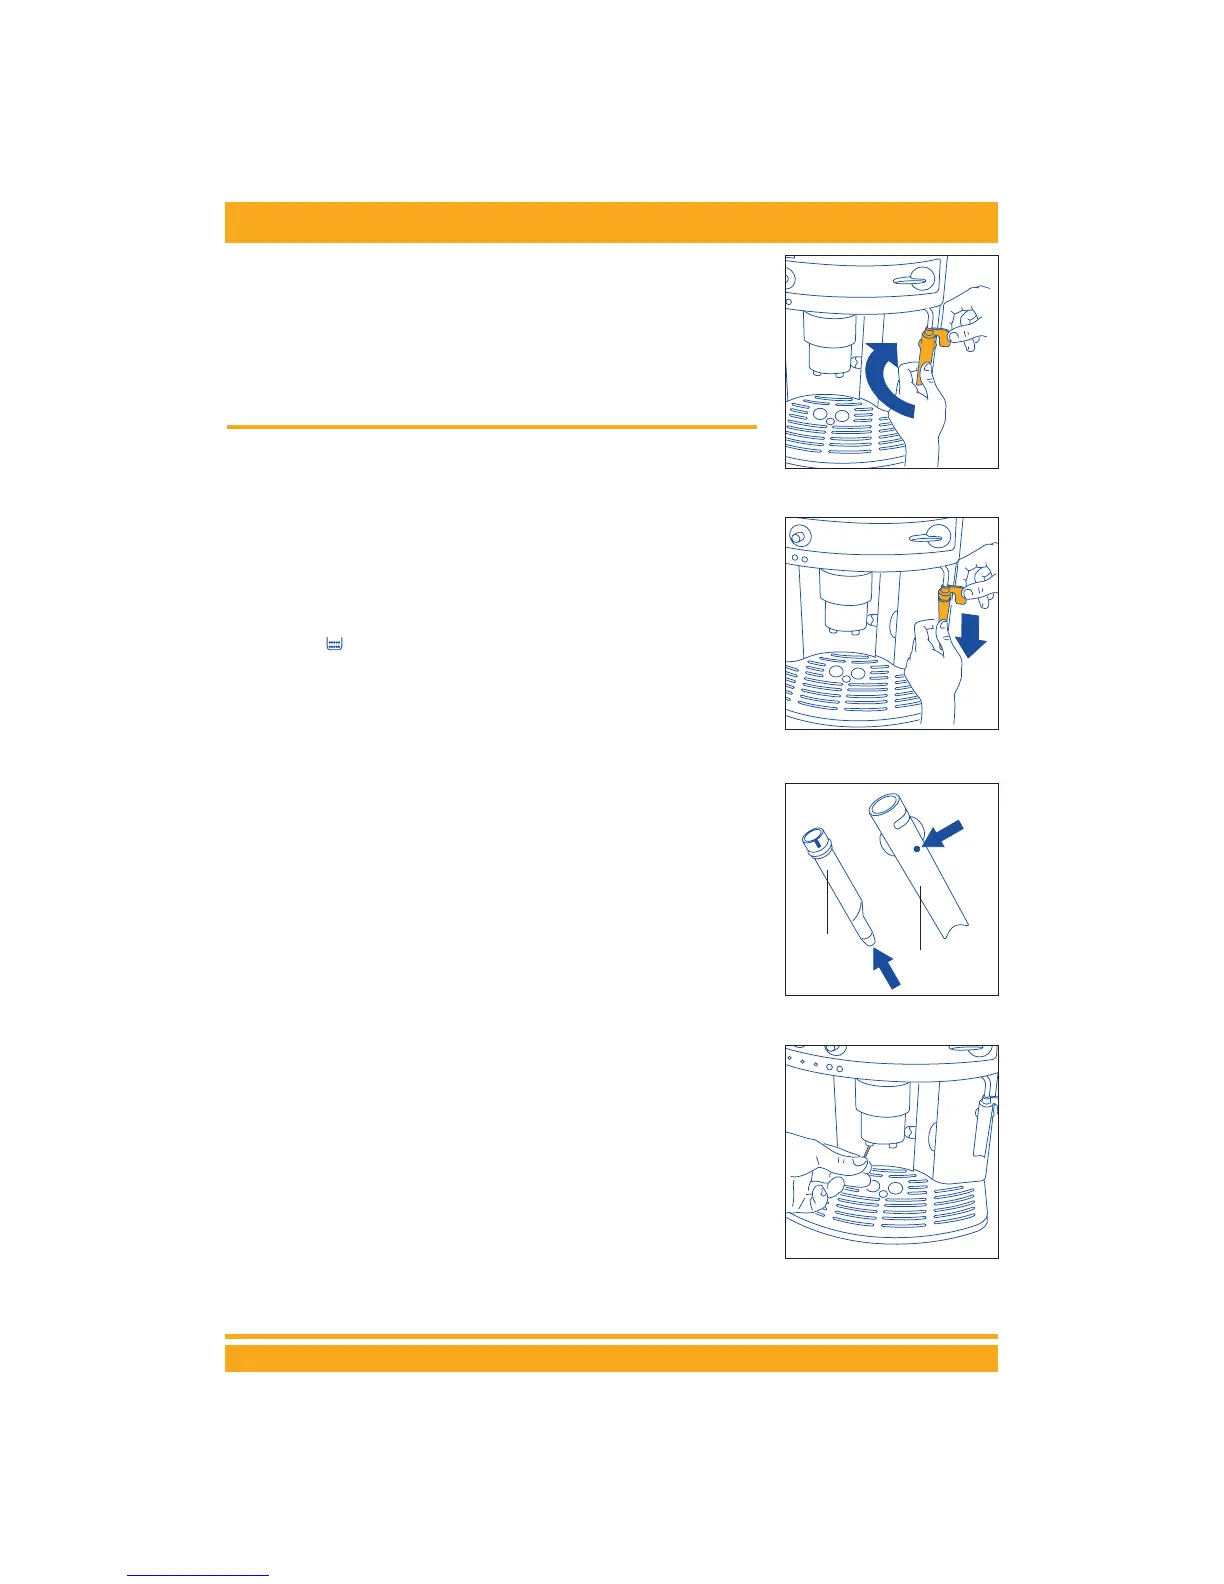
• Carefully wash the milk frother and the steam nozzle in warm water.
• Check that the two holes indicated by the arrows in Fig. 27 are not
clogged. If necessary, clean them using a needle or pin.
• Replace the steam nozzle by inserting it and vigorously turning it
upwards into the steam spout.
• Replace the milk frother by pushing it upwards and turning it anti-
clockwise.
10 CLEANING AND MAINTENANCE
• Before performing any cleaning operations, the machine must have
cooled down and must be disconnected from the mains power supply.
•Never immerse the machine in the water: it is an electrical appliance.
• Do not use solvents or abrasive detergents to clean the coffee maker.
A soft damp cloth will suffice.
• All the components of the machine must not be washed in the dishwa-
sher.
10.1 CLEANING THE COFFEE MAKER
• Clean the grounds container (as described in chapter 5, note 7) whe-
never the light comes on steady (chap. 12 - point3).
• The water tank should be cleaned regularly.
• The drip tray is fitted with a level indicator (red) showing the level of
water inside. When the indicator starts to become visible (a few milli-
metres under the drip tray), the drip tray must be emptied and clea-
ned.
•Check that the holes in the coffee delivery spout are not blocked. To
clean them, scrape the dry coffee residues with a needle (Fig. 28).
13
OPERATING INSTRUCTIONS
Fig.25
Fig.26
Fig.27
Fig.28
Steam
nozzle
Milk frother
 Loading...