13
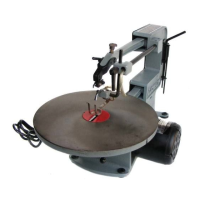
Fig. 25
3. Push blade holder clamping lever (C) Fig. 25, to the
rear as shown. This will automatically release the blade
(D) from the upper blade holder (E).
4. Push lower blade holder clamping lever (F) Fig. 26,
to the rear. This will automatically release blade (D) from
lower chuck.
5. Remove blade from lower chuck.
6. Insert new blade into the lower and upper blade
holders in the same manner, making certain the blade
teeth are pointing down toward the table.
7. Apply blade tension by referring to section, “AD-
JUSTING BLADE TENSION.” NOTE: NEVER push down
on blade tension knob (B) Fig. 25, to compress tension
spring.
C
E
D
CHANGING BLADES
1. WARNING: TO AVOID INJURY FROM ACCIDENTAL
STARTING, ALWAYS TURN SWITCH “OFF” AND RE-
MOVE POWER CORD PLUG FROM ELECTRICAL OUT-
LET BEFORE REMOVING OR REPLACING BLADE.
2. Remove table insert (A) Fig. 24, and release blade
tension by pulling tension lever (B) forward, as shown.
Fig. 24
A
B
Fig. 26
F
D
B
 Loading...