17
CHANGING BLADES
To change blades:
DISCONNECT MACHINE FROM POWER
SOURCE.
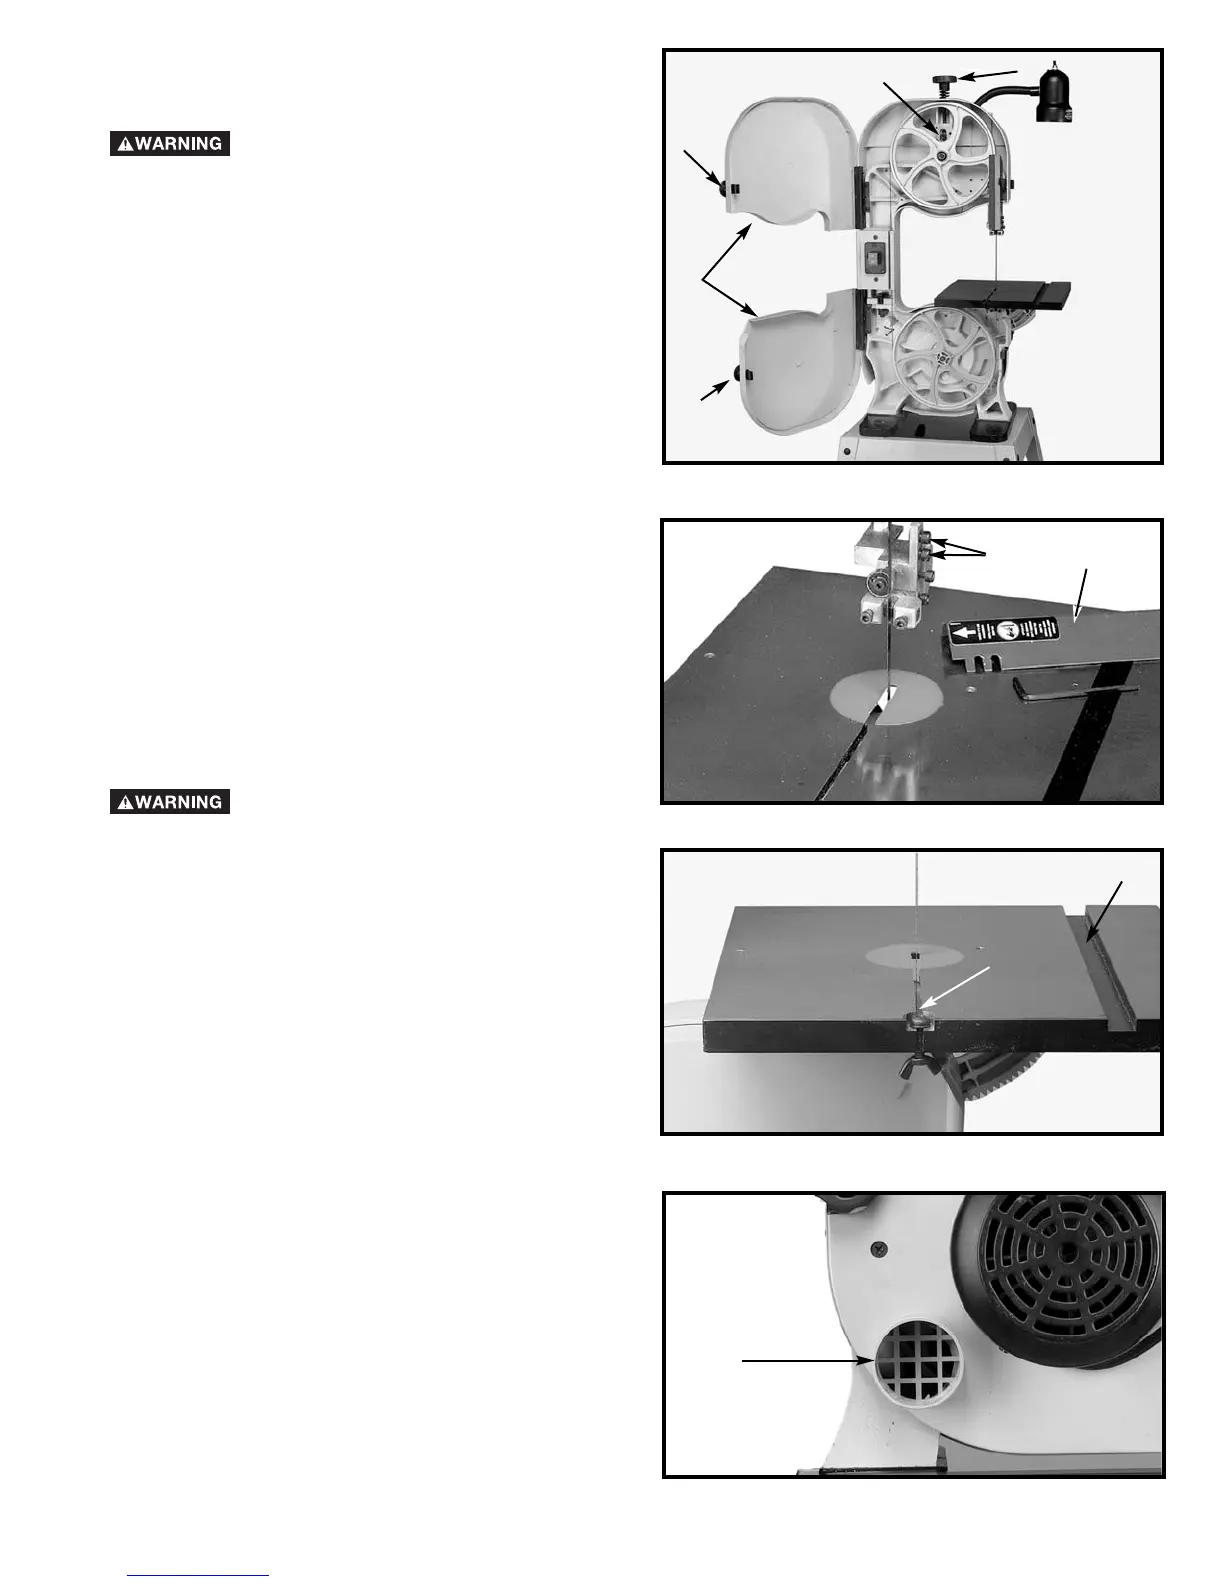
1. Pull door latches (A) Fig. 35 and open doors (B).
2. Loosen the two screws (C) Fig. 36, and remove the
blade guard (D).
3. To release tension on the band saw blade loosen
screw (E) and turning tension knob (G) Fig. 35
counterclockwise.
4. Remove table alignment screw (F) Fig. 37.
5. Slip the blade off both wheels and guide it out
through the slot in the table.
6. Check the new blade to make sure that the teeth will
point down toward the table when installed. IF NOT,
CAREFULLY TURN THE BLADE INSIDE OUT.
7. Place the new blade onto wheels and adjust the
blade tension, blade guides, and tracking as described
previously in this manual.
8. Replace the blade guard, (removed in STEP 2), and
the table alignment screw (removed in STEP 4). Tighten
both securely.
ALWAYS MAKE SURE THE UPPER
BLADE GUARD IS INSTALLED AND PROPERLY
ADJUSTED BEFORE OPERATING THE BAND SAW.
9. Close the doors (B) Fig. 35 before operating saw.
10. To use the miter gage as shown in Fig. 40, insert the
miter gage guide bar into miter gage slot (S) Fig. 37 and
adjust it to the desired angle.
Fig. 35
G
A
A
B
Fig. 36
C
D
Fig. 37
F
S
DUST PORT
A dust port (A) Fig. 38, is provided to connect your band
saw to a standard shop vacuum or dust collector. The
opening of the dust port is 2-1/4" I.D.
Fig. 38
A
E
 Loading...