7
ENGLISH
!6
Dimmer Button (DISPLAY)
• Push this button to change the brightness of the display.
• Push once to make the display 2/3 as bright as normal.
• Push again to make the display 1/3 as bright as normal.
• Push once again to turn the entire display off during playback
and all except the track number off in any other mode.
!7
Stop Button (2 STOP)
• Push this button to stop playback or pause mode.
The disc will stop rotating.
!8
Random Button (RANDOM)
• Push this button to play the track in random order.
(Refer to page 11.)
!9
Play Button (1 PLAY)
• Push this button to start playback of a disc during stop or
pause mode.
• When this button is pushed, is displayed and the
track number being played is displayed.
• Tracks are shown on the calendar display. Once a track has
been played, the corresponding track number goes out on
the calendar display.
@0
Pause Button (3 PAUSE)
• Push this button to stop playback temporarily during
playback.
• When this button is pushed during playback, playback is
stopped temporarily, the indicator goes out and the
indicator lights.
• Push this button or the 1 PLAY button again to continue
playback.
@1
Open/Close Button (5 OPEN/CLOSE)
• The disc holder is opened and closed by pushing this button.
• Push this button once to open the disc holder and once again
to close it.
• When the disc holder is closed with a disc loaded, the disc
will rotate for a few seconds while the disc contents are
read. The number of tracks and total playback time on the
disc are then displayed on the digital display t.
@2
Disc Holder
• Place the disc on the disc holder with the label facing up.
• Use the 5 OPEN/CLOSE button @1 to open and close the
disc holder.
• The disc holder may also be closed by pressing the 1 PLAY
button !9 or 3 PAUSE button @0.
@3
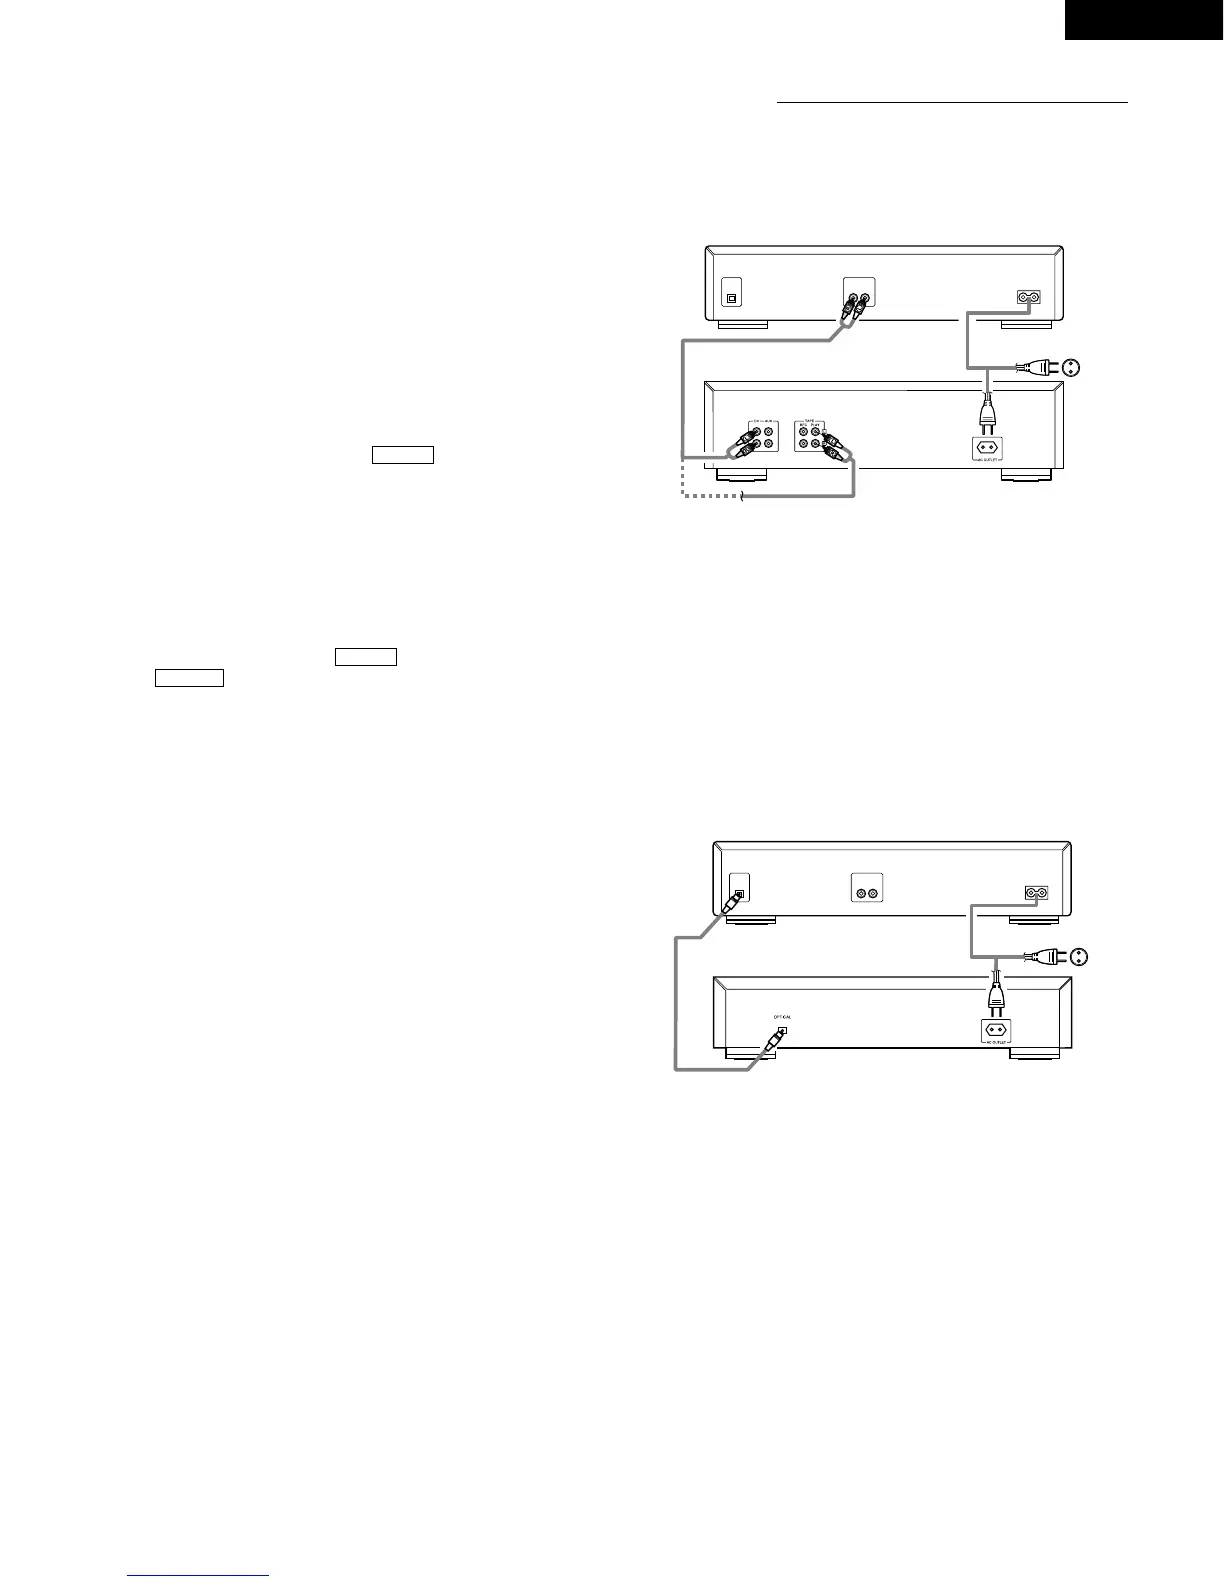
Digital Output Jack (OPTICAL)
• Digital data is output in optical form from this jack.
(Refer to page 7 for connections.)
@4
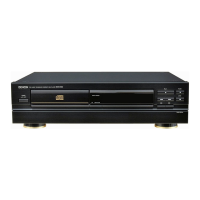
Output Terminal (LINE OUT)
• Connect these jacks to the input jacks on your amplifier.
(Refer to page 7 for details on the connections.)
@5
AC INLET
• Connect the included AC cord here.
3 PAUSE
1 PLAY
1 PLAY
CONNECTION
(1) Connecting the Output Terminal (LINE OUT)
Use the included pin cords to connect the left (L) and right (R)
output terminal (LINE OUT) of the DCD-485/685 to the CD, AUX
or TAPE PLAY left (L) and right (R) input jacks of the amplifier.
Connection Precautions
• Before proceeding with connections or disconnections of cables
and power cords, be sure to turn all system components off.
• Ensure that all cables are connected properly to the L (left) and R
(right) jacks.
• Insert plugs fully into the terminals.
• Connect the output jacks to the amplifier CD, AUX or TAPE PLAY
input jacks.
 Loading...