9
ENGLISH
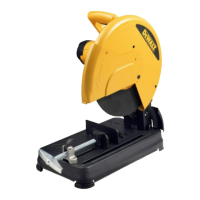
1. Push in spindle lock
12
and rotate wheel
10
by hand until
wheel lock lever engages slot in inside flange
20
to lock
wheel. Loosen the bolt
21
counterclockwise in the center
of the abrasive wheel with the 8mm hex key
7
. Bolt has
right-handthread.
2. Remove the bolt
21
, washer
22
, outside flange
23
and
old wheel
10
.
3. Make sure flange surfaces are clean and flat. Install the new
abrasive wheel by reversing the abovesteps.
4. For safe operation, securely tighten bolt
21
to firmly secure
the abrasive wheel
10
in between inner
20
and outer
flanges
23
. Do not overtighten bolt
21
.
WARNING: Check the work surface that the chop saw
rests on when replacing with a new abrasive wheel. It
is possible that the wheel may contact ANY ITEMS OR
STRUCTURE THAT EXTENDS ABOVE work surface
(under the base) when the arm is fullylowered.
Operation Tips for More Accurate Cuts
• Allow the wheel to do the cutting. Excessive force will cause
the wheel to glaze reducing cutting efficiency and/or to
deflect causing inaccuratecuts.
• Properly adjust fenceangle.
• Make sure material is laying flat acrossbase.
• Properly clamp material to avoid movement andvibration.
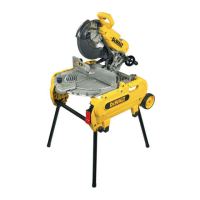
Motor Brush Inspection and Replacement
(Fig. H, I)
BE SURE TOOL IS UNPLUGGED BEFORE INSPECTING BRUSHES.
Brushes should be regularly inspected for wear. To inspect
brushes, unscrew the two end cap screws
24
and remove the
end cap
25
. To remove each brush
26
, first unplug the shunt
wire
27
terminal connection. Then carefully back the brush
spring out of the brush box and remove brush. Brushes should
slide freely in brush box. If brushes are worn down to 8 mm as
shown in FigureI, they should bereplaced.
To reinstall each brush, carefully back the spring out of the
brush box, insert the brush and return the spring making sure
it is pressing on the brush and not touching the brush box.
Reconnect shunt wire terminal, then replace the end cap and
twoscrews.
MAINTENANCE
Your
power tool has been designed to operate
over a long period of time with a minimum of maintenance.
Continuous satisfactory operation depends upon proper tool
care and regularcleaning.
WARNING: To reduce the risk of serious personal
injury, turn tool off and disconnect tool from power
source before making any adjustments or removing/
installing attachments or accessories. Be sure the
trigger switch is in the OFF position. An accidental start-up
can causeinjury.
Lubrication
Closed-type, grease-sealed ball bearings are used throughout.
These bearings have sufficient lubrication packed in them at the
factory to last the life of the chopsaw.
Cleaning
WARNING: Blow dirt and dust out of the main housing
with dry air as often as dirt is seen collecting in and around
the air vents. Wear approved eye protection and approved
dust mask when performing thisprocedure.
WARNING: Never use solvents or other harsh chemicals
for cleaning the non-metallic parts of the tool. These
chemicals may weaken the materials used in these parts.
Use a cloth dampened only with water and mild soap.
Never let any liquid get inside the tool; never immerse any
part of the tool into aliquid.
Optional Accessories
WARNING: Since accessories, other than those offered
by
, have not been tested with this product, use
of such accessories with this tool could be hazardous.
To reduce the risk of injury, only
recommended
accessories should be used with thisproduct.
Consult your dealer for further information on the
appropriateaccessories.
Use only high-strength Type 1 organic bonded wheels rated
4100 rpm orhigher according to EN12413, safety requirements
for bonded abrasiveproducts.
Protecting the Environment
Separate collection. Products and batteries marked
with this symbol must not be disposed of with normal
householdwaste.
Products and batteries contain materials that can
be recovered or recycled reducing the demand for raw
materials. Please recycle electrical products and batteries
according to local provisions. Further information is available at
www.2helpU.com.
 Loading...