13
ENGLISH
SDS Plus Bit Holder (Fig. F)
NOTE: Special adapters are needed to use the SDS plus tool
holder with straight shank bits and hexagonal screwdriver bits.
Refer to OptionalAccessories.
To Insert a Drill Bit or Other Accessory
1. Insert the shank of the bit about 19mm into SDS Plus
toolholder.
2. Push and rotate bit until it locks in place. The bit will be
securelyheld.
3. To release bit, pull the sleeve
10
back and remove thebit.
Keyless Chuck (Fig. F, G)
DCH254, DCH274
On some hammerdrills, a keyless chuck can be installed in place
of the SDS Plus bitholder.
WARNING: Never use standard chucks in the rotary
hammeringmode.
Replacing the SDS Plus Bit Holder with the Keyless Chuck
(Fig.G)
1. Select hammering only mode (see Operation Modes), this
locks the spindle to prevent it from rotating when unlocking
the removable toolholder.
2. Turn the locking collar
15
into the unlocked position and
pull the installed bit holderoff.
3. Push the keyless chuck
16
onto the spindle
17
and turn
the locking collar into the lockingposition.
4. To replace the keyless chuck with the SDS Plus bit holder,
first remove the keyless chuck the same way as the SDS
Plus bit holder was removed. Then replace the SDS Plus
bitholder the same way as the keyless chuck wasreplaced.
To Insert a Drill Bit or Other Accessory in Keyless Chuck
(Fig.F)
1. Grasp the sleeve
18
of the chuck with one hand and use
the other hand grasping the base of thechuck.
2. Rotate the sleeve counterclockwise (as viewed from the
front) far enough to accept the desiredaccessory.
3. Insert the accessory about 19mm into the chuck and
tighten securely by rotating the chuck sleeve clockwise
with one hand while holding the tool with the other hand.
Continue to rotate the chuck sleeve until several ratchet
clicks are heard to ensure full grippingpower.
Be sure to tighten chuck with one hand on the chuck sleeve and
one hand holding the tool for maximum tightness.
To release the accessory, repeat Steps 1 and 2above.
OPERATION
Instructions for Use
WARNING: Always observe the safety instructions and
applicableregulations.
WARNING: To reduce the risk of serious personal
injury, turn tool off and disconnect battery pack
before making any adjustments or removing/
installing attachments / accessories or when making
repairs. An accidental start-up can causeinjury.
Proper Hand Position (Fig. E)
WARNING: To reduce the risk of serious personal injury,
ALWAYS use proper hand position asshown.
WARNING: To reduce the risk of serious personal
injury, ALWAYS hold securely in anticipation of a
suddenreaction.
Proper hand position requires one hand on the main handle
8
,
with the other hand on the side handle
5
.
Operation Modes (Fig. A)
WARNING: Do not select the operating mode when the
tool isrunning.
Your tool is equipped with a mode selector dial
3
to selectthe
mode appropriate to desiredoperation.
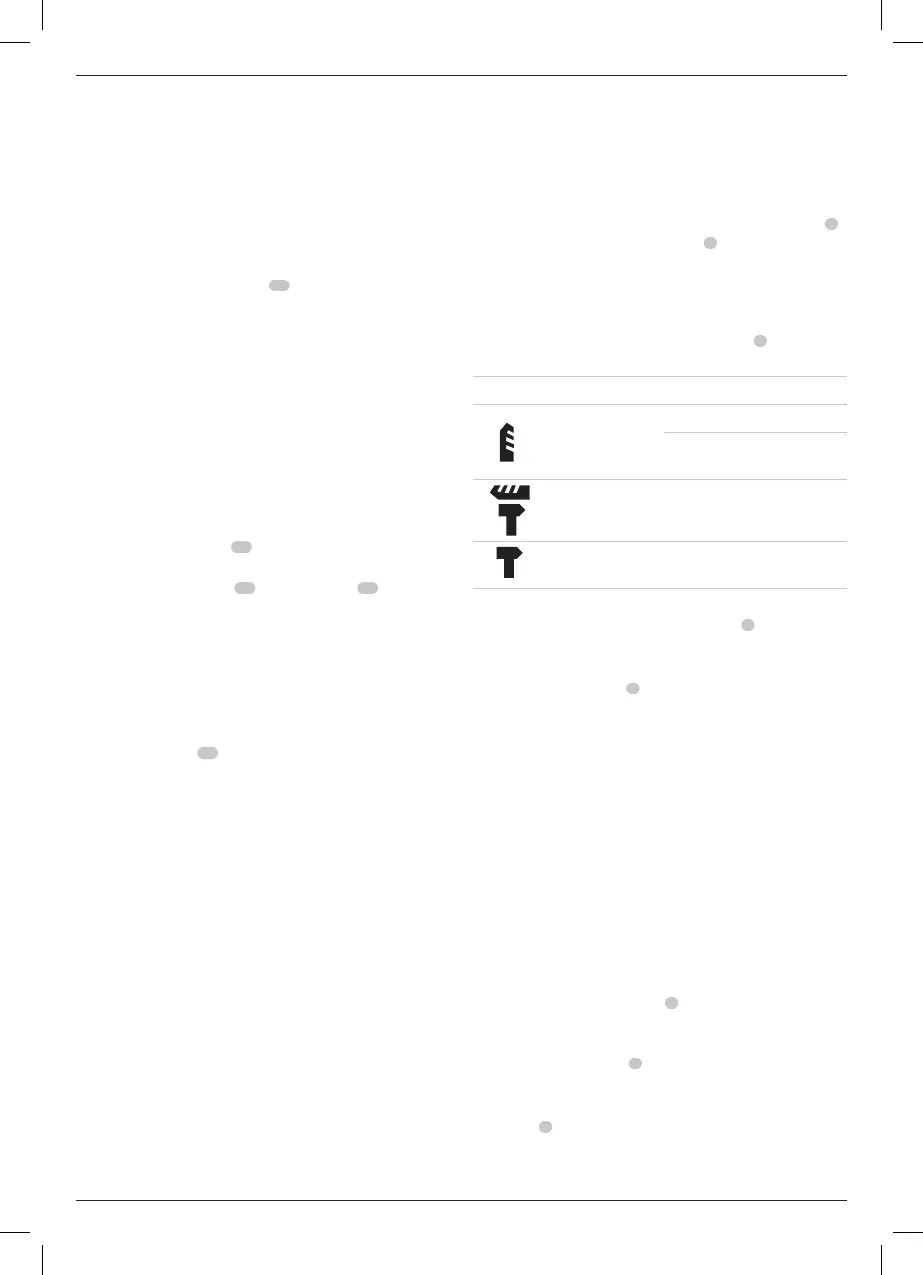
Symbol Mode Application
Rotary Drilling
Screwdriving
Drilling into steel, wood
andplastics
Rotary
Hammering
Drilling into concrete and
masonry
Hammering
only
Lightchipping
To Select an Operating Mode
1. Depress the mode selector release button
4
.
2. Rotate the mode selector dial so that the arrow points to the
symbol corresponding with the desiredmode.
NOTE: The mode selector
3
must be in rotary drilling, rotary
hammering or hammering only mode at all times. There are no
operable positions inbetween. It may be necessary to briefly
run the motor after having changed from 'hammering only' to
'rotary' modes in order to align thegears.
Performing an Application (Fig. A)
WARNING: TO REDUCE THE RISK OF PERSONAL
INJURY, ALWAYS ensure workpiece is anchored or
clamped firmly. If drilling thin material, use a wood “back-
up” block to prevent damage to thematerial.
WARNING: Always wait until the motor has come to
a complete standstill before changing the direction
ofrotation.
1. Choose and install the appropriate chuck, adapter, and/or
bit onto to the tool. Refer to Bit and BitHolders.
2. Using the mode selector dial
3
, selectthe mode
appropriate to desired application. Refer to
OperationModes.
3. Adjust the side handle
5
asrequired.
4. Place the bit/chisel on the desiredlocation.
5. Select the direction ofrotation using the forward/reverse
button
2
. When changing the position of the control
button, be sure the trigger isreleased.
- To select forward rotation, press the for ward/re verse
control button on the right side of thetool.

 Loading...