7
ENGLISH
slides, to be pulled outward and the saw head to pivot past the 0°/45° mark. Be sure to retighten
the attachment screw whenfinished.
Head Downlock Pin (Fig. A)
To lock the saw head in the down position, push the head down, rotate head lock knob
17
90° and the spring loaded pin will lock in and release the saw head. This will hold the saw head
safely down for moving the saw from place to place. To release, pull out the head lock knob and
rotate90°.
OPERATION
WARNING: To reduce the risk of serious personal injury, turn unit off and disconnect
it from power source before making any adjustments or removing/installing
attachments or accessories. An accidental start-up can causeinjury.
WARNING: Always use eye protection. All users and bystanders must wear eye protection
that conforms to ANSI Z87.1 (CAN/CSA Z94.3).
Plug the saw into any household 60 Hz power source. Refer to the nameplate for voltage. Be sure
the cord will not interfere with yourwork.
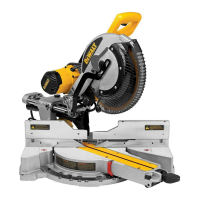
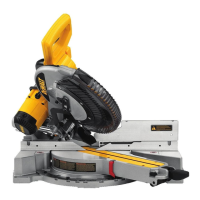
Body and Hand Position (Fig. M1–M4)
WARNING: To reduce the risk of serious personal injury, ALWAYS use proper hand position
asshown.
WARNING: To reduce the risk of serious personal injury, ALWAYS hold securely in anticipation of
a suddenreaction.
Proper positioning of your body and hands when operating the miter saw will make cutting
easier, more accurate and safer. Never place hands near cutting area. Place hands no closer than
4" (100mm) from the blade. Hold the workpiece tightly to the table and the fence when cutting.
Keep hands in position until the trigger has been released and the blade has completely stopped.
ALWAYS MAKE DRY RUNS (UNPOWERED) BEFORE FINISH CUTS SO THAT YOU CAN CHECK THE
PATH OF THE BLADE. DO NOT CROSS ARMS, AS SHOWN IN FIGUREM3.
Keep both feet firmly on the floor and maintain proper balance. As you move the miter arm
left and right, follow it and stand slightly to the side of the saw blade. Sight through the guard
louvers when following a pencilline.
Fig. M1
Fig. M3
Fig. M2
Fig. M4
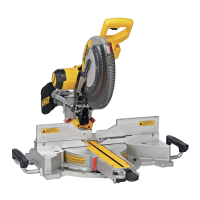
Trigger Switch (Fig. N)
To turn the saw on, push the lock-off lever
32
to the left, then depress the trigger switch
1
. The
saw will run while the switch is depressed. Allow the blade to spin up to full operating speed
before making the cut. To turn the saw off, release the switch. Allow the blade to stop before
raising the saw head. There is no provision for locking the switch on. A hole
33
is provided in the
trigger for insertion of a padlock to lock the switchoff.
Always be sure the blade has stopped before removing it from thekerf.
Fig. N
32
1
33
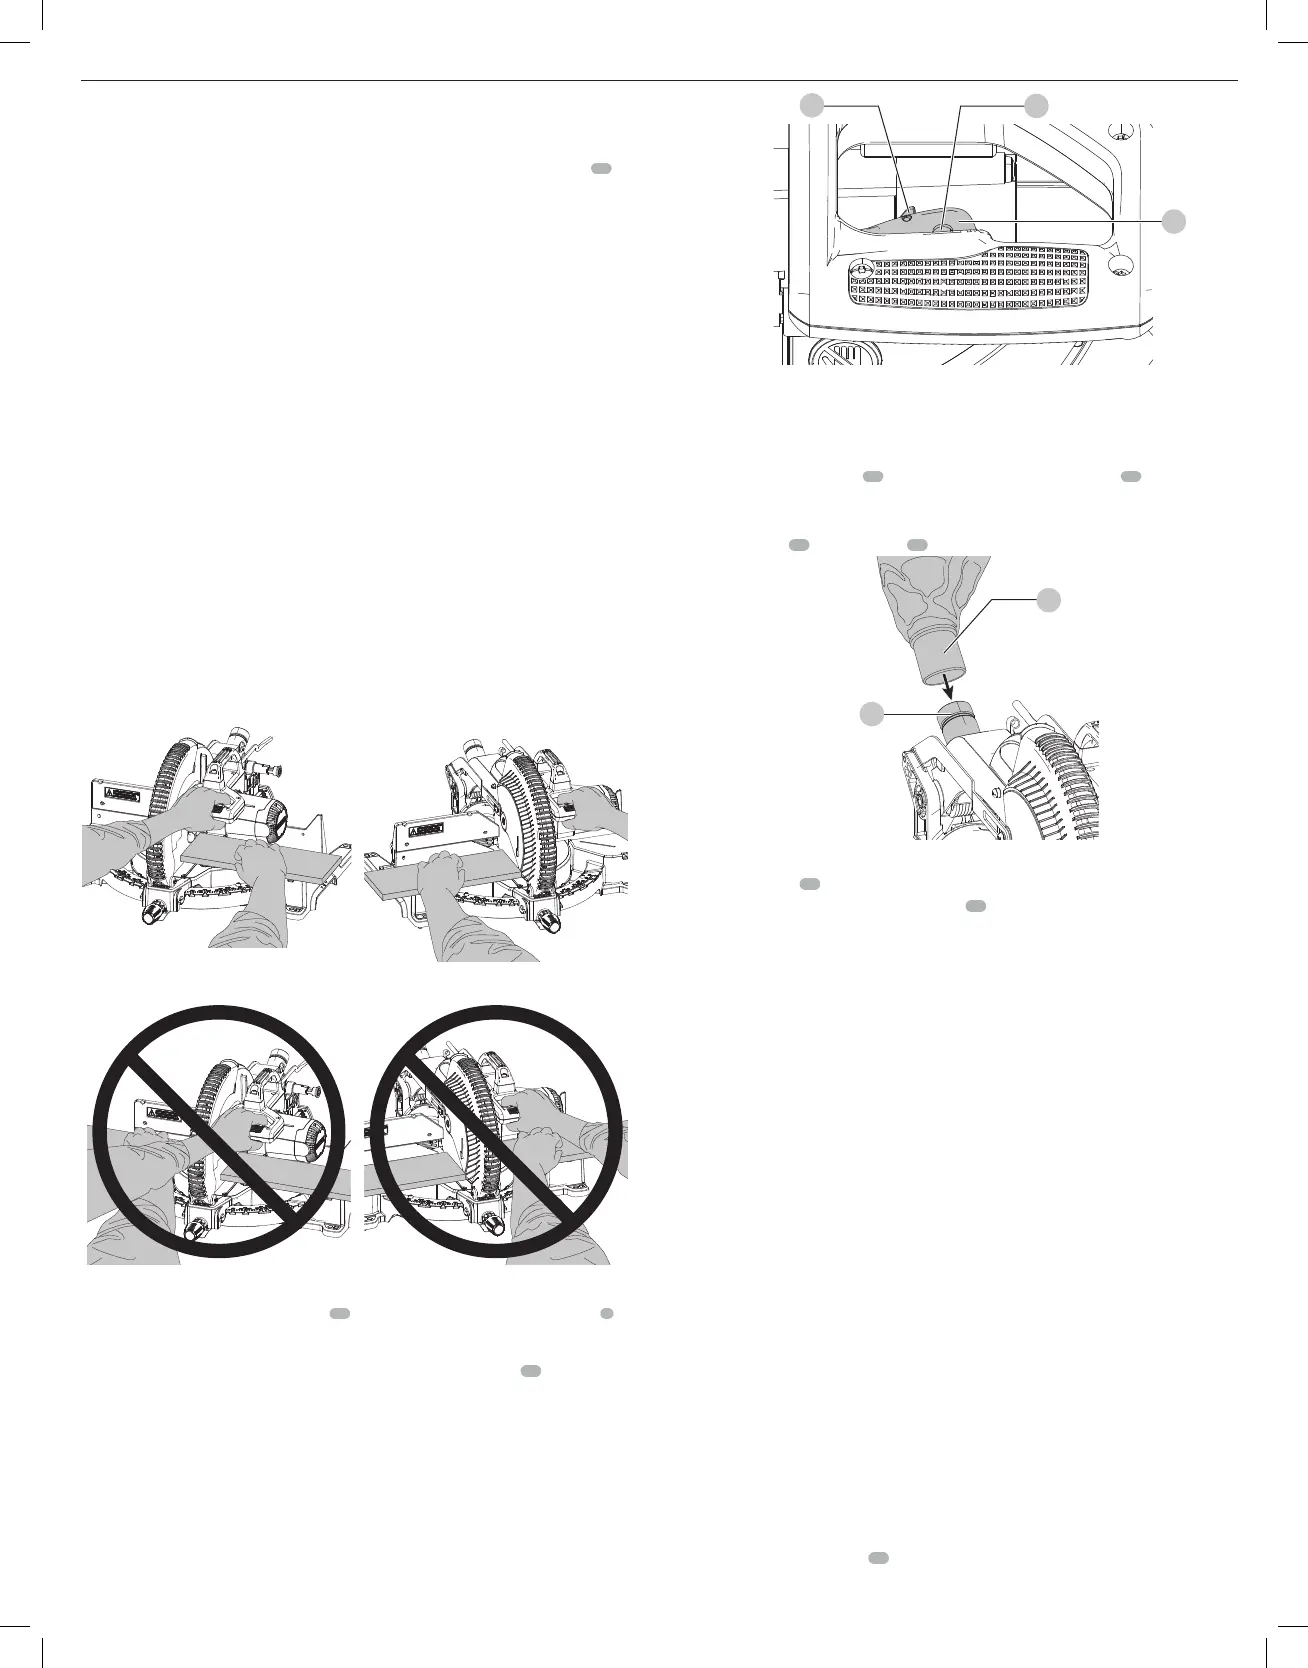
Dust Extraction (Fig. O)
WARNING: To reduce the risk of serious personal injury, turn unit off and disconnect
it from power source before making any adjustments or removing/installing
attachments or accessories. An accidental start-up can causeinjury.
Your saw has a built-in dust port
12
that allows either the supplied dust bag
35
or a shop
vacuum system to beconnected.
To Attach the Dust Bag
1. Fit the dust bag
35
to the dust port
12
as shown in FigureO.
35
12
Fig. O
To Empty the Dust Bag
1. Remove dust bag
35
from the saw and gently shake or tap the dust bag toempty.
2. Reattach the dust bag back onto the dust port
12
.
You may notice that all the dust will not come free from the bag. This will not affect cutting
performance but will reduce the saw's dust collection efficiency. To restore your saw's dust
collection efficiency, depress the spring inside the dust bag when you are emptying it and tap it
on the side of the trash can or dustreceptacle.
CAUTION: Never operate this saw unless the dust bag or
dust extractor is in
place. Wood dust may create a breathinghazard.
Cutting with Your Saw
NOTE: Although this saw will cut wood and many non-ferrous materials, we will limit our
discussion to the cutting of wood only. The same guidelines apply to the other materials. DO
NOT CUT FERROUS (IRON AND STEEL) MATERIALS OR MASONRY WITH THIS SAW. Do not
use any abrasiveblades.
Crosscuts
Cutting of multiple pieces is not recommended but can be done safely by ensuring that each
piece is held firmly against the table and fence. A crosscut is made by cutting wood across the
grain at any angle. A straight crosscut is made with the miter arm at the zero degree position. Set
the miter arm at zero, hold the wood on the table and firmly against the fence. Turn on the saw
by squeezing thetrigger.
CAUTION: Always use a work clamp to maintain control and reduce the risk of workpiece
damage and personalinjury.
When the saw comes up to speed (about 1 second) lower the arm smoothly and slowly to cut
through the wood. Let the blade come to a full stop before raisingarm.
Miter crosscuts are made with the miter arm at some angle other than zero. This angle is often
45° for making corners, but can be set anywhere from zero to 50° left or right. After selecting the
desired miter angle, be sure to lock miter lock knob. Make the cut as describedabove.
To cut through an existing pencil line on a piece of wood, match the angle as close as possible.
Cut the wood a little too long and measure from the pencil line to the cut edge to determine
which direction to adjust the miter angle and recut. This will take some practice, but it is a
commonly usedtechnique.
Bevel Cuts (Fig. A)
A bevel cut is a crosscut made with the saw blade at a bevel to the wood. In order to set the
bevel, loosen the bevel lock knob
11
and move the saw to the left as desired. (It is necessary to
 Loading...