7
ENGLISH
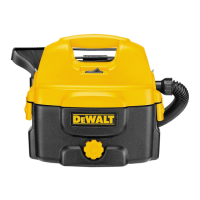
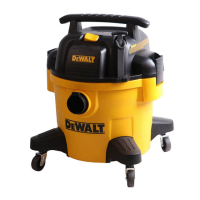
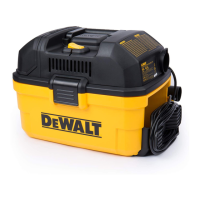
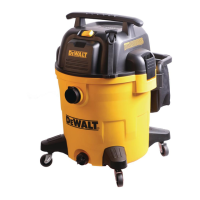
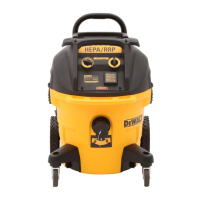
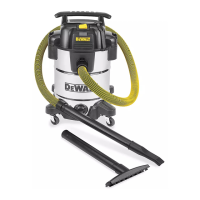
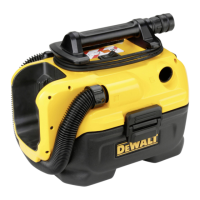
COMPONENTS (FIG. A)
WARNING: Never modify the power tool or any part
of it. Damage or personal injury couldresult.
Refer to Figure A at the beginning of this manual for a
complete list ofcomponents.
Intended Use
This dust extractor is designed for wet/dry applications and
to operate on a
60V FLEXVOLT™ battery pack only.
This dust extractor is for household and professionaluse.
DO NOT use in presence of flammable liquids orgases.
DO NOT let children come into contact with the appliance.
Supervision is required when inexperienced operators use
thisappliance.
ASSEMBLY AND ADJUSTMENTS
WARNING: To reduce the risk of serious personal
injury, turn unit off and remove the battery pack
before making any adjustments or removing/
installing attachments or accessories. An
accidental start-up can causeinjury.
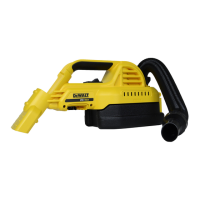
Attaching the Hose to the Dust Extractor
(Fig. A)
To attach the hose to the dust extractor, press the hose
release latch
15
and insert the proper end of the hose into
the hose inlet. The hose must be inserted fully before the
hose release latch isreleased.
To remove the hose, press the hose release latch and
remove the hose. The hose must be fully removed before
releasing the hose releaselatch.
The hose inlet plug
9
may be used to cover the hose inlet if
the hose is removed for transportation, cleaning,etc.
OPERATION
WARNING: To reduce the risk of serious personal
injury, turn unit off and remove the battery pack
before making any adjustments or removing/
installing attachments or accessories. An
accidental start-up can causeinjury.
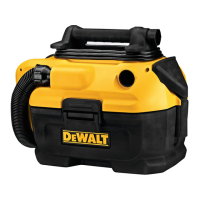
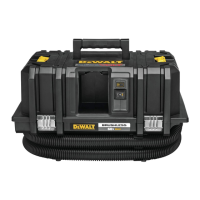
Installing and Removing the Battery Pack
(Fig. C)
NOTE: Make sure your battery pack
7
is fullycharged.
1. To install the battery pack into the dust extractor, insert/
slide battery pack into battery port
1
. Make sure the
battery pack is fullyseated.
The tool will automatically turn off if the Electronic
Protection System engages. If this occurs, place the lithium-
ion battery pack on the charger until it is fully charged.
Important Charging Notes
1. Longest life and best performance can be obtained if
the battery pack is charged when the air temperature
is between 65°F – 75°F (18° – 24°C). DO NOT charge
when the battery pack is below +40°F (+4.5°C), or
above +104°F (+40°C). This is important and will
prevent serious damage to the batterypack.
2. The charger and battery pack may become warm to the
touch while charging. This is a normal condition, and
does not indicate a problem. To facilitate the cooling of
the battery pack after use, avoid placing the charger or
battery pack in a warm environment such as in a metal
shed or an uninsulatedtrailer.
3. If the battery pack does not charge properly:
a. Check operation of receptacle by plugging in a lamp
or other appliance;
b. Check to see if receptacle is connected to a light
switch which turns power off when you turn out
the lights;
c. Move the charger and battery pack to a location
where the surrounding air temperature is
approximately 65°F – 75°F (18° – 24°C);
d. If charging problems persist, take the tool, battery
pack and charger to your local servicecenter.
4. The battery pack should be recharged when it fails to
produce sufficient power on jobs which were easily
done previously. DO NOT CONTINUE to use under these
conditions. Follow the charging procedure. You may
also charge a partially used pack whenever you desire
with no adverse effect on the batterypack.
5. Foreign materials of a conductive nature such as, but
not limited to, grinding dust, metal chips, steel wool,
aluminum foil, or any buildup of metallic particles
should be kept away from charger cavities. Always
unplug the charger from the power supply when there
is no battery pack in the cavity. Unplug the charger
before attempting toclean.
6. Do not freeze or immerse the charger in water or any
otherliquid.
Charger Cleaning Instructions
WARNING: Shock hazard. Disconnect the charger
from the AC outlet before cleaning. Dirt and grease
may be removed from the exterior of the charger using
a cloth or soft non-metallic brush. Do not use water or
any cleaningsolutions.
Wall Mounting
DCB107, DCB112, DCB113, DCB115, DCB118, DCB132
These chargers are designed to be wall mountable or to
sit upright on a table or work surface. If wall mounting,
locate the charger within reach of an electrical outlet,
and away from a corner or other obstructions which may
impede air flow. Use the back of the charger as a template
for the location of the mounting screws on the wall. Mount
the charger securely using drywall screws (purchased
separately) at least 1" (25.4 mm) long, with a screw head
diameter of 0.28–0.35" (7–9mm), screwed into wood to an
optimal depth leaving approximately 7/32" (5.5 mm) of the
screw exposed. Align the slots on the back of the charger
with the exposed screws and fully engage them in theslots.
 Loading...