9
ENGLISH
2. Attach the USB charger
3
to the battery pack
1
, making sure it is fullyseated.
NOTE: Once the USB charger is inserted the user will see the red LED illuminate for two
seconds indicating the power‑upsequence.
3. Connect the power adapter
7
USB port to the USB charger
3
Type‑C USB port using
either the provided USB cable
6
(for fastest charge rate) or a user suppliedcable.
4. The Stage 1Charging blink indicator represents the charge process that charges
approximately 80% of the battery's capacity. Stage2Charging blink indicator represents
the remainder, or top off charge process, for the battery to reach fullcapacity.
5. The completion of charge will be indicated by both LEDs remaining ON continuously.
The battery pack is fully charged and may be removed and used at this time or left in
the DeWALT USB charger.
The DeWALT USB charger will not charge a faulty battery pack. The charger refusing to light
could indicate a problem with the charger or a faulty batterypack.
NOTE: If the charger refuses to light, take the charger and battery pack to be tested at an
authorized servicecenter.
Charger Operation
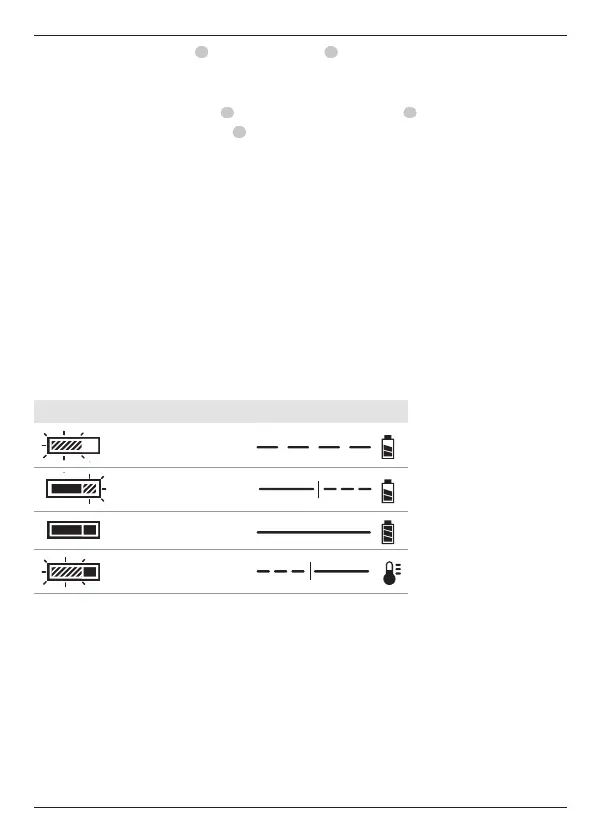
Refer to the indicators below for the charge status of the batterypack.
Indicators
Stage 1 Charging
Stage 2 Charging
Fully Charged
Hot/Cold Pack Delay*
* The red light will continue to blink, but a yellow indicator light will be illuminated during
this operation. Once the battery pack has reached an appropriate temperature, the yellow
light will turn off and the charger will resume the chargingprocedure.
The compatible charger(s) will not charge a faulty battery pack. The charger will indicate
faulty battery by refusing tolight.
NOTE: This could also mean a problem with acharger.
If the charger indicates a problem, take the charger and battery pack to be tested at an
authorised servicecentre.

 Loading...