Turn the Delay Off
In our example preset we want to bypass the Delay. Press the
EFFECT SELECT DOWN button again and the LED in the Delay
row will light. If the display reads on (On), press the STATUS but-
ton until the display reads off (Of).
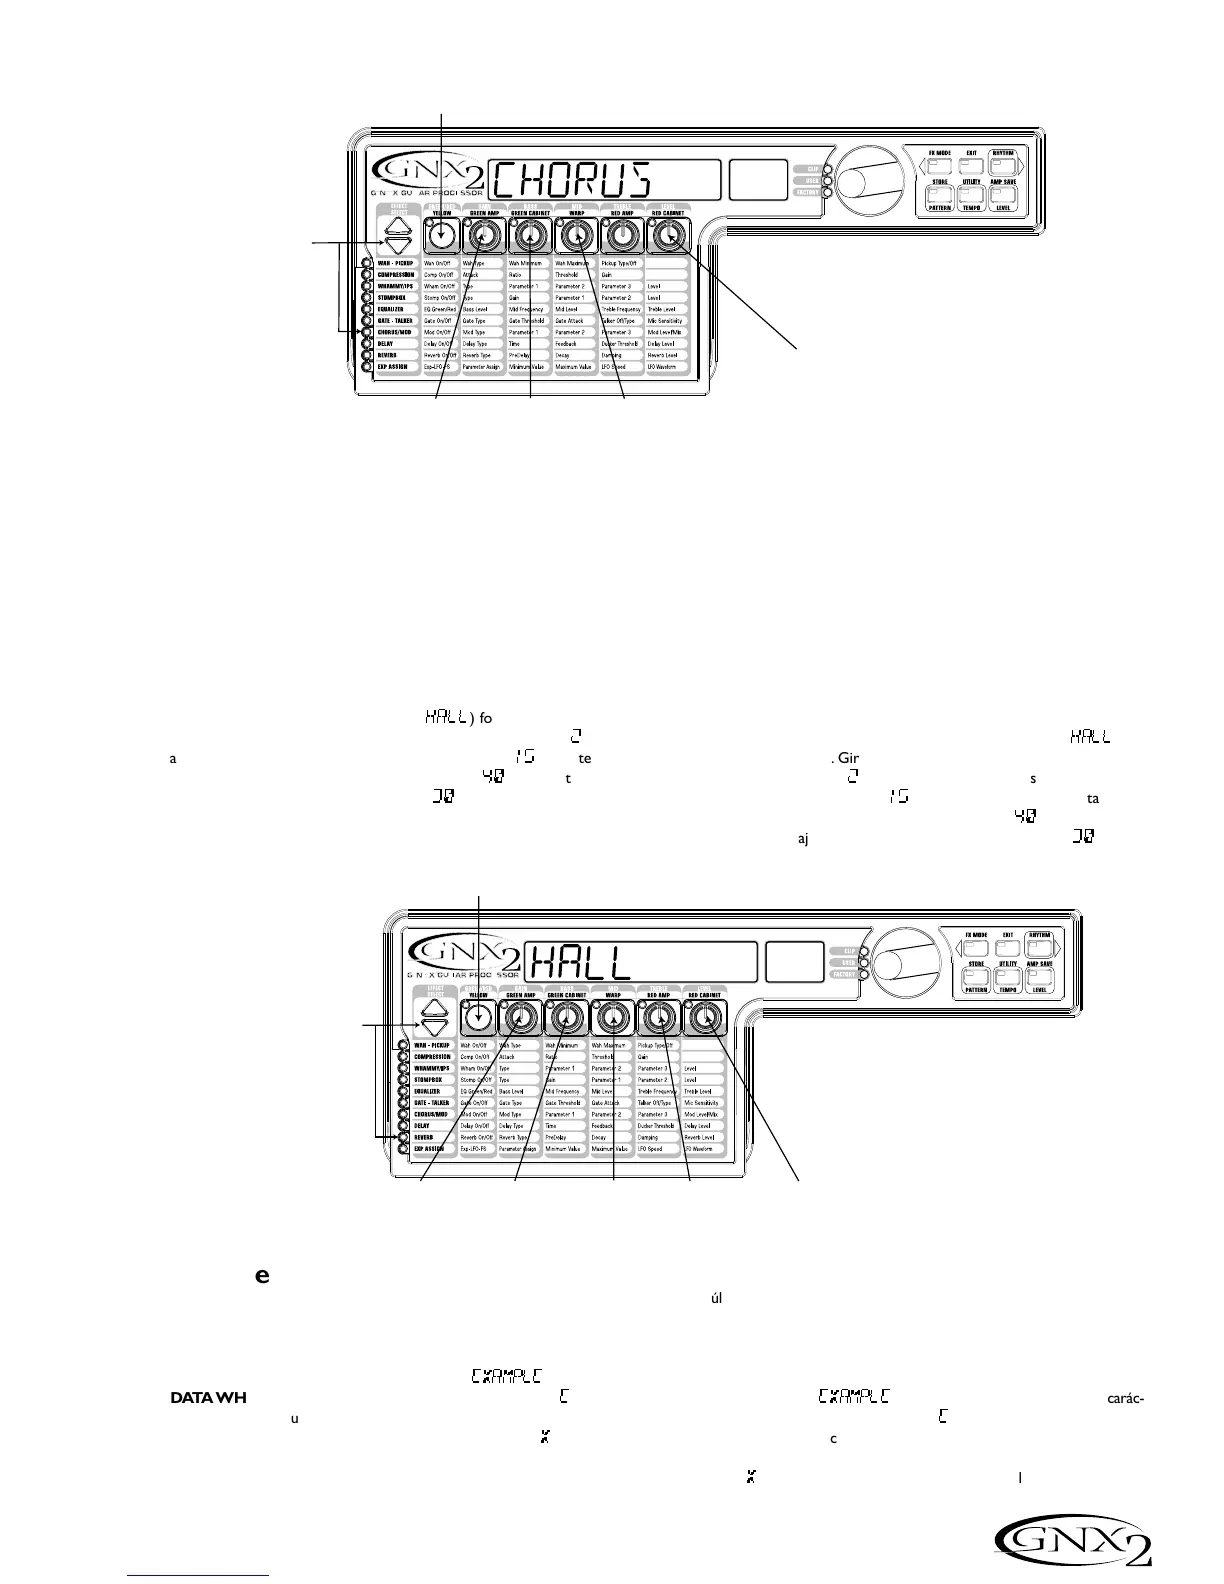
Select and Adjust the Reverb
In our example preset we wanted a little bit of Hall Reverb to pro-
vide some ambience. Press the EFFECT SELECT DOWN button
again and the LED in the Reverb row lights. If the display reads off
(Of), press the STATUS button until the display reads on (On).
Rotate the Number 1 knob to select Hall (
Hall
) for the Reverb
Type. Rotate the Number 2 knob to set the Reverb Predelay to
2
.
Rotate the Number 3 knob to set the Reverb Decay to
15
. Rotate
the Number 4 knob to set the Reverb Damping to
40
. Rotate the
Number 5 knob to set the Reverb Level to
30
.
Store the Preset
The last step, is to store our changes to a User Preset. If we changed
presets or turned the GNX2 off without storing these settings, it would
forget what we had done and revert back to the original preset.To store
the preset, press STORE. The first letter in the Display begins to flash.
Since this is an example preset, let’s name the preset
examplE
. Rotate
the DATA WHEEL until the flashing character in the display is an
E
.
Press the RHYTHM button once and the second character begins to
flash. Use the Data Wheel again until the flashing character is an
X
.
Continue using the Rhythm button to select the character location and
the Data Wheel to change the characters.
Desactivación del retardo
En nuestro Preset de ejemplo queremos anular el retardo. Pulse de nuevo el
botón EFFECT SELECT ABAJO para hacer que se encienda el LED de
la fila Delay. Si la pantalla le indica que el retardo est· activado (On), pulse el
botón Status hasta que en pantalla vea que queda desactivado(Of).
Elección y ajuste de la Reverb
En nuestro Preset queremos tener un pequeño toque de reverb de
salón para dar algo de ambientación acústica. Pulse otra vez el botón
EFFECT SELECT ABAJO para hacer que se encienda el piloto de
la fila Reverb. Si la pantalla le indica que la reverb está desactivada
(Of), pulse el botón STATUS hasta que vea en la pantalla que
queda activada (On). Gire el mando 1 para elegir salón (
Hall
)
como tipo de reverb. Gire el mando 2 para ajustar el pre-retardo de
la reverb a un valor de
2
. Gire el mando 3 para ajustar el decaimien-
to de la reverb a un valor de
15
. Gire el mando 4 para ajustar la
amortiguación de la reverberación a un valor de
40
. Gire el mando
número 5 para ajustar el nivel de la Reverb a un valor de
30
.
Almacenamiento del Preset
El último paso es guardar nuestros cambios en un Preset de usuario. Si
cambiamos a otro Preset o apagamos el GNX2 sin guardar estos ajustes,
perderíamos todo lo que habíamos hecho y volveríamos al preset origi-
nal. Para almacenar el preset, pulse el botón STORE. La primera letra de
la pantalla comenzará a parpadear. Dado que esto es un Preset de ejemp-
lo, vamos a llamarle
examplE
. Gire la rueda DATA hasta que el carác-
ter que parpadea en la pantalla sea una
E
. Pulse una vez el botón
RHYTHM para que comience a parpadear el segundo carácter de la
pantalla. Use de nuevo la rueda Data hasta que el carácter parpadeante
sea una
X
. Continúe usando el botón Rhythm para elegir la posición de
los caracteres y la rueda Data para cambiar los caracteres.
35
Tutorial / Tutorial
 Loading...