12
I. LCD SZ System Low Voltage Wire
Connections
Reach up into the return air opening and pull down the
remaining wires. See (FIG. 15).
Make sure the positive (+) 12
Vdc terminal is disconnected from supply bat-
tery. Otherwise, damage to unit could occur.
1. Connect the previously run +12 Vdc supply wire
to the red wire to the red wire at the electronic
control box.
2. Connect the previously run –12 Vdc supply wire
to both the black wire to the black wire at the
electronic control box and to the wire of the three
wire cable that goes to the thermostat 12V– ter-
minal.
3. Connect the previously run furnace thermostat
wires(ifapplicable)tothebluewirestothe1/4″
connectors at the electronic control box using
thesupplied1/4″insulatedconnectors.Thepo-
larity of this connection does not mater.
4. Connect the red/white wire at the electronic con-
trol box to the wire of the three wire cable that
goes to the thermostat 12V+ terminal.
5. Connect the orange wire at the electronic control
box to the wire of the three wire cable that goes
to the thermostat COMMS terminal.
J. CCC 2 System Low Voltage Wire
Connections
Reach up into the return air opening and pull down the
remaining wires. See (FIG. 15).
Make sure the positive (+) 12
Vdc terminal is disconnected from supply bat-
tery. Otherwise, damage to unit could occur.
1. Connect the previously run 12 Vdc wires to the
red and black wires in the 6 wire harness. Con-
nect +12 Vdc to the red wire; –12 Vdc to the
black wire.
2. Connect the previously run furnace wires (if ap-
plicable) to the blue wires in the 6 wire harness.
3. Terminate the 4 conductor communication
cable(s) protruding from the roof opening. The
cable(s) must be terminated with a telephone
RJ-11-6C4P connector. Refer to the crimp tool
manufacturer for crimping instructions.
RJ-11-6C4P connectors MUST be in-
stalled as shown in (FIG. 6) & (FIG. 7).
4. Plug the 4 conductor communication cable into
one of the RJ-11-6C4P telephone couplers in
the electronic control box. If more than one zone
is used, the second coupler is used to join each
additional zone.
g. Plug the 6 pin electrical cord from the unit
into the matching 6 pin connector in the elec-
tronic control box. The plug is polarized and
willonlytinonedirection.
h. Plug the freeze control into the matching
black 2 pin connector in the electronic con-
trol box.
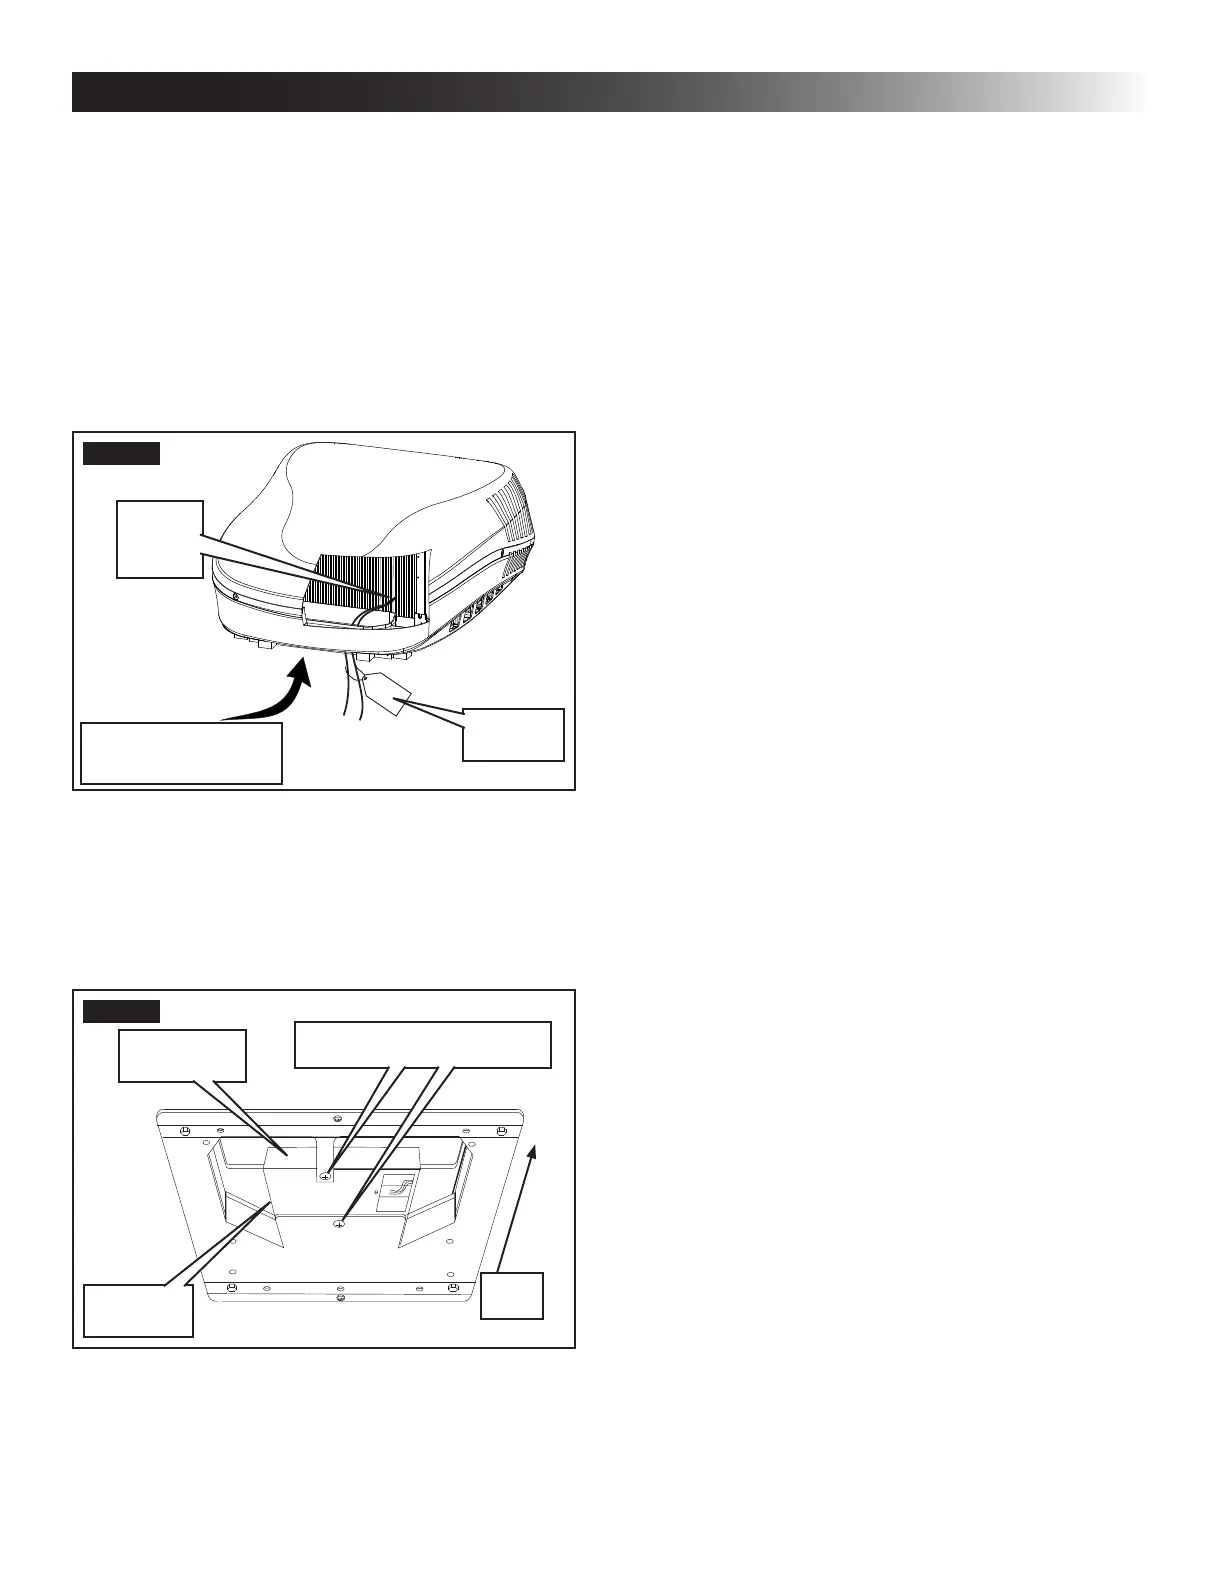
i. Insert the freeze control sensor into the
evaporator coil ns approximately 2-1/2″
abovethebottomofthecoilnsandin2-1/2″
fromtherightside.See(FIG.20).Bendns
over sensor to secure in place.
FIG. 20
Route Up Through
Return Air Opening
Remove
Hang Tag
Freeze
Control
Sensor
j. Plug the 6 wire harness into the matching 6
pin connector in the electronic control box.
k. Attach electronic control box to the ceiling
template using the two (2) blunt self-tapping
screws provided in the electronic control box
kit. See (FIG. 21).
FIG. 21
Front
Curb Side
Electronic
Control Box
Blunt Self-Tapping Screw
INSTALLATION INSTRUCTIONS
 Loading...