41
EN
Americana and New Generation Refrigerators Service Procedures
8.25 Testing the Interior Light Switch
for Continuity
q
w
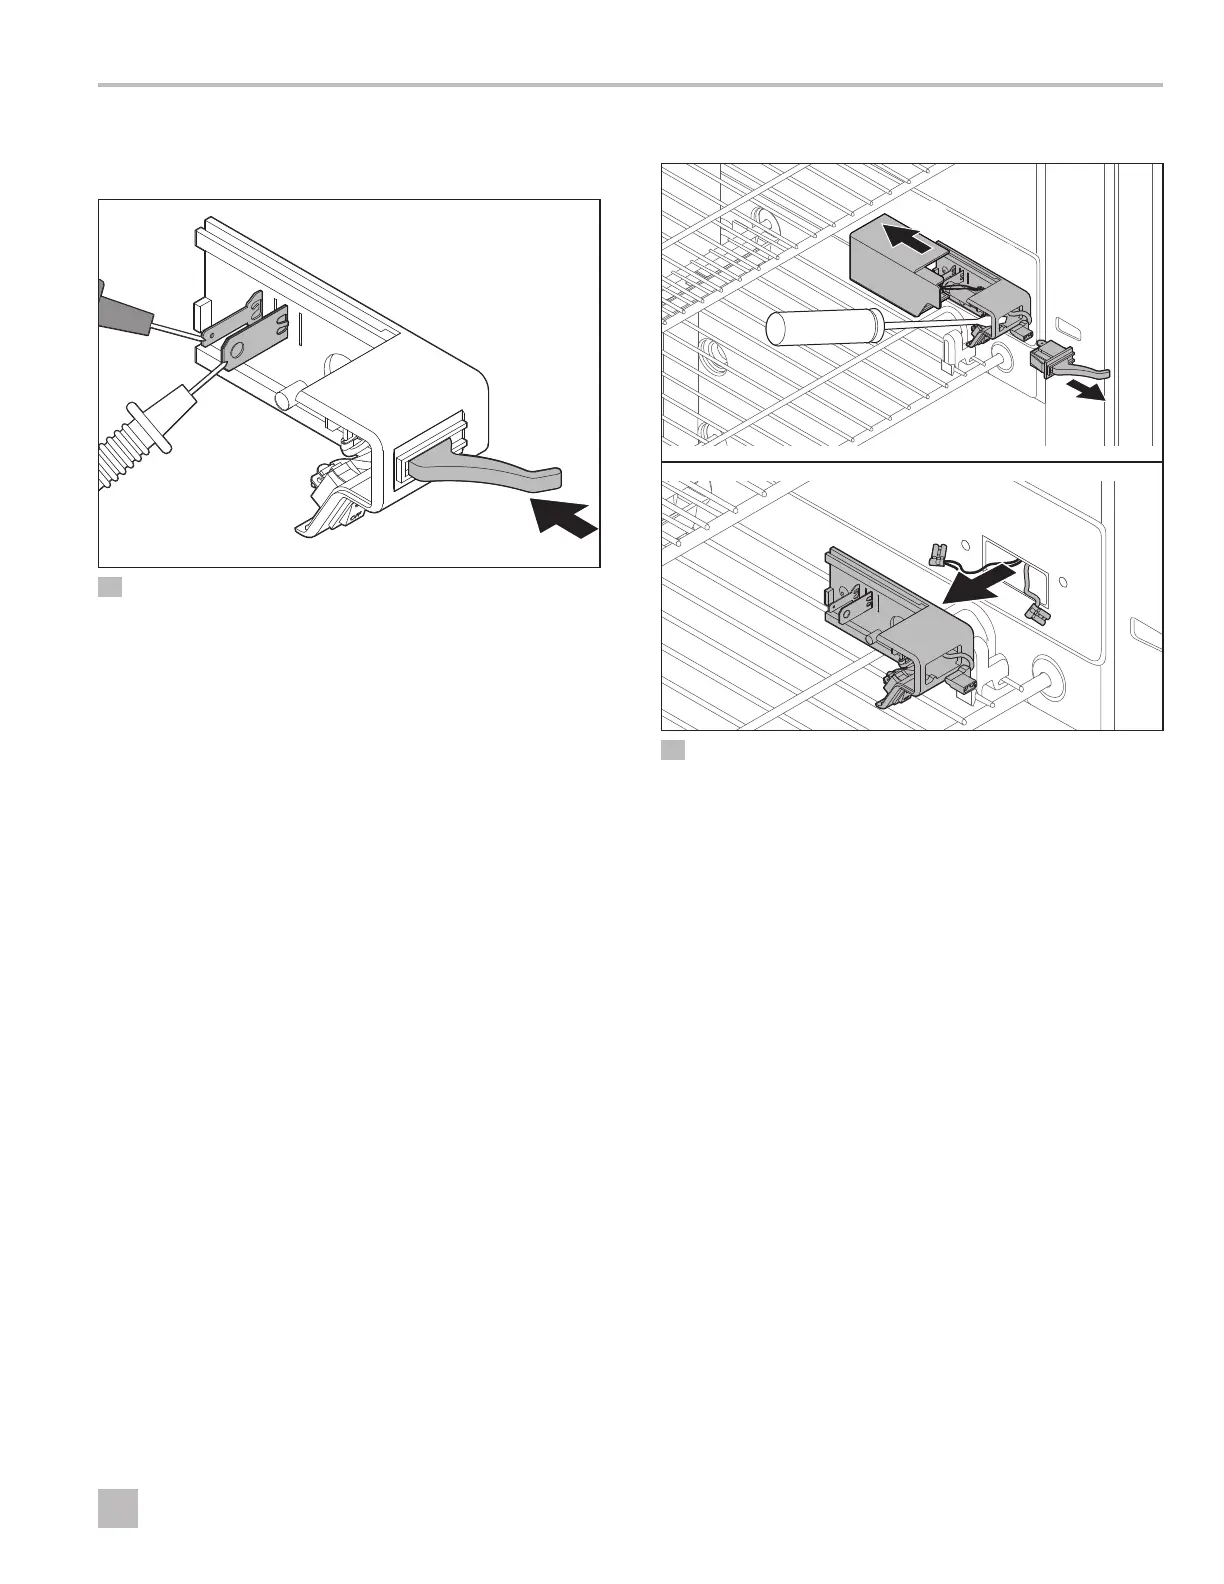
25 Testing the Interior Light Blades
q
Blades
w
Light Switch
1. Perform the steps in “Replacing the Interior Light” on
page 41 to remove the light switch.
2. Set the multi-meter to the Ohms resistance setting.
3. Disconnect the wires from the switch.
4. Attach the leads of the multi-meter to the blades.
5. Depress the switch.
The reading should show no continuity. If it shows
continuity, it indicates a faulty switch.
6. Release the switch.
The reading should show continuity. If it shows no
continuity,it indicates a faulty switch.
I
Consult the operating manual for the multi-meter
for specific device function.
8.26 Replacing the Interior Light
26 Removing the Interior Light Assembly
q
Light Cover
e
Light Switch
w
Light Bulb
r
Light Housing
The following steps may vary depending on the model
and generation of the refrigerator.
1. Disconnect the unit from all power sources (120VAC
and 12VDC).
2. Disconnect the lamp wiring from the lower control
module.
3. Remove the light cover to access the light housing.
Replace if needed.
4. Remove the screws securing the housing to the
refrigerator liner. Replace if needed.
5. Remove the light bulb. Replace if needed.
6. Disconnect the wiring to the light switch. Replace if
needed.
7. Perform these steps in reverse to complete the
replacement.
e
w
q
r