9
EN
Installation
3 Installation
WARNING: FIRE OR ELECTRICAL SHOCK
HAZARD. Failure to obey these warnings
could result in death or serious injury.
• This product is designed for 12 VDC use only. Do not
connect the vent fan to 110 VAC.
• Shut off the gas supply, disconnect the 120 VAC
power from the RV, and disconnect the positive
(+) 12VDC terminal from the supply battery before
drilling, cutting into, or wiring the RV.
NOTICE: The vent fan is designed to run on filtered DC
current. Do not connect the vent fan to unfiltered DC
current. Doing so could result in circuit board damage or
failure.
This section describes how to install a vent fan
horizontally on an RV roof, or vertically on an exterior wall
with minor modifications.
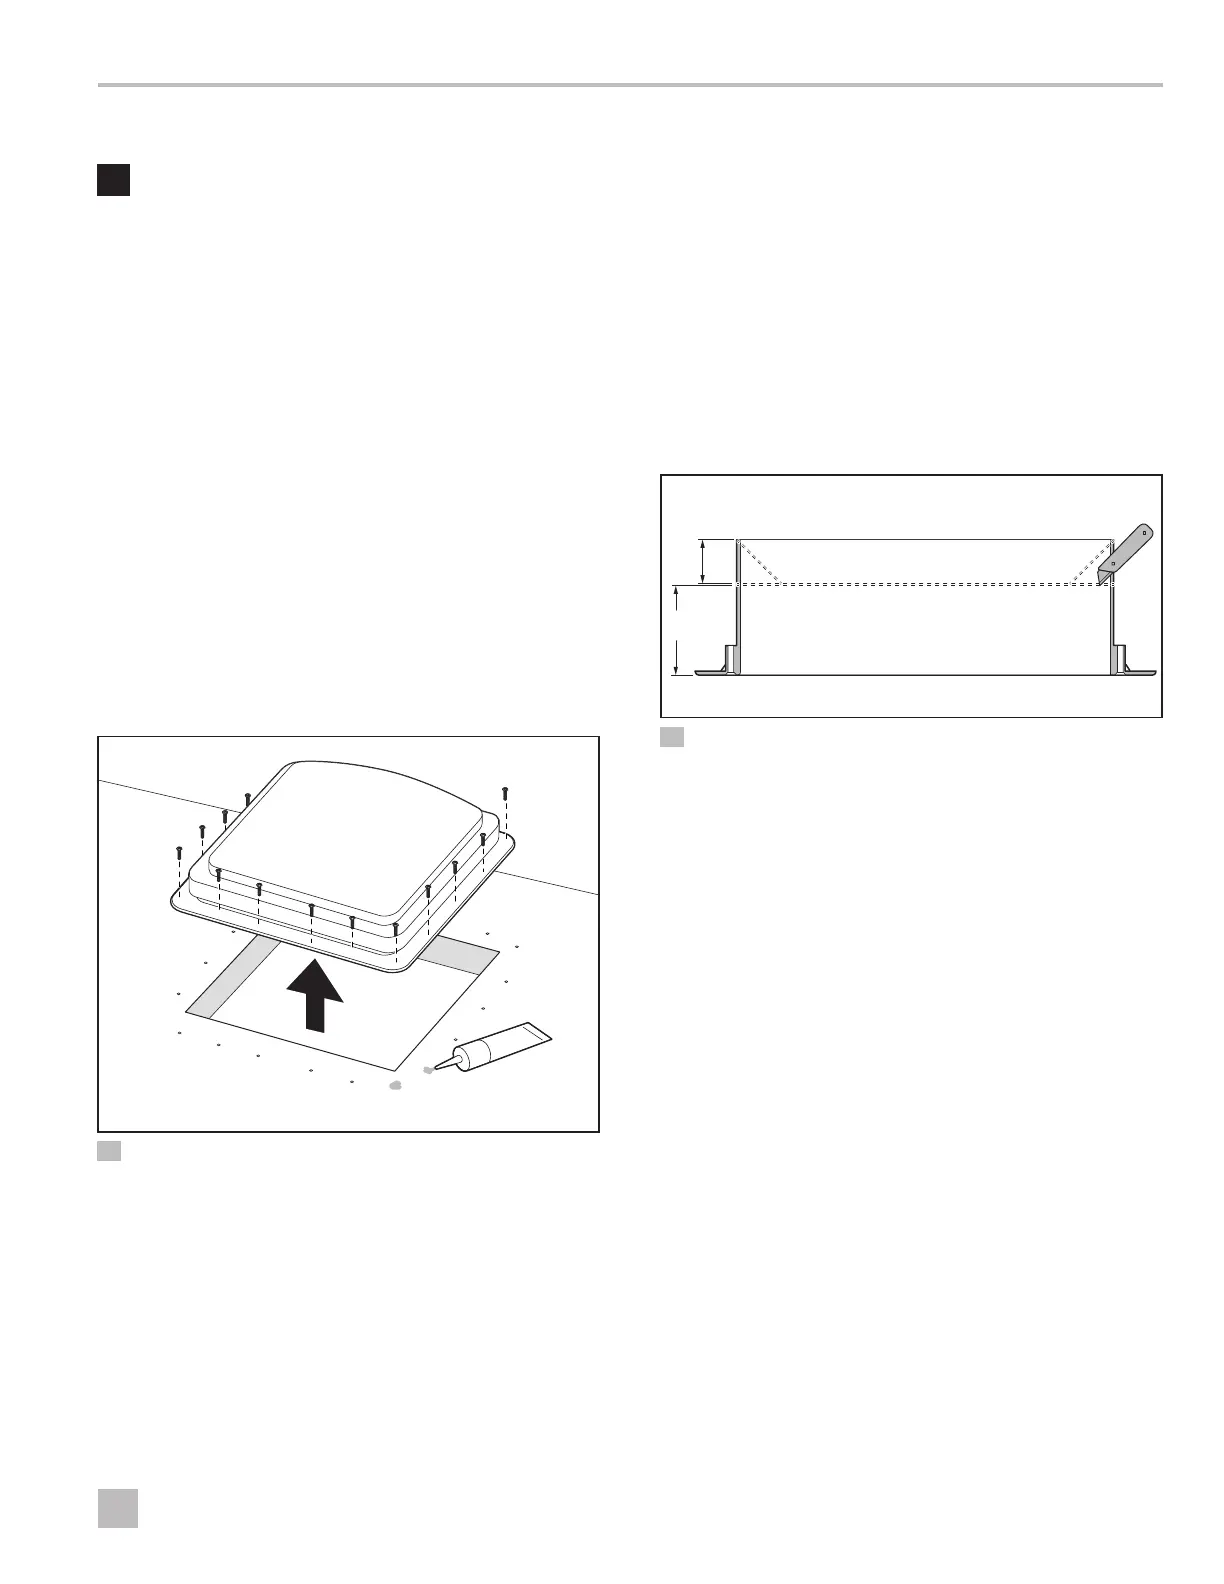
3.1 Removing the Existing Vent
q
w
e
r
5 Remove the Existing Vent
q
Existing Vent
e
Screw Holes
w
Existing Screws
r
Sealant
1. Unscrew and remove the existing roof vent.
2. Remove any caulking compound around the roof
or wall opening. A clean surface offers a better
seal. Consult your RV owner’s manual for cleaning
recommendations.
3. Seal any screw holes and seams where the roof
gasket will be located, using a good grade of
all-weather roof sealant.
3.2 Assessing the Trim Garnish
1. Determine the length, width, and thickness or depth
of the roof or wall opening where the new fan vent
will be installed.
2. Confirm you have the correct trim garnish for the
depth of the roof or wall opening. See “Trim Garnish
Dimensions” on page6.
q
w
CC
e
6 Resizing the Trim Garnish
q
Required Trim Garnish
Height
e
Utility Knife
w
Excess Trim Garnish to
Remove
3. Use a utility knife to adjust the size of the trim garnish
(CC) to the correct height, if necessary.
a. Use a straight edge and a pen to mark horizontally
around all four sides from the top edge. Score the
marked lines.
b. Cut from the top edge of the corners at a 45
degree angle down to the score line, then break
the excess plastic away from the trim garnish (CC).
3.3 Assessing the Roof Structure
NOTICE: If you are not using an existing 14.5 in. x
14.5in. (368 mm x 368 mm) vent opening for your vent
fan, see “Installation Requirements” on page7.
Fan-Tastic Vent Fan

 Loading...