4
1. Check dimensions of mounting space above and below oor.
2. Determine best toilet discharge connection: above oor, out rear or below oor.
3. Allow at least ½-inch (1.3 cm) clearance between toilet rear and wall.
4. Make sure compartment, shower and vanity doors will clear toilet bowl.
5. Check location nearest cold water line.
6. Water line must be at least ½-inch ID and provide a minimum ow of two (2)
gallons per minute (7.6 liters per minute).
7. Water valve assembly for 106 toilet can be positioned any distance horizontally from
the toilet but must be at least 6 in. (15.24 cm) above the top of the toilet bowl rim.
8. Check clearances to side wall for installation of ush lever cover and back wall
for best clearance.
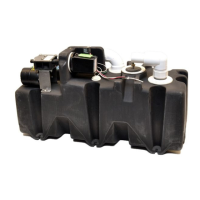
1. The vacuum holding tank inlet must be located no more than 20 feet (6.1 m)
from the toilet discharge.
2. The VHT inlet must not be located more than 3 feet (.9 m) above the outlet of
the toilet. (NOTE: The lower the tank, the better the system efciency.)
3. The VHT must be mounted in a horizontal position.
4. The VHT must not be exposed to temperatures over 120°F. Do not place near
heat sources such as engine manifolds, water heaters, generators, etc.
Mounting space must provide for free air ow.
1. OdorSafe PlussSanitation Hose must be used; it is sized to use SeaLand ttings
in the system, minimizing vacuum leakage.
2. It is important that restrictions in the vacuum hose be kept to a minimum.
Where a bend must occur in a hose run, the radius of the bend must not be
less than 6 inches (15.24 cm). If a tighter radius is required, use a SeaLand 90°
bend kit to assure a clog-free transition.
The VacuFlush system operates on a unique and uncom-
mon principle – powerful, instantaneous vacuum force.
As a result, certain installation points must be stressed
because they are the most common sources of incorrect
installation.
1. Leaks at Fitting Joints
One benet of vacuum operation is that leaks are inward
and will not cause drippage of sewage. Vacuum leaks
result in frequent cycling of the vacuum pump which
causes unnecessary wear on the motor and gear drive.
Most vacuum leaks occur at tting joints. Care should
be taken to assemble tting joints per the instructions.
Allow time in your installation schedule to give cemented
ttings, if used, time to cure before manipulating them.
Also, a proper PVC cleaner or primer must be applied
prior to cementing ttings.
2. Cementing Hose to Fittings
Never cement hose to ttings. The SeaLand custom hose
adapter is specically designed to t precisely into the
OdorSafe Hose. The hose will slide easily on the tting
if it is lubricated with liquid dishwashing detergent and
twisted clockwise when attached.
3. Locating Components in Accessible Spaces
Never locate a component of the vacuum system in a
space which is inaccessible or difcult to reach.
4. Hose…Too Much, Too Little
Try to avoid unnecessary hose runs that result in
excessive bends or loops. Excessive hose reduces
vacuum transfer efciency. Hose should be securely
tied down every three feet. Too little hose length also
causes problems by forcing the hose into tight bends or
kinks. Always leave a small amount of extra hose length
for future maintenance. The distance between the toilet
and the Vacuum Holding Tank (VHT) may not exceed
20 feet (6.1 m).
5. Hose… Wrong Type
To complete a VacuFlush installation, OdorSafe Sanita-
tion Hose or rigid PVC pipe (Schedule 40 or heavier)
must be used.
6. Hose… Odor Permeation
Avoid low spots in hose or sections where waste will
remain for very long periods. Waste trapped in hose will
produce gases in the nal stage of decomposition that
are very difcult to contain. If possible, have hose from
the toilet drain into the VHT.
7. Protecting Toilet and Preventing Objects from
Falling into System During Installation.
After mounting toilet and attaching seat and lid assembly,
slide seat assembly carton over seat and lid. Next, place
toilet box down over toilet. This will ensure additional
protection to the toilet after installation.
Failure to follow recommended procedures that result
in any of the above problems will invalidate component
warranty.
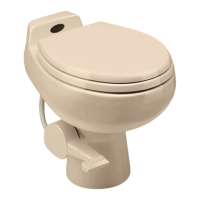
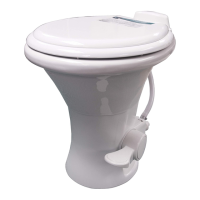
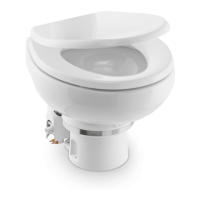
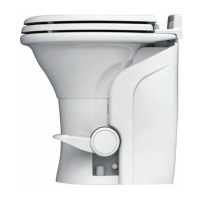
KEY INSTALLATION POINTS
Vacuum Toilet
Vacuum Holding
Tank (VHT)
Vacuum Hose
and Fittings
COMPONENT LOCATING PROCEDURE
Component Location
Check
Bathroom com-
partment or under
berth.
Any space that
permits access to
remove the entire
unit.
Use only OdorSafe
Plus hose and
SeaLand ttings.
They are made to
t together.
 Loading...