3
Required Tools for Disassembly/Reassembly
• 1/4 in. Hex Key
• 5/16 in. Hex Key
• 9/16 in. Hex Key
• 5/8 in. Hex Key
• 12 mm Hex Key
• 5/16 in. Socket or End Wrench
• 1/2 in. Socket or End Wrench
• 9/16 in. Socket or End Wrench
• 11/16 in. End Wrench
• 3/4 in. Socket or End Wrench
• 1 in. Socket or End Wrench
• 1 1/4 in. Socket or End Wrench
• Breaker Bar or Ratchet Wrench
• Torque Wrench (200 Max. Capacity)
• Adjustable Pliers
• Screwdrivers (Small & Large)
• Internal Retaining Pliers (str. .047 Tips)
• Internal Retainer Pliers (Str. Tips)
• Dial Indicator with Magnetic Base
• Depth Micrometer with Extensions
• Parallel Bars (2)
• Slide Hammer
• Split Blade Bearing Puller
• Seal Bullet (Special)
• Low Clearance Bearing Puller (Special)
• Hammer (Steel and Plastic)
• Small Machinist Ruler
• Small Flashlight
• Light Petroleum Jelly
• Suitable Solvents and Cleaners
• Low Clearance Bearing Puller (Special)
Special Tools are shown on pages 55-57
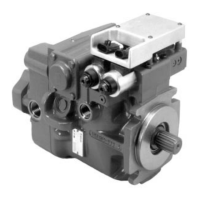
Introduction
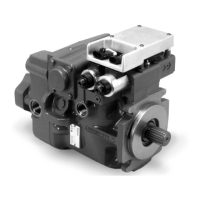
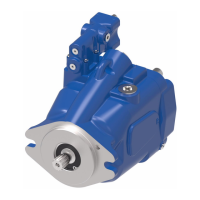
This Manual provides service information for Eaton Heavy Series 2 Variable Displacement Pumps, Models 33, 39, 46, 54 and
64. Step by step instructions for complete disassembly, inspection and reassembly of the pump are given. The following
recommendations should be followed to insure successful repairs.
• Most repairs require the removal of the pump from the vehicle.
• Cleanliness is extremely important.
• Clean the port areas thoroughly before disconnect the hydraulic lines.
• Plug the pump ports and cover the open hydraulic lines immediately after they’re disconnected.
• Drain the oil and clean the exterior of the pump before making repairs.
• Wash all metal parts in clean solvent.
• Use compressed air to dry the parts. Dot not wipe them dry with paper towels or cloth: lint in a hydraulic system
will cause damage.
• The compressed air should be filtered and moisture free.
• Always use new seals when reassembling hydraulic pumps.
• Lubricate the new rubber seals with a petroleum jelly like Vaseline before installation.
• Torque all bolts over gasketed joints, then repeat the torquing sequence to make-up for gasket compression.
After all repairs are complete it is essential to verify the accuracy of pump repairs on an authorized test stand.
 Loading...