Maintenance
Periodic inspection
1. External: Periodically check the condition of the paint
and finish, especially when the transformer is exposed
to inclement atmospheric conditions. If weathering
takes place, clean the tank thoroughly, wipe off any
insulating liquid that might have been spilled on the
surface and repaint with a factory approved paint.
Occasionally, inspect and tighten all bolted joints and
check for leaks.
2. Regularly inspect all gauges. The liquid level must
remain normal, considering the temperature effect.
Refill when samples have been taken. Prolonged
periods of zero pressure could indicate a gas leak and
should be checked out. The liquid temperature should
not rise higher than the design value on the nameplate,
plus ambient temperature.
3. Liquid samples should be taken periodically and
analyzed as indicated under "Sampling". It is recom-
mended that you keep a log of the test values to
determine when reconditioning or replenishing service
is required.
Removing and replacing bushings
Bushing construction falls into two general categories:
"draw lead" type as represented by Figure 12 and bottom
connected types with a fixed center stud or internal spade
as represented by Figure 13.
The method for removing bushings will differ depending
upon the type of construction. The two methods are dealt
with separately in the written material that follows.
Before any work commences, standard safety precautions
must be observed.
WARNING
Before working with bushings, make sure that the
transformer is de-energized and that all circuits to
and from the transformer are grounded in order to
discharge any stored energy and prevent accidental
re-energization. Failure to do so may result in death,
severe personal injury and equipment damage.
Additional precautions include the following:
•
Lock in the “open” position disconnect switches in the
supply lines to and from the transformer.
•
If the transformer is under vacuum or pressure, bring the
tank to ambient pressure.
•
If the bushing to be removed is below the liquid level,
lower the level sufficiently to prevent fluid loss.
•
To protect from the atmosphere and contaminants, store
in clean, dry, sealed containers any removed liquid that
will be returned to the transformer.
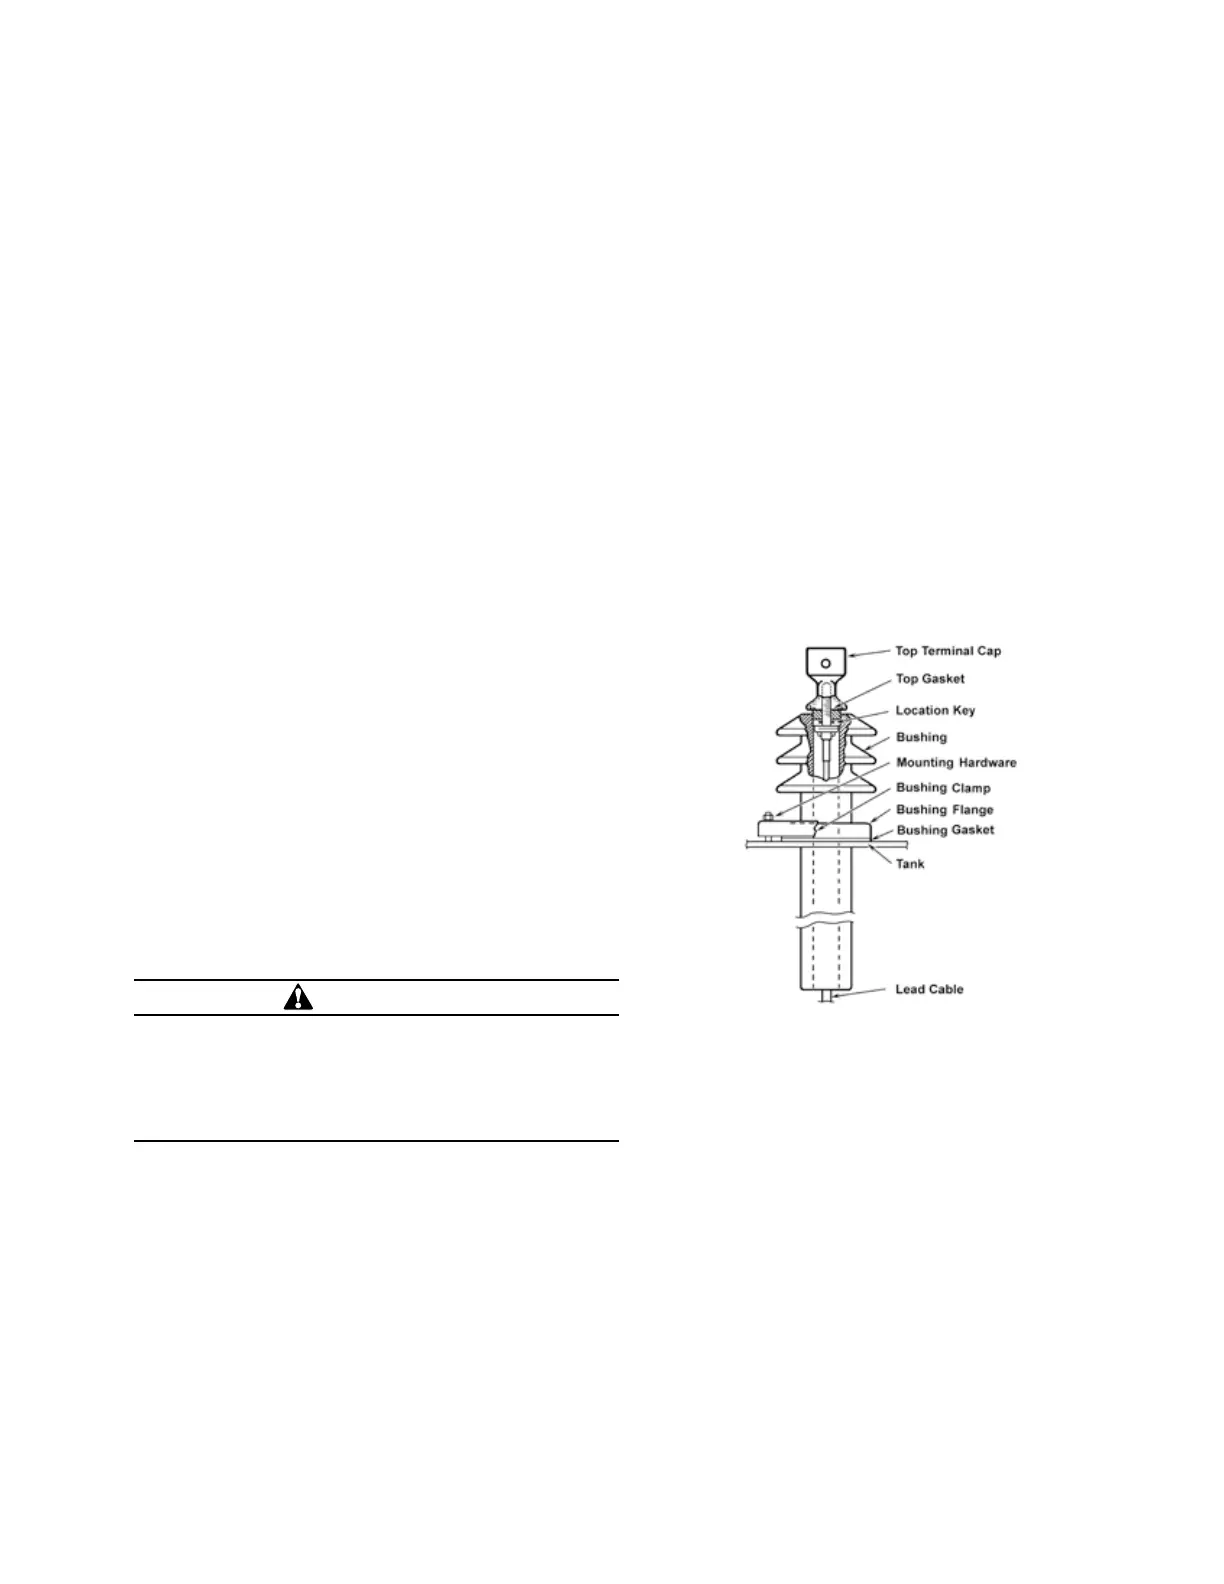
Removing and replacing draw lead type bushings
Removing
1. Unscrew and remove the top terminal cap, exposing
the threaded stud end of the draw lead cable. In some
cases, the threaded stud will be held by a pin that must
also be removed.
2. Fasten a pull wire, cord or rod to the stud in order to
guide the lead through the bushing’s bore and prevent
it from falling into the opening when the bushing is
removed. (In some cases, the lead will be of sufficient
thickness to be self-supporting; if so, this part of the
procedure can be omitted).
3. Remove the bushing mounting clamp nuts at the tank
to release the mounting clamp plate and free the
bushing for removal.
4. Remove the bushing, guiding the draw lead conductor
and terminal stud through the base of the bushing.
Figure 11. Draw lead type bushing.
11SubStation tranSformer inStallation and partS replacement information MN202002EN JUNE 2016

 Loading...


