4 KA369R, KA542R, AND KA57WE AUXILIARY SWITCH KIT INSTALLATION AND ADJUSTMENT INSTRUCTIONS MN280031EN
Turn the couplers to lock them in the disengaged
position.
Non-Reclosing
Control Lever
Contact Position
Indicator
Manual Operating
Lever
Spring-Loaded
Couplers (engaged)
E-Ring
Connecting Links
(engaged)
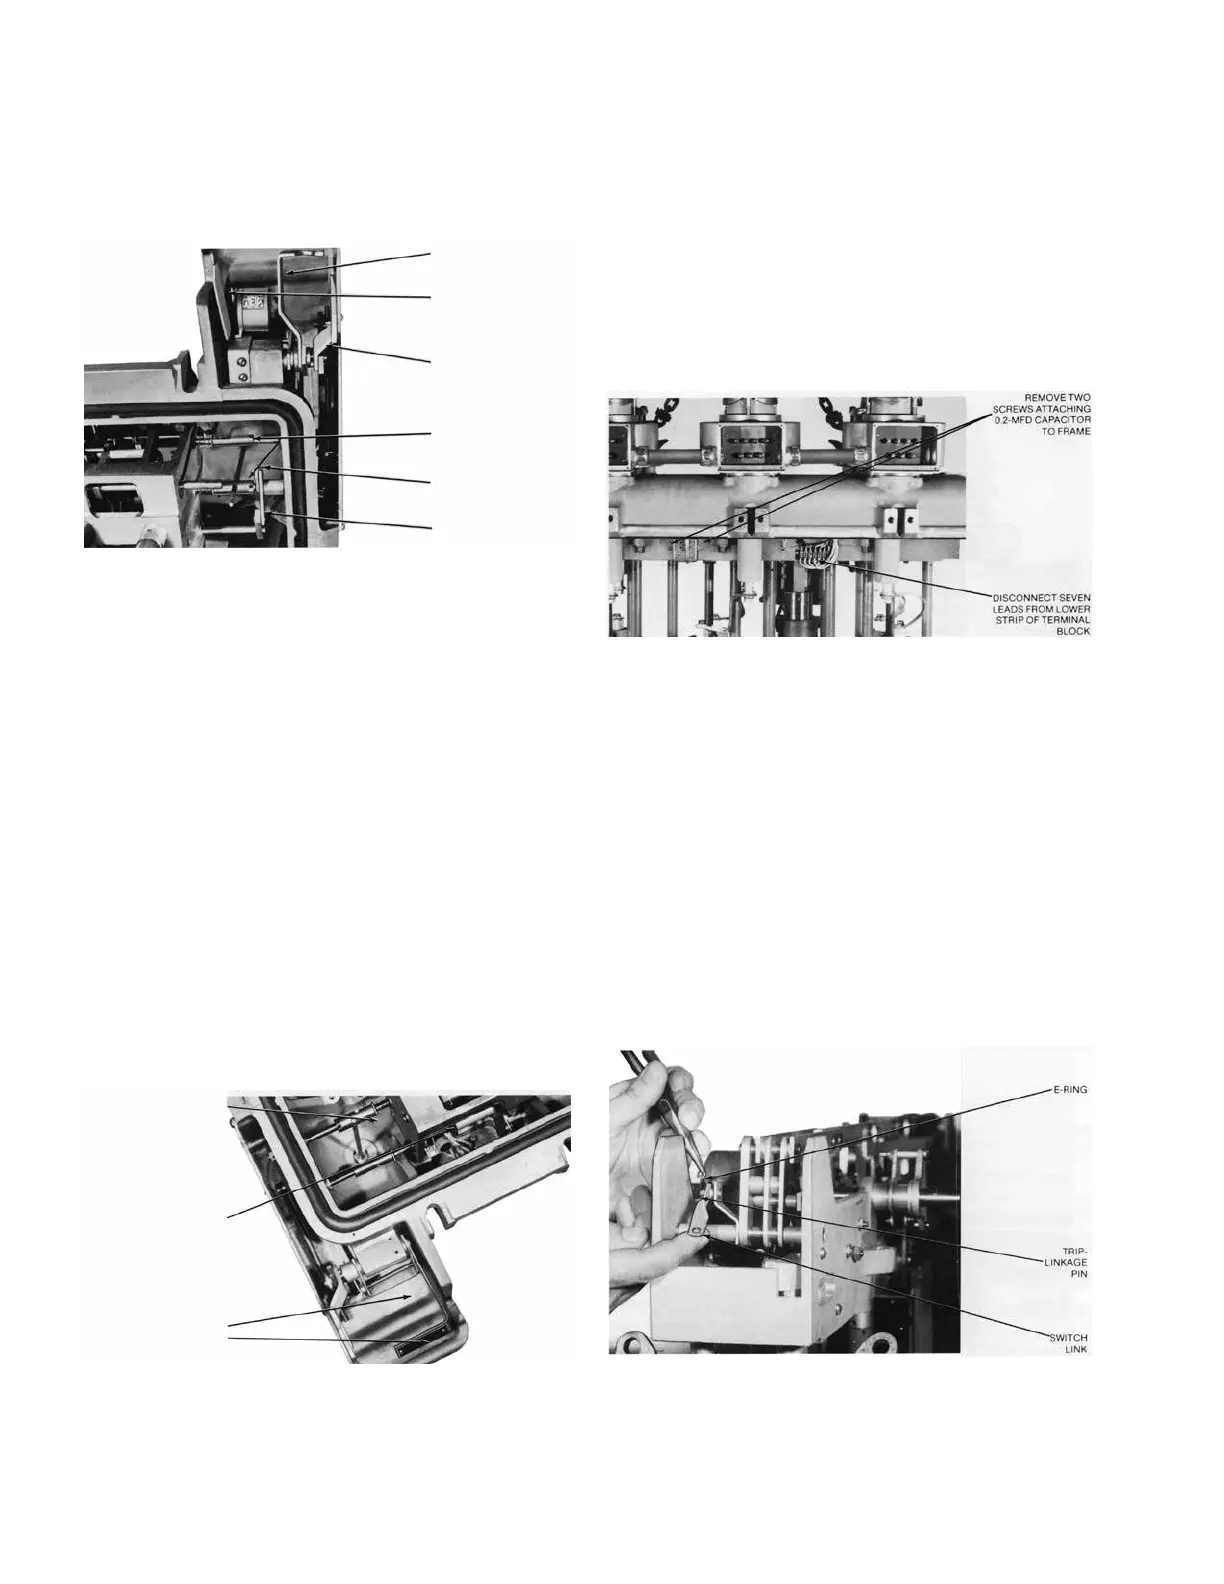
Figure 2. Disconnecting control lever prior to head
assembly removal.
C. Disconnect the non-reclosing control lever by
removing the E-ring indicated in Figure 2 and
separating the two connecting links.
ote:N Prior to completing the next step ensure the recloser
mechanism is supported from below.
D. Remove the six 1/2-inch x 4-1/2-inch socket-head
bolts that secure the frame to the head casting.
Six tubular spacers will be released when the head is
lifted.
•
This procedure applies only to these electronic
reclosers: RE, RVE, RXE, VWE, VWVE, WE, WVE.
A. Disconnect all bushings leads at the lower end of the
bushings.
B. Disengage the lockout lever and the contact position
indicator by pushing the spring-loaded couplers
inward (Figure 3).
Turn the couplers to lock them in the disengaged
position.
Contact Position
Indicator
Manual Lockout
Lever
Spring-Loaded
Sleeves
Figure 3. Spring-loaded sleeves of locknut lever and
contact position indicator in engaged positions.
C. Remove the two screws that secure the 0.2 mfd
capacitor to the load side of the recloser frame
(Figure 4).
D. Disconnect the seven leads connected to the lower
terminal strip of the terminal block attached to the
recloser frame (Figure 4).
Label these seven leads corresponding to the terminals
from which they are disconnected. Terminals are
lettered A through G, right to left.
Figure 4. Capacitor and terminal block location.
E. Remove the screw that secures the nylon lead strap
to the frame above the terminal block.
ote:N Prior to completing the next step ensure the recloser
mechanism is supported from below.
F. Remove the six 1/2-inch x 4-1/2-inch hexsocket head
bolts that secure the frame to the head casting.
Six tubular spacers and lockwashers will be released
when the bolts are removed and the head is lifted from
the recloser-mechanism frame.
5. Proceed with accessory installation by assembling the
switch link (Item 9) to the trip-link pin on the recloser
mechanism (Figure 5).
Refer to Figure 6 and Table 2 to determine which hole
in the switch link is to be used.
Figure 5. Assemble switch link to trip-link pin.

 Loading...


