3- SETTING UP TO INSTALL
Recommended Clearances:
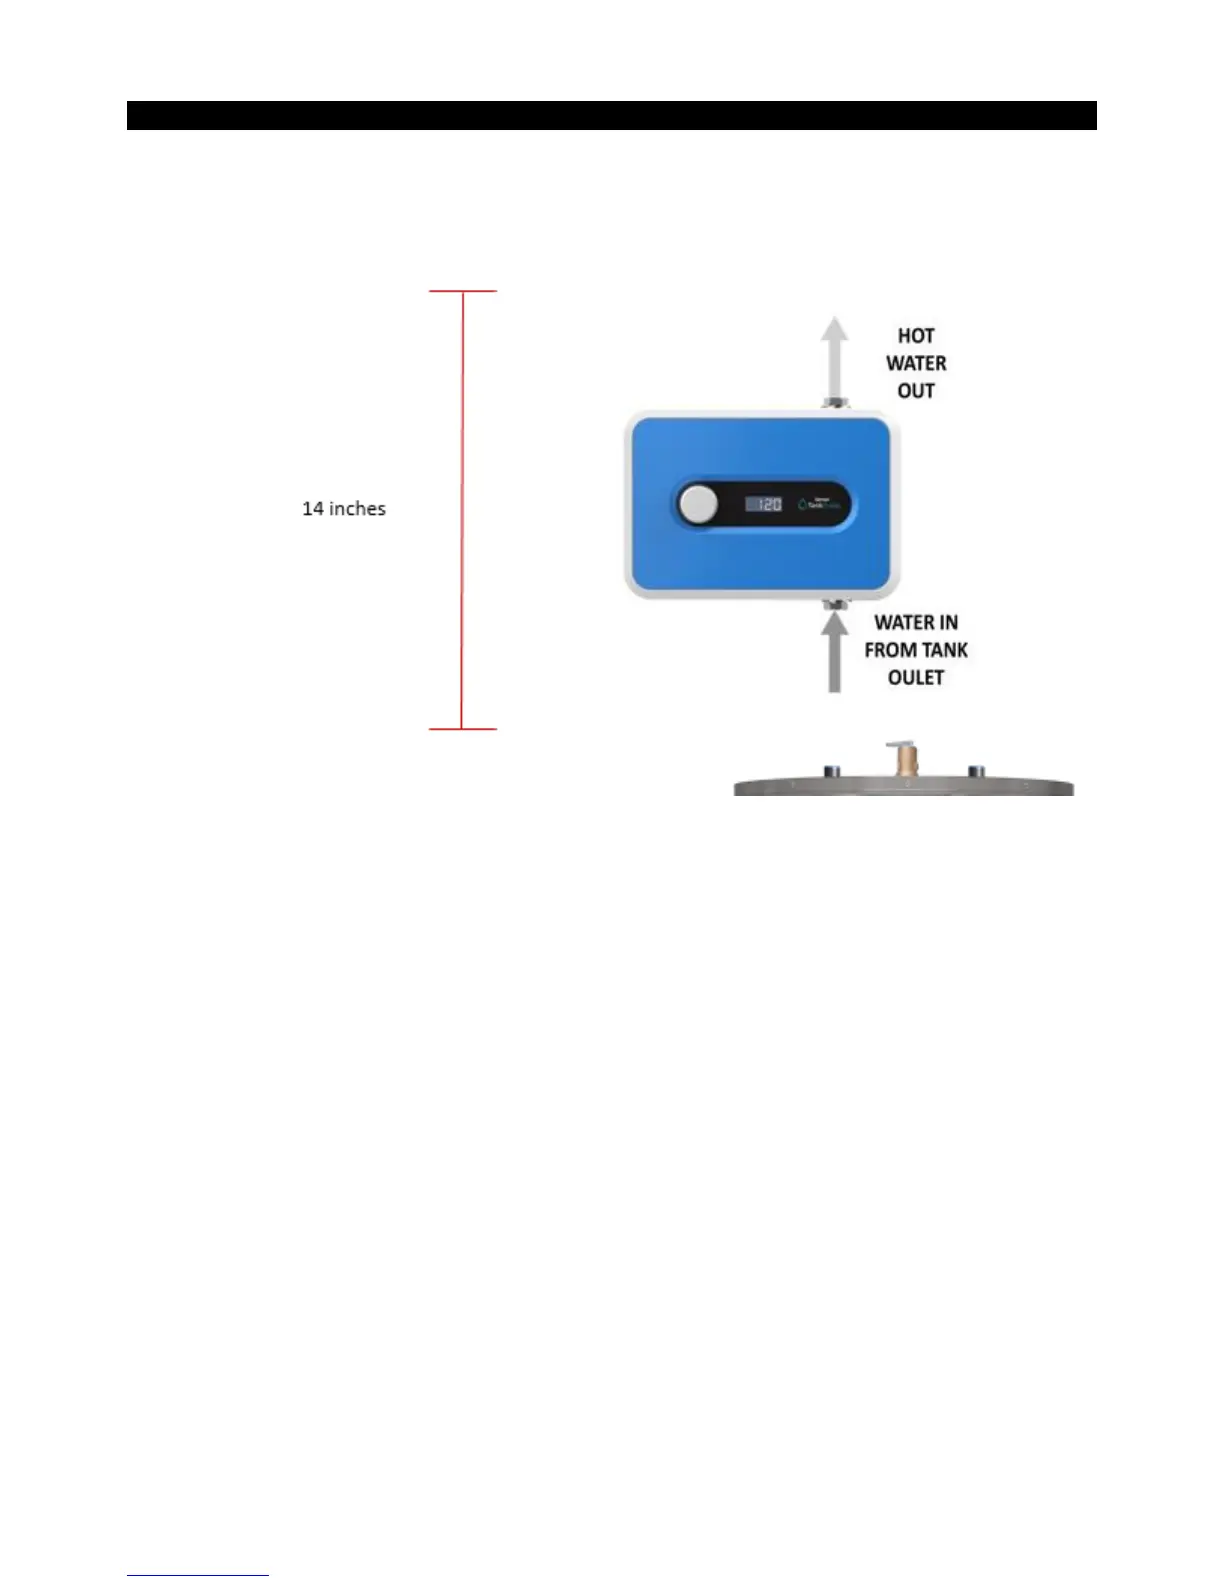
At least 14 inches from above the existing tank heater to the next obstruction
6 inches in front of and to the sides of the TankBuddy™, for service maintenance
Pre-Mounting Steps
1. SHUT OFF ELECTRICITY ON YOUR CIRCUIT BREAKER BEFORE PROCEEDING TO ANY FURTHER
INSTALLATION STEPS.
2. Make sure there is at least 14 inches of straight pipe clearance above the tank heater. This is the
required room in order for the unit to effectively connect in series with the tank and outlet pipe.
IF SPACIAL ISSUES ARISE, OR IF THE COPPER PIPE IS NOT STRAIGHT (ABNORMAL PIPING THAT IS
NOT STRAIGHT), AN ADDITIONAL PLUMING HOSE MAY NEED TO BE USED.
3. Close the supply water valve to the tank heater, located in most cases above the tank heater on the
cold water inlet side. You must do this to drain your system.
4. Open the drain valve of the water tank to let the tank completely deplete of water. The drain valve
is usually located near the bottom of the tank.
5. Drain the water from all existing hot water pipes by first opening all hot water faucets of any kind in
the house. Leave the faucets open until plumbing installation is complete. If water does not stop
flowing, check to make sure the inlet water to the tank heater has been completely shut off.
6. Assess your plumbing system before you cut the pipe – possible plumbing layouts on the following
page
CUTTING THE PIPE IS A CRITICAL STEP. IT IS IMPERATIVE YOU REFER TO THE GUIDE ON THE
FOLLOWING PAGES FOR CLEAR INSTRUCTIONS ON HOW TO CUT THE HOT COPPER PIPE.
Note: If you do not have any of the following plumbing layouts, we recommend you then hire a
licensed and qualified plumber to perform this portion of the installation.
 Loading...