product operating instruction
E.G.O. Germany (E.G.O. Elektro-Gerätebau GmbH)
document id.: 90.60145.653-001-02-A / state: 230 - released
designation: Thermostats 55.xxxxx.xxx / 56.xxxxx.xxx
4 Installation and Commissioning
4.1 Mechanical installation
4.1.1 Basic information on installation
You can freely choose the order of assembly depending on the application. Note the following points:
If the adjustment facial expressions are inaccessible: set the switch-off temperature before
installation.
For thermostats with 2 sensors: note the correct position of the sensor according to the type
drawing.
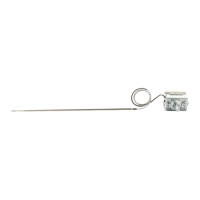
4.1.2 Sensor mounting
1. Position the sensor at the measuring point and fix it. Unwind the capillary tube if necessary.
2. Lay the capillary tube securely. Note the following points:
– Avoid sharp turns or kinks.
– Possibly position and fix sliding insulating hoses.
– Possibly complete and assemble the stuffing box screw connections.
Ensure that there is sufficient permanent tightness.
4.1.3 Fasten thermostat inside the housing
1. With 2-point fastening: select the screw so that the following conditions are met:
– Sufficient fixation is guaranteed.
– The screw does not touch the housing.
2. With central fastening:
– Choose fastening materials, such as nut or cap nut according to the type
drawing.
– Make sure there is sufficient torque and avoid „over-turning“.
3. For temperature limiter and thermal cut-out: ensure that the reset mechanism can move freely.
4. If applicable put on a suitable knob.
4.2 Regulation
4.2.1 With adjustable thermostats: set the switch-off temperature
Adjust facial expressions with a suitable tool, e.g. knob, turn until the intended storage temperature
is reached. Note the following points:
– Temperature-characteristic according to the type drawing
– Installation position of the thermostat (correct alignment of the spindle
surface)
 Loading...