9. Ejection Mechanism
10. Electric Contacts
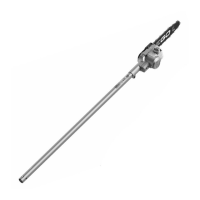
11. Chain Kickback Brake Handle
12. Chain Tensioning Knob
13. Front Handle
14. Rear Handle
15. Chain Tensioning Screw
16. Side Cover
17. Side Cover Knob
18. Chain Sheath
19. Lubricating Hole
20. Sprocket in Guide Bar Tip
NOTICE: The chain kickback brake handle services as the
lever for chain brake activation. It also provides protection
against projecting branches and helps prevent the left hand
from touching the saw chain if it slips off the front handle.
ASSEMBLY
WARNING: If any parts are damaged or missing,
do not operate this product until the parts are replaced.
Use of this product with damaged or missing parts could
result in serious personal injury.
WARNING: Do not attempt to modify this product
or create accessories not recommended for use with this
chain saw. Any such alteration or modication is misuse
and could result in a hazardous condition leading to
possible serious personal injury.
WARNING: To prevent accidental starting that could
cause serious personal injury, always remove the battery
pack from the tool when assembling parts.
ASSEMBLING/REPLACING THE BAR AND CHAIN
WARNING: Always wear gloves when handling the
bar and chain; these components are sharp and may
contain burrs.
1. Position the chain saw power head on its side with
the side cover facing upwards (Fig. H).
2. Turn the side cover knob counterclockwise to remove
the side cover and then loosen the chain tensioning
knob as much as possible.
3. Lay the new saw chain in a loop on a at surface and
straighten any kinks (Fig. I).
4. Place the chain drive links into the guide bar groove
and make the chain a loop at the back of the guide
bar (Fig. J).
5. Hold the chain in position on the guide bar and place
the loop around the sprocket of the power head.
6. Slide the guide bar slot over the alignment anges
until the tension adjusting pin is inserted in the lower
hole in the tail of the bar (Fig. L1).
NOTICE: Small directional arrows are engraved in the
saw chain. Another directional arrow is molded into the
housing. When looping the saw chain onto the sprocket,
make sure that the direction of the arrows on the saw
chain will correspond to the direction of the arrow on the
housing. If they face in opposite directions, turn over the
saw chain and guide bar assembly (Fig. L2).
7. Replace the side cover and slightly tighten the side
cover knob.
8. Lift the tip of the guide bar up to check for sag
(Fig. K). Release the tip of the guide bar and turn the
chain tensioning knob clockwise. Repeat this process
until the sag is eliminated.
9. Tighten the side cover knob securely to ensure that
the saw chain is properly tensioned before using.
NOTICE: To extend the guide bar life, invert the bar
occasionally.
NOTICE: If chain is too tight, it will not rotate. Loosen
the side cover knob slightly and turn the tensioning knob
once from right to left. Lift the tip of the guide bar up and
retighten the side cover knob securely. Assure that the
chain will rotate without binding.
ADJUSTING THE CHAIN TENSION
◾ Stop the motor and remove the battery pack before
adjusting the chain tension. Make sure the side
cover knob is loosened. Turn the chain tensioning
knob clockwise to tension the chain. See the section:
“REPLACE THE BAR AND CHAIN” for additional
information.
◾ A cold chain is correctly tensioned when there is no slack
on the underside of the guide bar and the chain is snug, but
it can be turned by hand without binding. The chain must
be re-tensioned whenever the ats on the drive links do not
sit in the bar groove.
◾ During normal saw operation, the temperature of
the chain will increase. The drive links of a correctly
tensioned warm chain will hang approximately 1.3 mm
out of the bar groove (Fig. M).
NOTICE: New chains tend to stretch; check chain tension
frequently and tension as required.
NOTICE: A chain tensioned while it is warm may be too
tight upon cooling. Check the cold tension before next use.
 Loading...