5
Installation
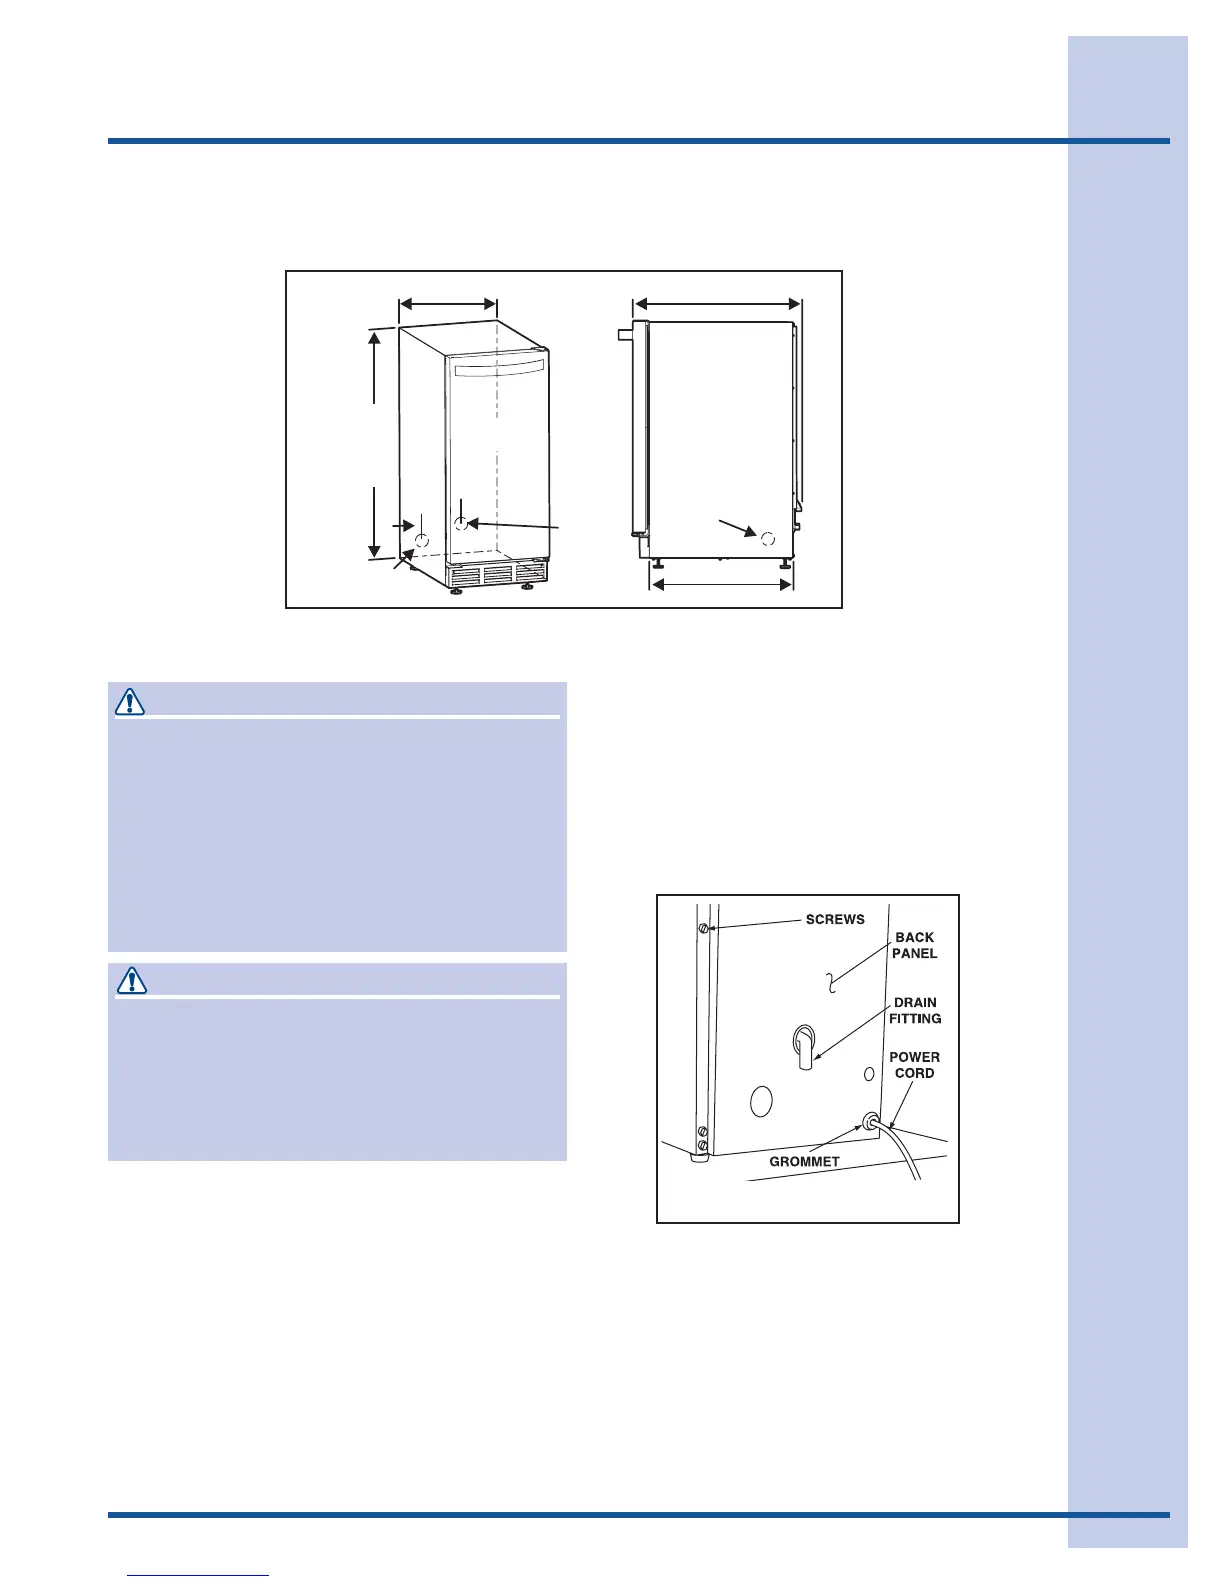
Installation Dimensions
Installing the Drain
CAUTION
PLEASE READ all instructions completely
before attempting to install or operate the unit.
All ice makers require a connection to the
water supply and improper hook-up can result
in substantial property damage! All water
and drain connections MUST BE made by a
licensed/qualified plumbing contractor. Failure
to follow recommendations and instructions
may result in damage and/or harm.
CAUTION
Plumbing installation must observe all
state and local codes. All water and drain
connections MUST BE made by a licensed/
qualified plumbing contractor. Failure to follow
recommendations and instructions may result
in damage and/or harm.
Model EI15IM55GS can be installed using a gravity
drain or the Electrolux EIMP60, optional drain
pump kit.
Follow these guidelines when installing drain lines
to prevent water from flowing back into the ice
maker storage bin and/or potentially flowing onto
the floor causing water damage:
Gravity Drain
• Drain lines must have a 5/8 inch inside
diameter.
• Drain lines must have a 1 inch drop per 48
inches of run (1/4 inch per foot) and must not
create traps.
• The oor drain must be large enough to
accommodate drainage from all drains.
• Insulate the bin drain line to prevent
condensation.
14 - 15/16”
(37.9)
24”
(61)
5”
(12.7)
21 - 3/4”
(55.2)
34 - 1/8”
(86.7)
FULL
RETRACT
HEIGHT
WA TER
VALVE
WA TER
OUTLET
WA TER
DRAIN
Figure 1
 Loading...