4
TEST EQUIPMENT
Turn on power to the system.
Fan Operation
If your system does not have a G terminal connection, skip to Heating System.
1.) Press the fan button to select the On position. The blower should begin to operate.
2.) Press the fan button to select the Auto position. The blower should stop immediately.
Heating System
1.) Press the System button to select the Heat position. Heat Pumps only - if the auxiliary
heating system has a standing pilot, be sure to light it.
2.) Press to adjust thermostat setting to 1° above room temperature. The heating system
should begin to operate and the thermostat will indicate Heat On.
3.) For heat pumps with auxiliary- Press to adjust thermostat setting to 3° above room
temperature. The auxiliary heat should begin to operate and the thermostat will indicate
Heat On Aux.
4.) Press to adjust thermostat setting 1° below room temperature. The heating system
should stop operating and the Heat On icon will disappear.
Auxiliary System ( only for heat pumps with auxiliary)
1.) Press the system button to select the Aux position. This bypasses the heat pump and runs
auxiliary only heat.
2.) Press to adjust thermostat setting to 1° above room temperature. The auxiliary heating
system should begin to operate and the thermostat will indicate Heat On Aux.
3.) Press to adjust thermostat setting 1° below room temperature. The auxiliary heating
system should stop operating and the Heat On Aux icon will disappear.
Cooling System
1.) Press the System button to select the Cool position.
2.) Press to adjust thermostat setting 1° below room temperature. The blower should
come on immediately on high speed, followed by cold air circulation. The thermostat will
indicate Cool On. There can be up to a 5 minute delay. (see INSTALLER MENU, item 50)
3.) Press to adjust thermostat setting to 1° above room temperature. The cooling system
should stop operating and the Cool On icon will disappear.
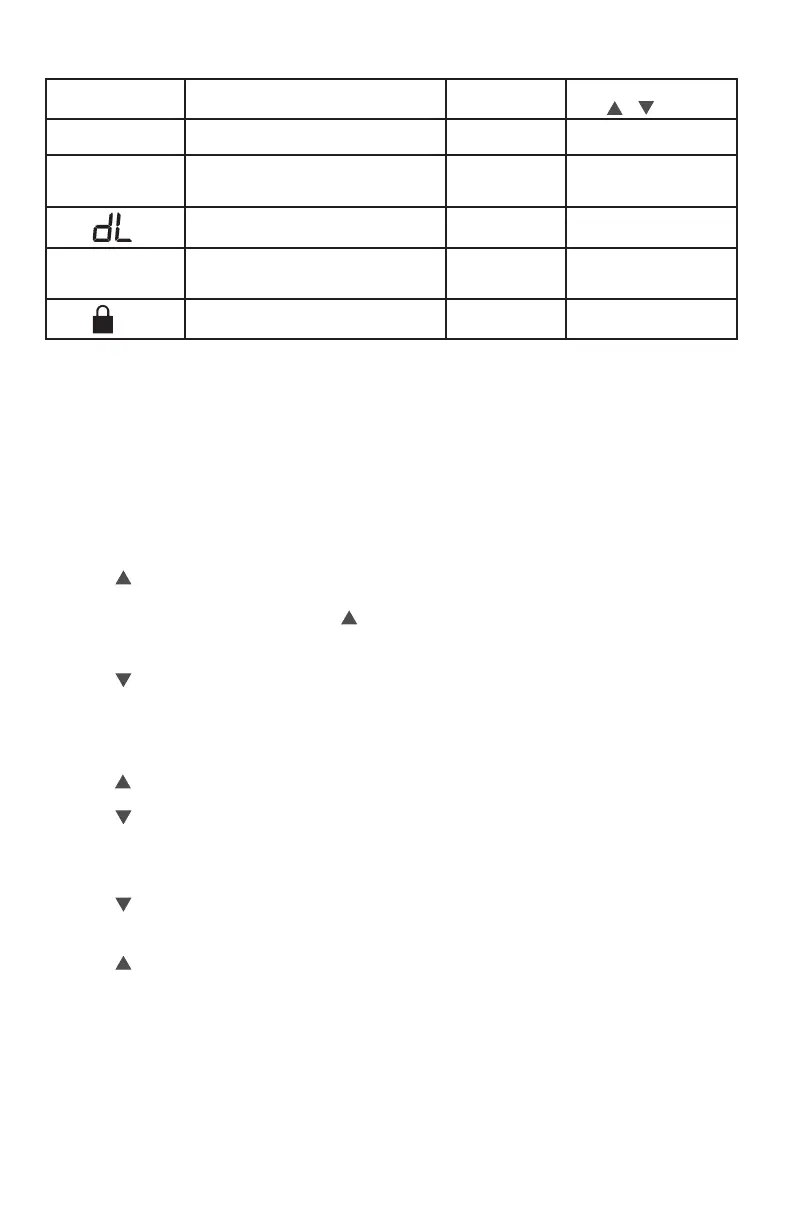
Installer Menu #
(Hold Menu 8 Seconds)
Description
Default Setting
(ashing icons)
Settings
(Press or )
79
Fahrenheit or Celsius °F
°F – Fahrenheit
°C – Celsius
81
Temperature Display Adjustment:
adjust the displayed “Room
Temperature”
0 -5 to +5
83
Continuous Display Light: keep the
backlight always on – “C” wire required
OFF
On – always on
OFF – momentarily
88
Auto Changeover: thermostat
automatically switches between heat
and cool
OFF
On – enable auto
OFF – disable auto
99
Keypad Lock: prevent unwanted
changes to the thermostat
OFF
On – disable buttons
OFF – all buttons are active
INSTALLER MENU (C0ntinued)
4
MISE À L’ESSAI DE L’ÉQUIPEMENT
Ouvrez l’alimentation électrique du système.
Fonctionnement du ventilateur
Si le système n’a pas de borne de branchement G, passez à la section Système de chauage.
1.) Appuyez sur le bouton de ventilateur pour sélectionner la position Marche. Le ventilateur devrait se mettre
en marche.
2.) Appuyez sur le bouton de ventilateur pour sélectionner la position Auto. La ventilation devrait s’arrêter
immédiatement.
Système de chauage
1.) Appuyez sur le bouton System pour sélectionner la position Heat (Chauage). Thermopompes seulement –
si le chauage auxiliaire a un pilote permanent, assurez-vous de l’allumer.
2.) Enfoncez pour régler le thermostat à 1° au-dessus de la température ambiante. Le système devrait se
mettre en marche et le thermostat devrait indiquer Heat On (chauage en marche).
3.) Pour les thermopompes avec chauage auxiliaire – Appuyez sur pour régler le thermostat à 3° au-dessus
de la température ambiante. Le chauage auxiliaire devrait se mere en marche et le thermostat devrait
indiquer Heat On Aux.
4.) Enfoncez pour régler le thermostat à 1° sous la température ambiante. Le système de chauage devrait
s’arrêter et l’icône Heat On disparaîtra.
Système auxiliaire (seulement pour les thermopompes avec système auxiliaire)
1.) Appuyez sur le bouton System pour sélectionner la position Aux. Cela contourne la thermopompe et
permet d’utiliser seulement le chauage auxiliaire.
2.) Enfoncez pour régler le thermostat à 1° au-dessus de la température ambiante. Le chauage auxiliaire
devrait se mettre en marche et le thermostat devrait indiquer Heat On Aux.
3.) Enfoncez pour régler le thermostat à 1° sous la température ambiante. Le système de chauage
auxiliaire devrait s’arrêter et l’icône Heat On Aux disparaîtra.
Système de climatisation
1.) Appuyer sur le bouton System pour sélectionner la position Cool (climatisation).
2.) Enfoncez pour régler le thermostat à 1° sous la température ambiante. Le ventilateur devrait se mettre
en marche immédiatement à vitesse maximum, puis l’air froid devrait se mettre à circuler. Le thermostat
indiquera Cool On. Il peut y avoir un délai allant jusqu’à 5 minutes. (voir MENU DE L’INSTALLATEUR,
article 50.)
3.) Enfoncez pour régler le thermostat à 1° au-dessus de la température ambiante. Le système de
climatisation devrait s’arrêter et l’icône Cool On disparaîtra.
Num. de menu
d’installateur
(enfoncez Menu 8 secondes)
Description
Réglage par
défaut
(icônes clignotantes)
Réglages
(appuyez sur ou )
79
Fahrenheit ou Celsius °F
°F – Fahrenheit
°C – Celsius
81
Réglage de la température achée :
permet d’ajuster la température ambiante
achée
0 -5 à +5
83
Éclairage continu de l’achage : garde le
rétroéclairage toujours activé – l commun
requis
OFF
On – toujours allumé
OFF – allumé momentanément
88
Permutation automatique : le système
alterne automatiquement entre le
chauage et la climatisation
OFF
On – activée
OFF – désactivée
99
Verrouillage clavier : empêche des
changements non désirés au thermostat
OFF
On – désactivation des boutons
OFF – tous les boutons sont
actifs
MENU DE L’INSTALLATEUR (suite)
Note: If Starting Soon is shown on the display, the compressor lockout feature is operating. There will be up
to a 5 minute delay before the compressor turns on (see INSTALLER MENU, item 50).
Remarque : S i Starting Soon (Démarrage bientôt) s’ache, la fonction de verrouillage du compresseur est activée. Il y aura
un délai allant jusqu’à 5 minutes avant la mise en marche du compresseur (voir MENU DE L’INSTALLATEUR, article 50).
 Loading...