English
10
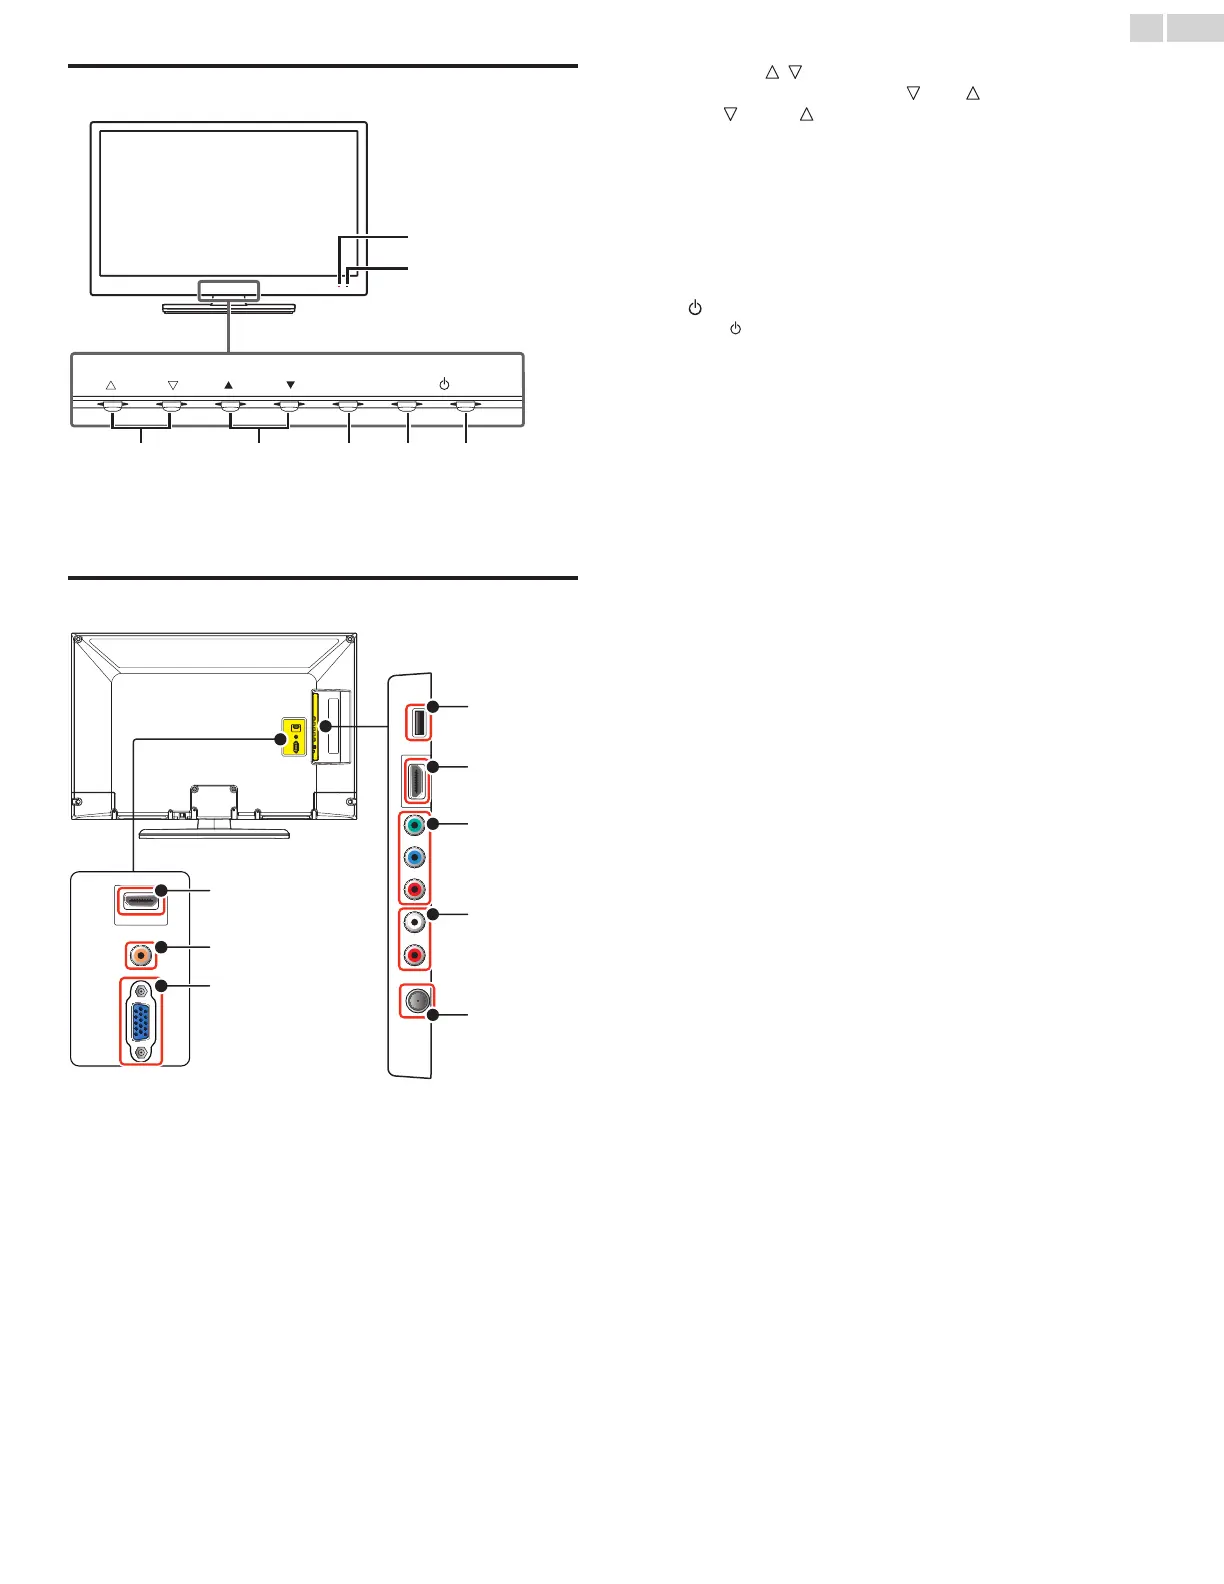
Control panel
a VOLUME /
Press to adjust volume down (
) / up ( ) or to move
left (
) / right ( ) when selecting menu items.
b CHANNEL ▲/▼
Press to select channels or to move up (▲) / down (▼) when
selecting menu items.
c MENU
Press to open the menu to make or change the device settings.
d SOURCE
Toggle to select the connected devices.
e POWER
Press to turn the unit On and go into Standby mode.
To completely Turn Off the unit, you must unplug the AC power
cord.
f Power On indicator
Lights up red when the unit is in Standby mode and ashes while
the unit is Turning On.
g
Infrared sensor
Receives IR signals from remote control.
VOLUME
CHANNEL
MENU
SOURCE
POWER
a b c d e
f
g
Terminals
h USB terminal
Data Input from USB Memory Stick only.
Do not connect any device to this terminal such as; Digital
camera, keyboard, mouse, etc.
i HDMI 2 Input jack
Digital audio and video Input from high de nition Digital devices
such as Blu-ray disc players, cable boxes and satellite set-top
boxes.
j Component (Y/Pb/Pr) / Composite Video (VIDEO) Input jacks for
VIDEO
Composite Video Input (VIDEO) jack is shared jack with
Component Video Input (Y) jack.
k Analog Audio (L/R) Input jacks
Connect Analog Audio signals from;
- HDMI-DVI / Analog Audio (L/R) jacks signal
- Component Video / Analog Audio (L/R) jacks signal
- Composite Video / Analog Audio (L/R) jacks signal
- PC Connection / Analog Audio (L/R) jacks signal with Stereo
mini 3.5mm plug Audio cable on PC
l 75 ohm Cable / Antenna connection
Signal Input from an antenna, cable or satellite.
m HDMI 1 (HDMI-DVI) Input jack
HDMI connection for HDMI or DVI device.
n Digital Audio Output jack
Digital Audio (S/PDIF) Output to home theaters and other Digital
Audio systems.
o PC Input jack
VGA cable connection for PC.
h
i
j
k
l
m
n
o
 Loading...