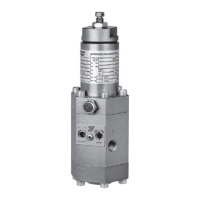
PS/79 and PS/80
3
MAINTENANCE
CAUTION
Servicingshouldbecarriedoutbyqualied,
skilled personnel only. For further information,
please contact our Technical Support
Representatives or our authorized dealers.
Before servicing, cut off regulator inlet and outlet and release
any trapped pressurized gas. Use suds to check that there
are no leaks.
Replacing Filter
Remove the screws (key 41), cover (key 59), and replace a.
felt (key 61). Reassemble by reversing the above sequence.
Replacing Stabilizer Diaphragm and Seal Pad
Remove screws (key 41), cover (key 64), spring (key 47) a.
and diaphragm assembly (key 48, 49, 50, 51, 52, and 53).
Replace diaphragm if necessary.
Unscrew seat (key 54) and replace pad holder (key 56).b.
Reassemble by reversing the above sequence, make sure c.
not to “pinch” O-rings (key 55).
Replacing Valve Seal Pads
Remove plug (key 27) and seat (key 30). Slide out spring a.
(key 32), pad holder unit (key 34) and forked stem (key 35).
Replace pad holder (key 34) and O-ring (key 37).b.
Reassemble by reversing above sequence.c.
General Maintenance
Completely release spring (key 5) by turning the adjusting a.
screw (key 1) counterclockwise.
Remove screws (key 7) and cover (key 4).b.
Keep plate (key 9 or 75 for the AP version) blocked with c.
a box wrench, unscrew nut (key 6). This must be done
exactly as described to prevent damage to or breaking of
safety valve (key 20).
Unscrew plate (key 9 or 75 for the AP version) from stem d.
(key 13) remove parts (key 10, 11 and 12 or 76, 78, 10, 77
and 12 for the AP version).
For PS/80 and PS/80-AP version: e.
Unscrew plate (key 9 or 75 for the AP version) from stem
(key 13)remove parts (key 10, 68, 69, 11 and 12 or 76, 78,
68, 69, 10, 77 and 12 for the AP version).
Slide off split pin (key 40). Remove locknut (key 16) with f.
appropriate wrench and slide out parts (key 17, 18, 19
and 20). Make sure that the surface of seat (key 26) which
is sealed by pad (key 21) is in proper condition.
Replace diaphragms (key 10) and all seals.g.
Proceed as directed in the replacement of lter, stabilizer h.
diaphragm, seal pad, and valve seal pads.
Reassembly
Lubricate the static O-rings with a thin layer of Molykote
55 M, be very careful not to damage the O-rings when
reassembling. No other pilot parts are to be lubricated.
Reassemble parts by reversing the above steps. As you
proceed, make sure that parts move freely and without
friction. In addition:
Once lever (key 39) and stem (key 13) have been a.
mounted, check that, with stem (key 13) against body
(key 25), clearance between forked stem (key 35) and
registered (A) of lever (key 39) is 0.2 to 0.3 mm. If not,
use register to correct.
CAUTION
The above clearance can be checked by
gently pulling stem (key 13) upward. Use
the proper tool to make sure that the top
plate (key 9) is on the same plane as that
supporting the diaphragm (key 10) in the
body (key 25).
Mount diaphragm (key 10) and screw on plate (key 9), b.
rst by hand then with box wrench, (always holding upper
diaphragm (key 10) rmly in place) in order to avoid
damage to stem (key 13) and levers below.
Holding plate (key 9) rmly in place with box wrench, c.
tighten nut (key 6).
Before remounting cover (key 4), center diaphragm as d.
follows:
Mark a reference point (with pencil) on the diaphragm; •
turn it to the right without forcing and mark another
reference on body.
Now turn diaphragm to the left and mark a further reference.•
Position the diaphragm mark midway between the two •
marks on the body.
Tighten all screws uniformly to ensure proper sealing.e.
CAUTION
The pilot has a wide range of self-adjustment
values. However, given actual operating
conditions, it may necessary to assist it at
timesbyndingthebestsettingofregister/
pin screw (key 29) or the most suitable
calibration jet (key 15).
 Loading...