Sigma DS1, DS2, and DS3 Card Printers Installation and Administrator’s Guide 11
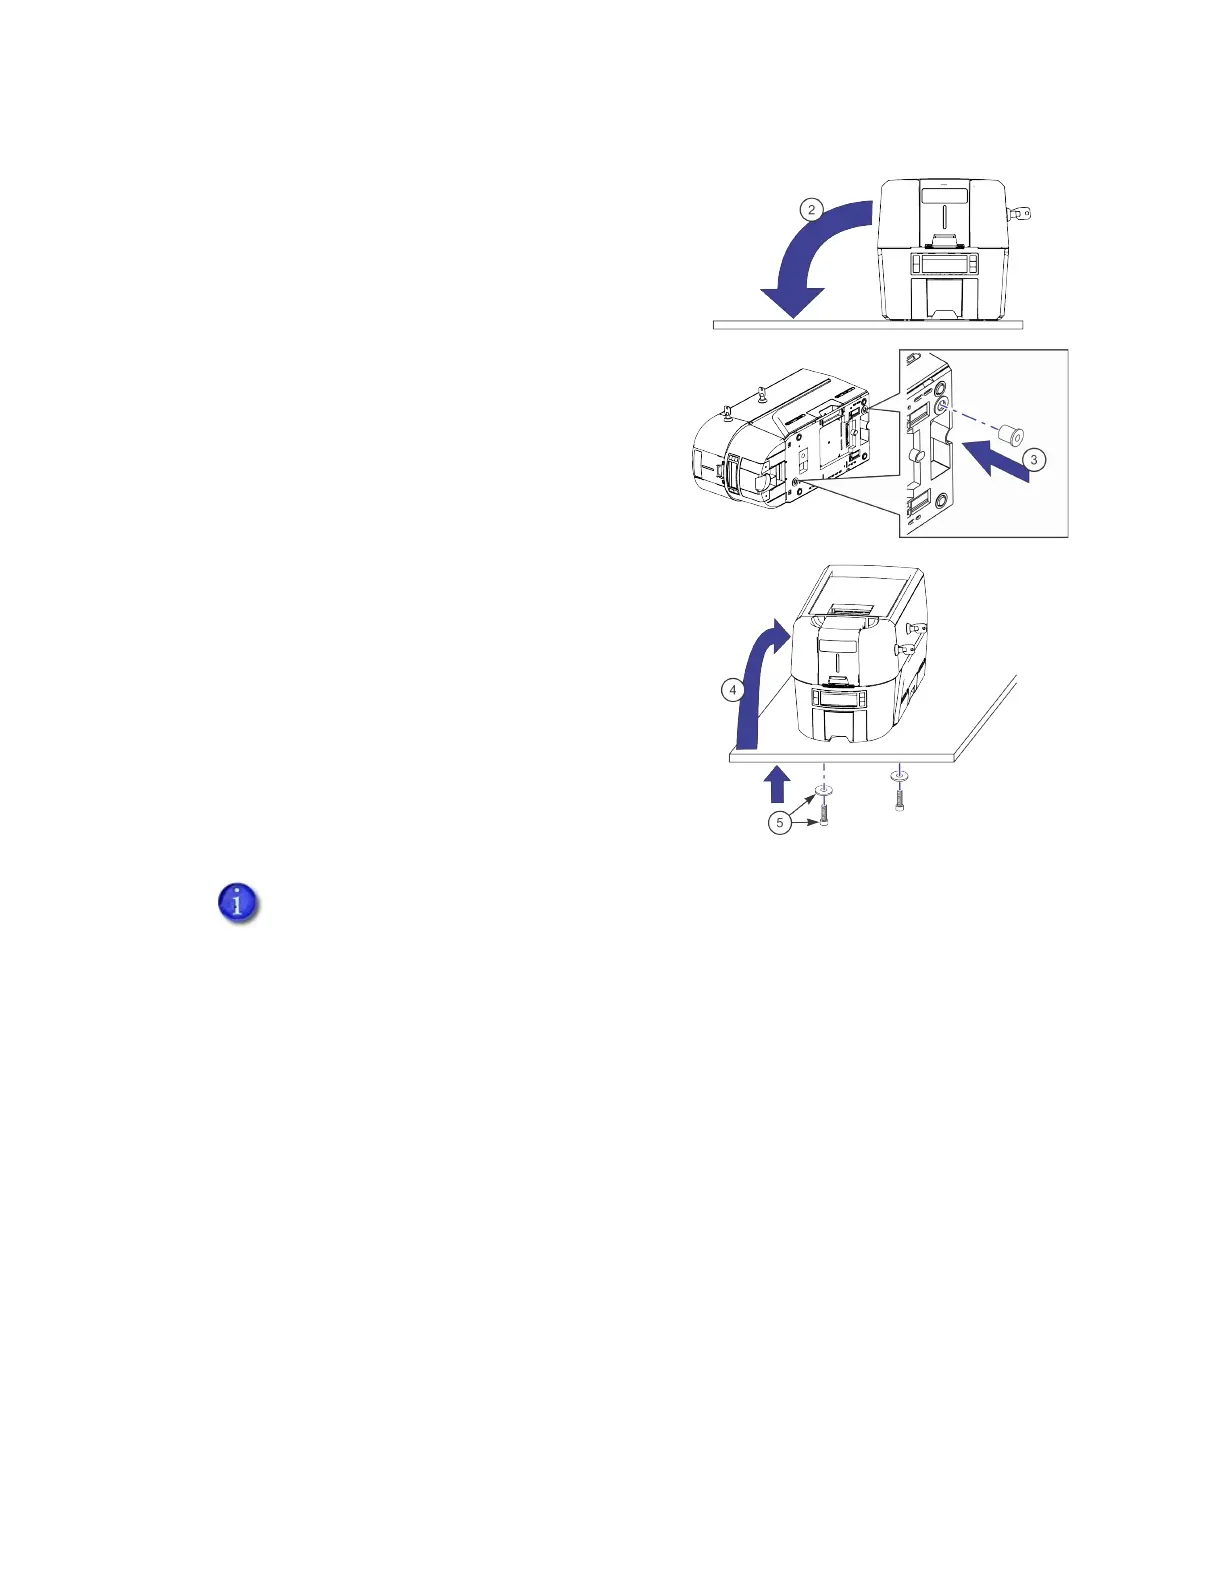
2. Carefully tip the printer onto its left side.
3. Insert the M6 well nut threaded inserts into
the bolt-down openings on the bottom of the
printer.
4. Return the printer to its upright position and
position it over the holes that are drilled in the
mounting surface.
5. Secure the printer to the mounting surface.
a. Place a flat washer on each of the screws
beneath the mounting surface.
b. Insert the M6 screws through the holes in
the mounting surface and into the well
nuts in the bottom of the printer.
c. Tighten the screws securely.
If your system includes the optional laminator, you can secure the laminator to a
mounting surface. Refer to the Laminator Upgrade Installation Instructions that are
shipped with the CLM laminator.
 Loading...