ELPMBUNI
Page - 18 - Installation Manual
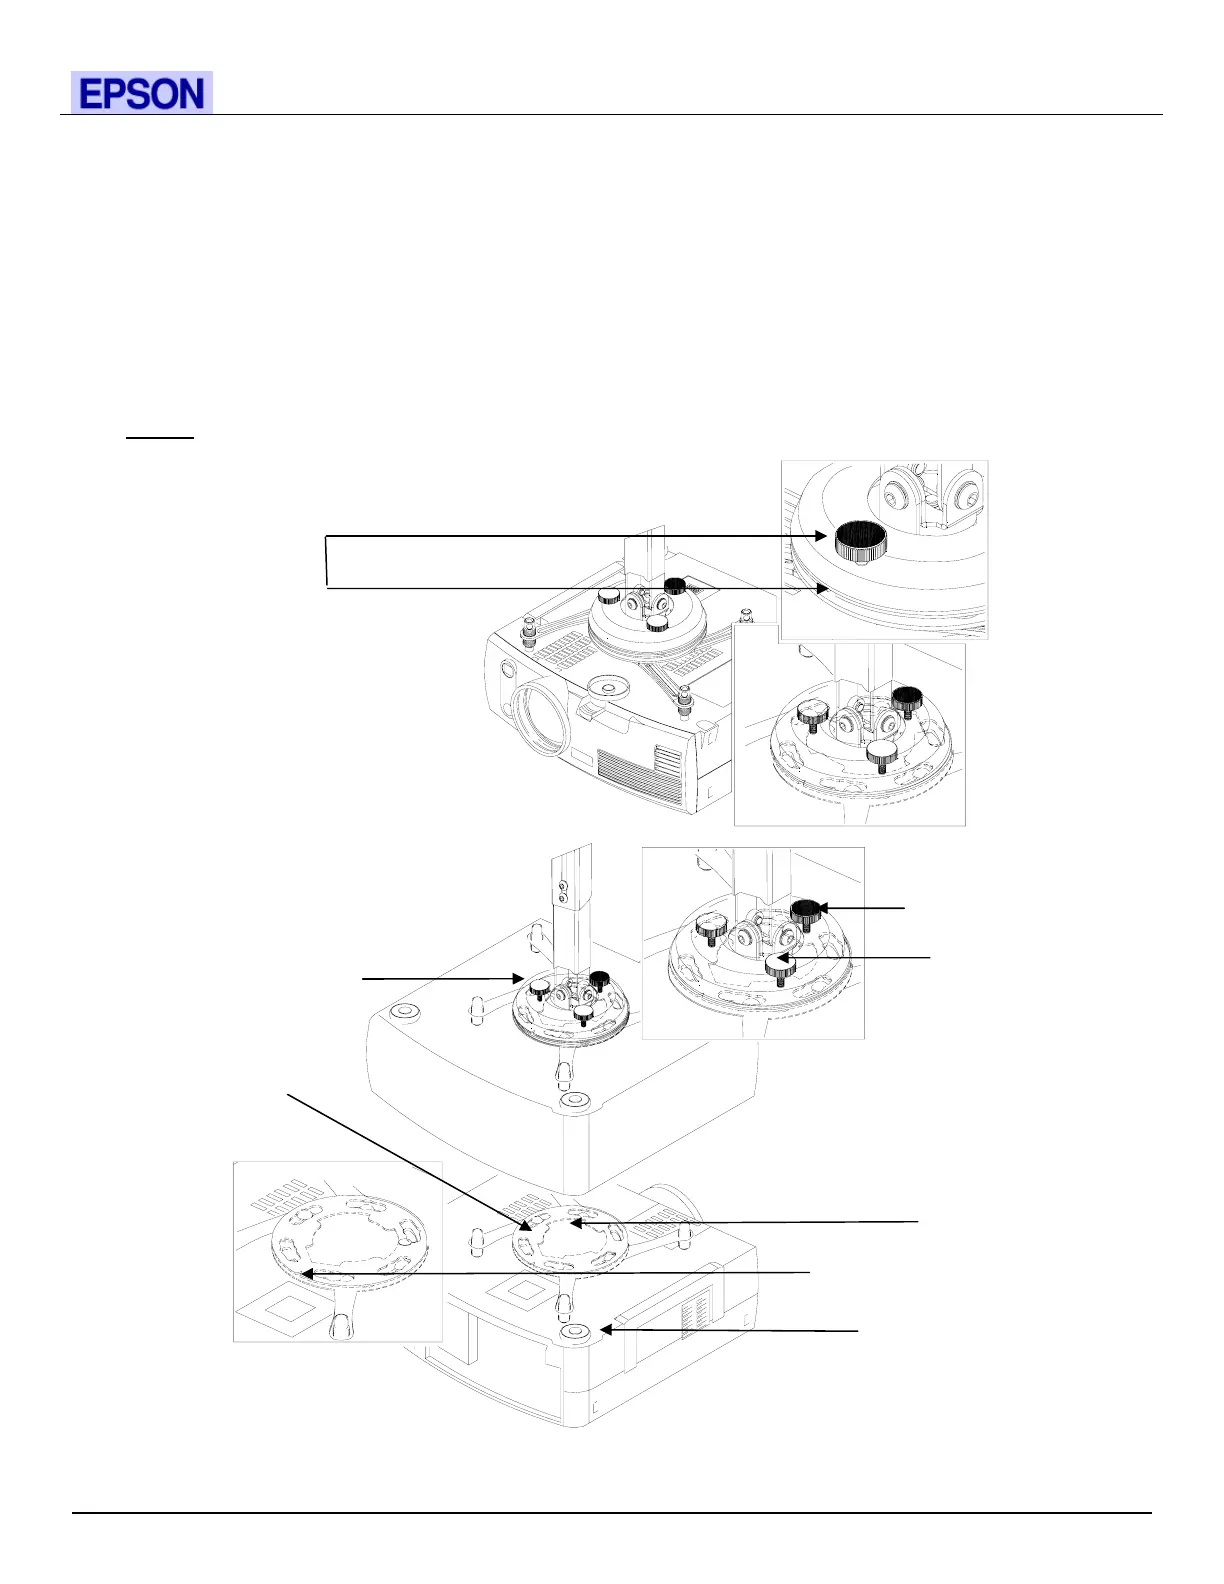
Securing the Projector to the Upper Assembly
1. Make sure the three-knurl knobs are loosened to fully expose to the “tri-lock” mounting plate in the base
of the upper assembly.
2. Carefully lift the projector and insert the mounting bracket mating special tri-lock cutout into the mating
portion of the upper assembly.
3. Once inserted rotate the projector and mounting bracket 180° and secure the rear safety knob first to
prevent further rotation of the bracket in the upper assembly.
4. Tighten the remaining two tension knurl knobs until the mount becomes rigid.
5. The safety knob should line up with the alignment slot on the mounting bracket (Figure 13).
NOTE: Follow the number sequence prior to securing the projector to the upper assembly.
Figure 13
The alignment slot must be
in direct alignment with the
safety knob to lock the
mounting bracket to the
upper assembly
Universal Mount
Alignment Slot
Tri-Lock Opening
Projector Mount
Tension Knurl
Knobs
Safety Knurl Knob
Insert universal bracket to the
tri-lock, then rotate the
projector 180°
 Loading...