System Recovery Procedure for Epygi Devices
Revision 1.2 5 23-Mar-17
2 Requirements
Below are listed the required specifications for the recovery procedure:
• PC with Operating systems: Windows 10, Windows 7, Windows XP, Windows Vista,
• TFTP Server software installed on a PC (e.g. – Tftpd32).
3 System Recovery Procedure
Upload the Emergency FW as follows:
1. Connect the PC directly to the device’s LAN port.
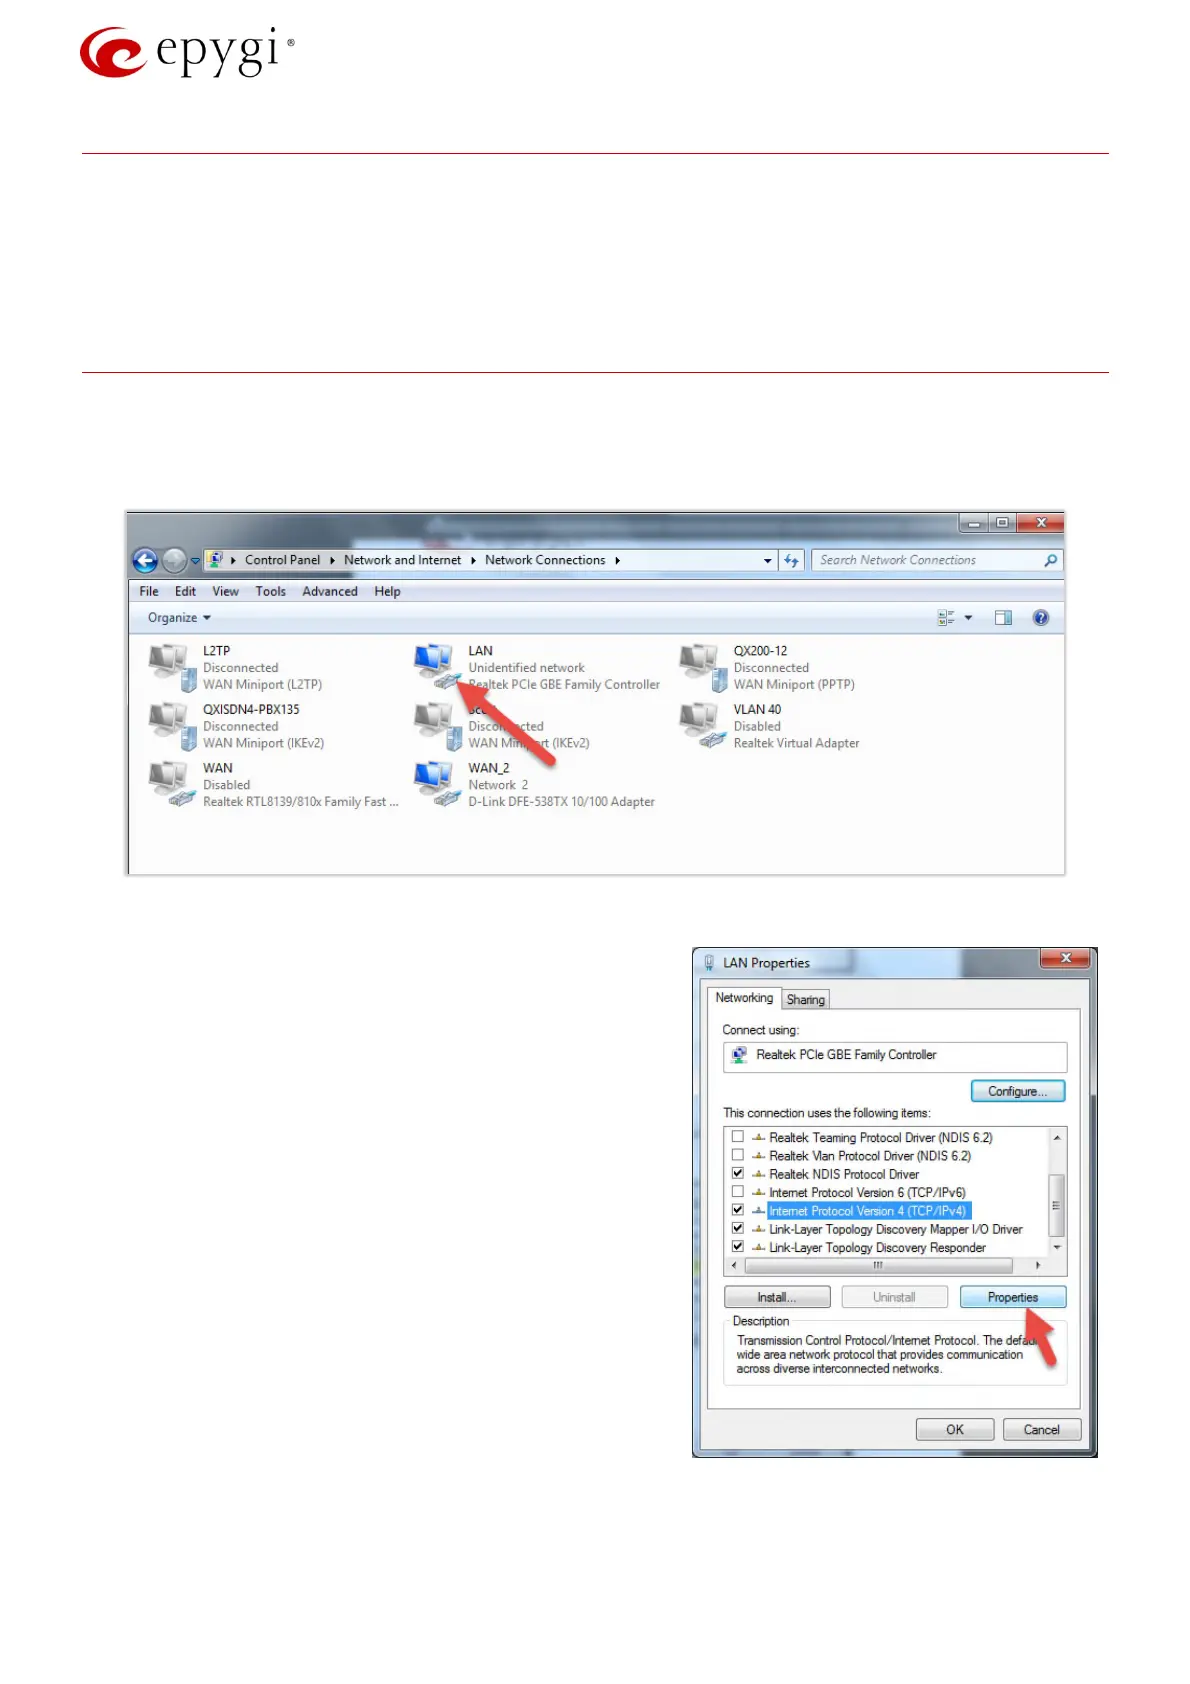
2. Navigate to Control PanelNetwork and InternetNetwork Connections (Figure 1).
Figure 1: Control Panel\Network and Internet\Network Connections
3. Select the Local Area Connection (with the right
mouse button) and select LAN Properties (Figure 2).
4. Highlight the Internet Protocol Version 4(TCP/IPv4)
and click on the Properties button. TIP: Make first a
note of the displayed values in that window to make
sure that you will be able to reconfigure your PC
properly after having finished the emergency firmware
procedure.
5. In case of IP PBXs – assign the IP address
172.30.0.100 with Subnet Mask 255.255.0.0 to PC
(Figure 3).
In case of Gateways – assign the IP address
172.28.0.100 with Subnet Mask 255.255.0.0 to PC.
Click OK to finish this step.
6. Download the tftpd32.exe (with tftpd32.chm and
tftpd32.ini) and the XX-SW.bin file corresponding to
your device from the Epygi’s Support Portal.
Figure 2: LAN Properties
 Loading...