System Recovery Procedure for Epygi Devices
Revision 1.2 6 23-Mar-17
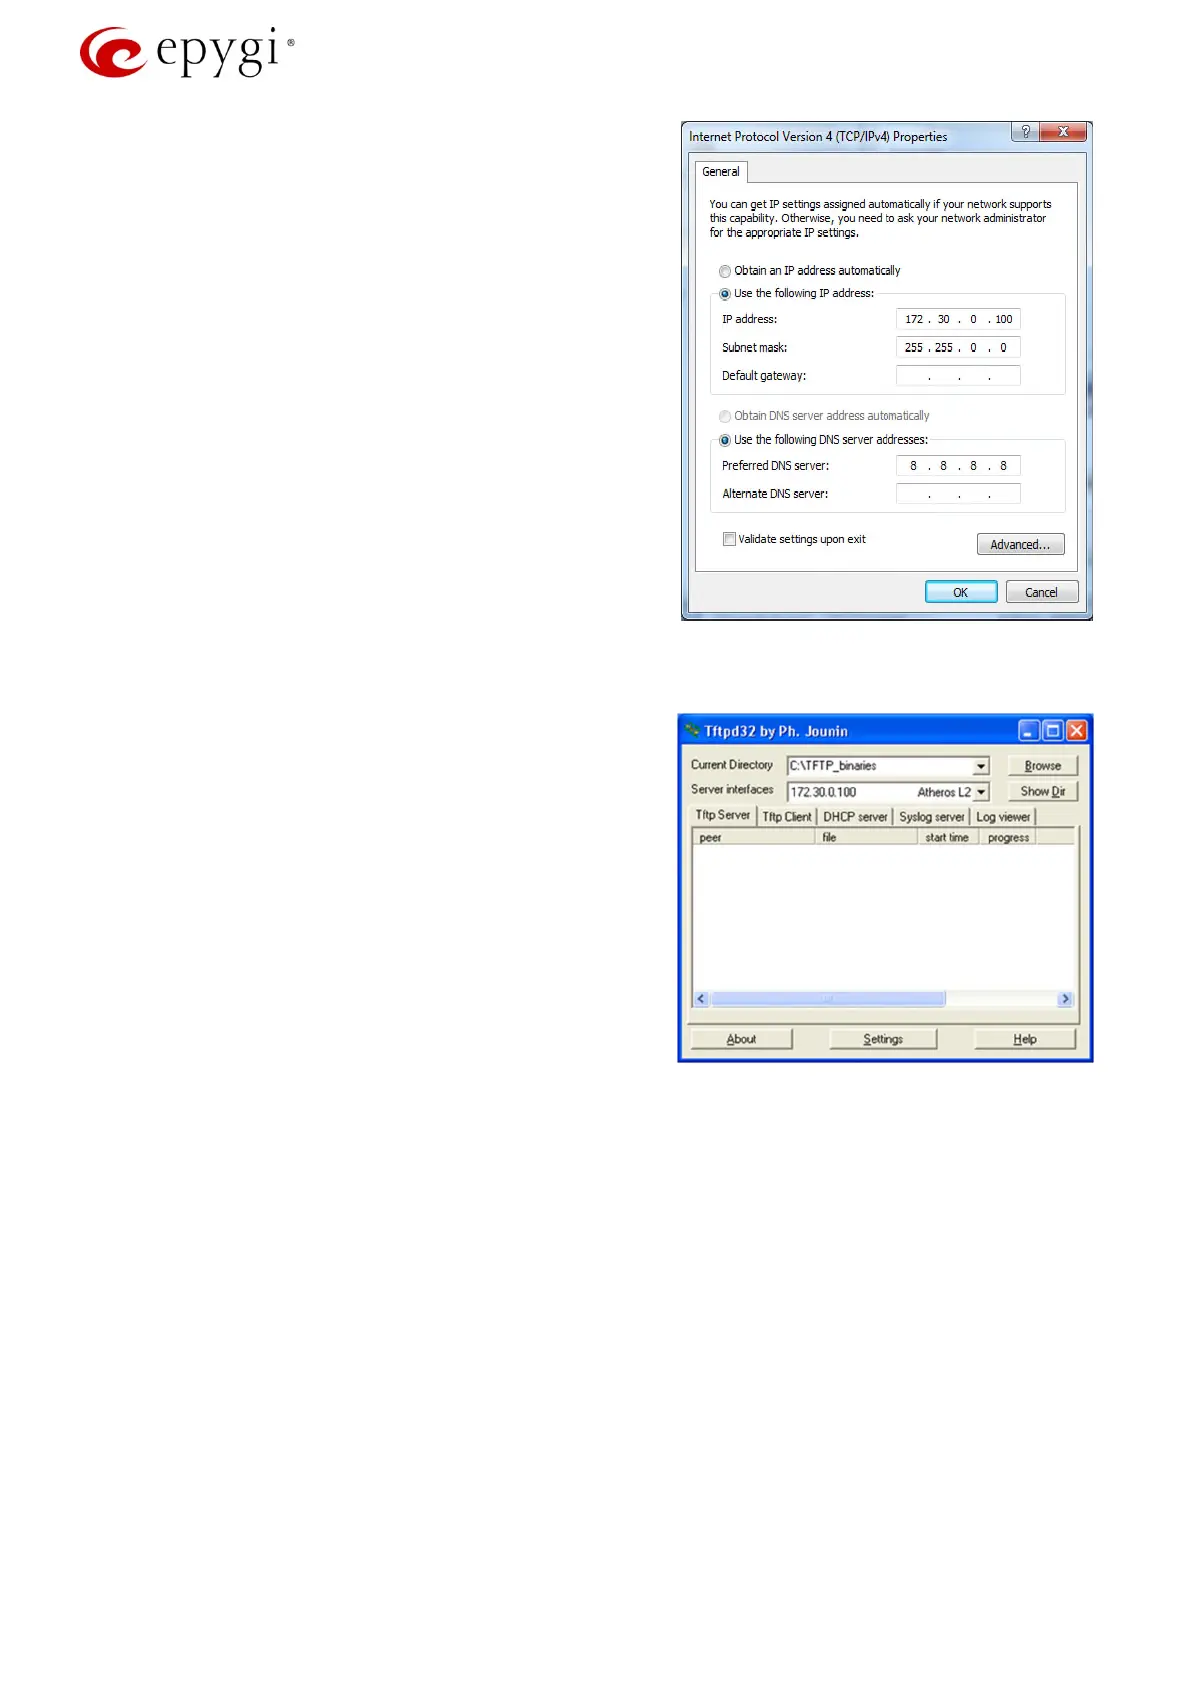
7. Run tftpd32.exe program and configure the following
parameters (Figure 4):
• Current Directory requires the path of the XX-SW.bin
file stored on the PC.
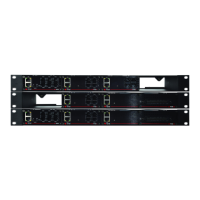
• Server interface requires the IP address of the PC:
172.30.0.100 for IP PBXs and 172.28.0.100 for
Gateways.
8. To start uploading emergency FW, it is necessary:
• For Quadro devices power on the device.
• For QX devices press the reset button and keep it
pressed during 3-5 seconds.
The red Fault LED and the yellow Busy LED will stop
blinking alternately and start blinking in parallel. This shows
that the device has accepted the emergency FW and is
loading it. After a few seconds, the device will boot,
indicated as follows: The red Fault LED will glow for a few
seconds, then the yellow Info LED will glow for another
few seconds while the green Busy LED is jittering. As
soon as the yellow Info LED extinguishes, the boot
sequence has been completed successfully.
Now, you may access the device again entering its default
IP address (172.30.0.1 for IP PBXs or 172.28.0.1 for
Gateways) into the address field of your web browser.
1. Update device with the desired FW version if
required.
2. Restore backed up configuration (if stored
previously).
Figure 3: LAN IP address configuration for IP
PBXs
Figure 4: Tftpd32 Configuration
 Loading...