65
INSTALLATION
INSTALLING THE OUTBOARD
IMPORTANT: Follow all directions carefully.
The outboard’s warranty will not cover prod-
uct damage or failure that results from incor-
rect outboard installation.
Refer to Priming the Oil System on page 20.
Mounting DH, DR, DRL, HP and HT
Models
Center the outboard on the transom (or
mounting bracket) and tighten clamp screws
by hand.
Use the outboard stern brackets as a tem-
plate for location and size of holes to drill in
the transom.
Use each stern bracket’s mounting holes as a
guide to drill 5/16 in. (7.9 mm) holes through
the transom. Drill two (2) mounting holes on
25 / 30 HP models and (4) mounting holes on
15 H O models
Install the mounting bolts through the stern
brackets and transom. Install large washers
and locknuts onto bolts and tighten securely.
A WARNING
The outboard must be correctly installed.
Failure to correctly install the outboard
could result in serious injury, death or
property damage. We strongly recom-
mend that your Dealer install your out-
board to ensure proper installation.
A WARNING
Even if equipped with clamp screws,
your outboard must be bolted to the boat
to prevent it from “working off the tran-
som” during operation.
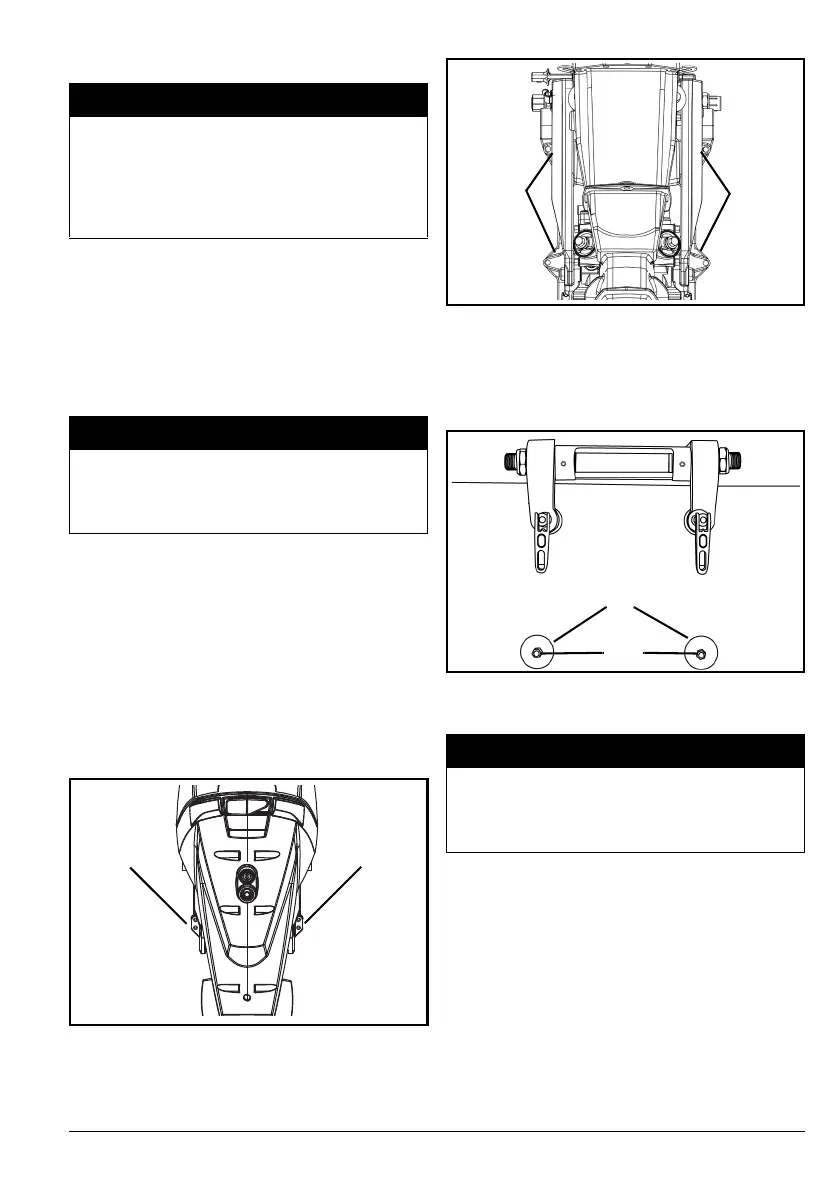
25 / 30 DR & DRL Models
1. Drilled transom holes
007040
15 DH, HP & HT Models
1. Drilled transom holes
007999
1. Large washers
2. Bolts
18961
A WARNING
When replacing bolts, screws, or other
fasteners, use Evinrude/Johnson parts
or parts of equivalent strength and mate-
rial.
 Loading...