4
English
DC 6V
1 12 3 4 5
6 7 8 9 10 11 12 13
14
15 16 17
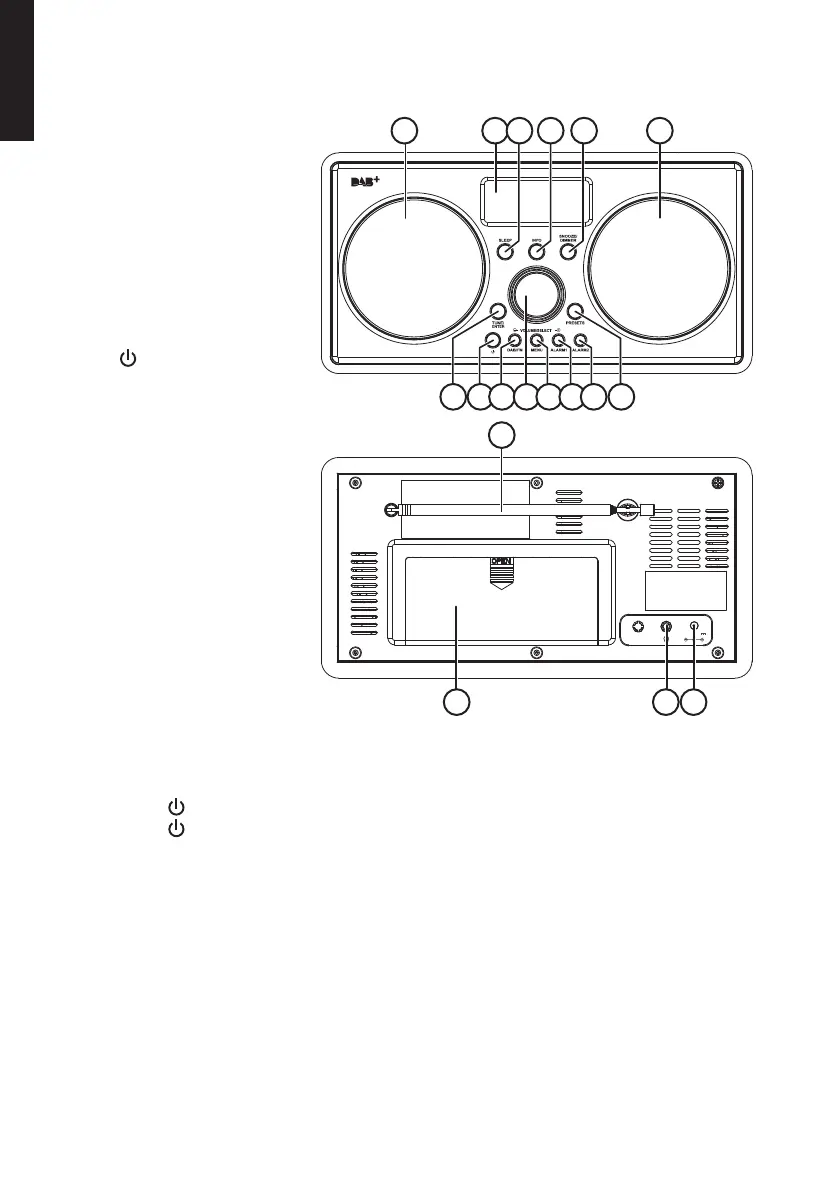
Buttons and functions
1. Speaker
2. Display
3. [ SLEEP ]
4. [ INFO ] Information
5. [ SNOOZE/DIMMER ]
Snooze function/
display illumination
6. [ TUNE/ENTER ]
Tune/confirm
7. [
] Standby
8. [ DAB/FM ] DAB/FM radio
9. [ VOLUME/SELECT ]
Raise and lower
thevolume
10. [ MENU ] Menu
11. [ ALARM1 ] Alarm time 1
12. [ ALARM2 ] Alarm time 2
13. [ PRESETS ]
Preset stations
14. Telescopic aerial
15. Battery cover
16. Headphone socket
17. DC IN
Getting started
1. Plug theDC connector on themains lead into thepower socket [ DC IN ] on theradio.
2. Plug themains lead into awall socket.
3. Press [ ] to turn theradio on.
4. Press [ ] to turn theradio off.
Inserting batteries
1. Unplug themains lead from both theradio and thewall socket.
2. Slide thebattery cover in thedirection of thearrow and take it off.
3. Insert 4×AA/LR6 batteries. Observe thepolarity markings in thebattery compartment.
4. Refit thebattery cover.
Note:
In order for theradio to run on battery power, theDC connector must be unplugged.
Theradio will shut off and theclock will be set to zero when themains lead is plugged
into awall socket.
 Loading...