2
Set up your device
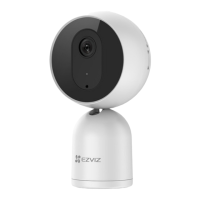
Step 1 Power-on
Plug one end of the power cable into the camera, and plug the other end into the power
adapter. Then plug the adapter into a power outlet, as shown in the figure below.
Power Outlet
Power Cable
Step 2 Camera Setup
1. Create a user account
-Connect your mobile phone to a Wi-Fi network.
-Download and install the EZVIZ app by searching “EZVIZ” in the App Store or
Google Play Store
TM
.
-Launch the app and register for an EZVIZ user account by following the start-up wizard.
2. Add a camera to the EZVIZ app
-Log in the EZVIZ app.
-On the EZVIZ app Home screen, tap “+” in the upper-right hand corner to go to the QR
code scanning interface.
-Scan the QR Code on the bottom of the camera.
Bottom of Camera
-Follow the EZVIZ app wizard to finish Wi-Fi configuration.
For Wi-Fi configuration, make sure your phone is connected to a 2.4GHz Wi-Fi
network from the router.
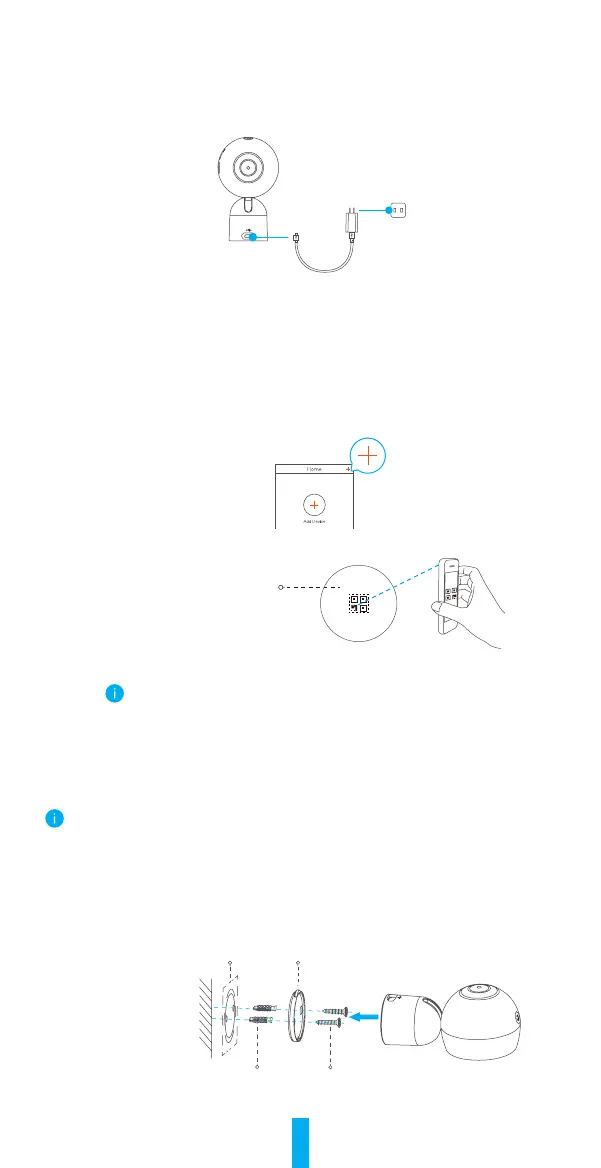
Installation
There is a magnetic piece inside the camera. You can skip the following steps and attach the
camera directly to a magnetic surface.
•Secure the base to the desired position with screws. Refer to Option 1.
•Secure the metal plate to the desired position with foam sticker. Refer to Option 2.
Option 1 Secure the base with screws
Step 1 Place the drill template onto a clean and flat surface.
Step 2 (For cement wall/ceiling only) Drill screw holes according to the template,
and insert anchors.
Step 3 Fix the base on the template with screws.
Step 4 Mount the camera to the base.
ScrewsAnchors
Drill Template Base
 Loading...