10
Setup & Installation (Continued)
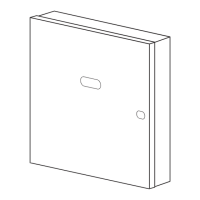
Installing the Mounting Bracket
Step 1
Turn o power.
Step 2
Remove existing alarm and mounting bracket (if necessary).
Step 3
Attach the Onelink mounting bracket to the junction box.
Stand-Alone Alarm Only:
• Connect the white wire on the power connector to the neutral wire in the junction box.
• Connect the black wire on the power connector to the hot wire in the junction box.
• Tuck the orange wire inside the junction box. It is used for interconnect only.
NOTE: Visit www.firstalert.com/product/safe-sound to view alarms compatible with Onelink Safe & Sound.
Strip o about 1/2" (12 mm) of the plastic coating on the orange wire on the power connector.
• Connect the white wire on the power connector to the neutral wire in the junction box.
• Connect the black wire on the power connector to the hot wire in the junction box.
• Connect the orange wire on the power connector to the interconnect wire in the junction box.
Repeat for each unit you are interconnecting. Never connect the hot or neutral wires in the junction
box to the orange interconnect wire. Never cross hot and neutral wires between alarms.
Interconnected Units Only:
!
WARNING: Improper wiring of the power connector or the wiring leading to the
power connector will cause damage to the alarm and may lead to a non-functioning alarm.
 Loading...