OPTION GROUP 4
Feature Default Setting - I Optional Setting - II Optional Setting - III Optional Setting - IV
4-01 Aux 1 output 0.5sec Latch Program
4-02 Aux 2 output 0.5sec Latch Program
4-03 Aux 1 output Control Aux 1 Horn Status
4-04 Aux 2 output Control Aux 2 Dome Light Defrost
4-05 Secure Aux Output (1 and 2 Only) On Off
4-06 Auxiliary Input 1 Prewarn Trigger (-) Disarm
4-07 Auxiliary Input 2 Trigger Prewarn (-) Arm
4-09 Key Sense or Glow Plug input Glow Plug Input Key Sense Input
Bypass Through RS232 Port (Only
Available on CM5000)
4-11 ADS Fortin
nd nd nd nd
4-12 2 Ignition 2 Ignition 2 Accessory 2 Starter Ground When Armed
nd nd nd nd
4-13 2 Accessory 2 Accessory 2 Starter 2 Ignition Horn
nd nd nd nd
4-14 2 Starter 2 Starter 2 Ignition 2 Accessory Dome Light
Option Menu Descriptions
Unlock Before, Lock After Starting
1-01
– This option unlocks the door before remote starting to
disarm the factory alarms.
Lock/Unlock Pulse Duration
1-02
– This option changes the duration that both lock and unlock wires
pulse. Please see the above option table for available options.
Driver’s Priority Unlock
1-03
- The driver’s door must be isolated from the other doors. Use the
Orange/Black CN-4 as your 2
nd
Unlock output.
Double Pulse Unlock1-04 – This feature cannot be used with Option 1-03. This feature provides a
double pulse on the blue unlock wire.
Rearm Output
1-05
– Optional event to shut RAP systems off.
Locking while in Passive Arming
1-08
– This option changes the behavior of the lock during Passive
mode. With the optional setting the doors will not lock during Passive arming.
Ignition Controlled Locks
1-09
– This feature locks the doors when you start the vehicle and press
the foot brake. You must also turn this feature on through the remote by tapping I+IV (2 Way
remotes) or Lock+Key (1 Way remotes)
Ignition / Accessory Upon Unlock
1-11
– This option will pulse the ignition wire, accessory, or both
upon unlock/disarm. Most new Chrysler vehicles need the ignition and accessory pulsed to
disarm the factory alarm.
Double Pulse Disarm
1-13
– This option changes the behavior of the orange/white wire on Connector
3. At default the wire will pulse once upon disarm. This option will change it to double ground
pulse upon disarm.
1-14
Auto Lock Mode – This option must be set for the Auto Mode on 2 Way international remotes to
function.
20
(manual transmission) mode, the system must be set up in Reservation mode prior to the vehicle being
able to remote start. IMPORTANT: All warranties or claims are void if a controller with a cut loop is
installed on a vehicle with a manual transmission.
Reservation Mode for Manual Transmissions
To remote start a manual transmission vehicle, the system must first be set up in reservation mode.
Reservation mode is designed to prevent the vehicle from remote starting while the transmission is in
gear.
Installation Requirements
1. The vehicle’s door triggers must be connected to the control module. Prior to making final connections,
test the factory door triggers to ensure that they are functioning properly.
2. The vehicle’s emergency/parking brake wire must be connected to the control module. The proper
vehicle wire usually provides a negative (-) trigger while the emergency / parking brake is set.
3. The vehicle’s clutch must be momentarily bypassed while the remote start cranks the engine. This
momentary bypass simulates the clutch being depressed. For complete details on how to wire a
momentary clutch bypass consult your CompuTech program or contact our technical support department
by calling 888-820-3690.
IMPORTANT: Do not install a remote start in manual transmission vehicles with convertible / removable
tops and in user’s vehicles that leave their windows down. Firstech nor their authorized dealers will
assume responsibility for improper use or install.
Activating Reservation Mode
STEP 1: Start the vehicle with the key. Place the transmission in neutral, remove pressure from the
pedal brake, and set the emergency/parking brake.
STEP 2: Remove the key from the vehicle’s ignition. The vehicles engine should remain running even
after the key has been removed. If the vehicle does not remain running, check the emergency / parking
brake connection.
STEP 3: Exit the vehicle and close the door. The vehicle’s engine should shut off upon closing the door.
If the vehicle’s engine does not shut off, check the door trigger connection or wait for the factory dome-
light to go out. The Firstech system is in reservation mode and the vehicle is ready to safely remote start.
Additional Notes
Reservation mode will be cancelled if the control module recognizes the vehicles door, hood or trunk
opening – or if the alarm is triggered. Each time the end user wants to remote start their manual
transmission vehicle, they must set the control module in reservation mode. Reservation mode settings
can be programmed with Option 1-06.
9
Aux 1 Output Control4-03 – This option changes the behavior of the default auxiliary wire on
Connector 3. This is a small white wire that is marked Horn output. The SF version makes this
wire an auxiliary output. With this option you can change the output to Horn or Status output.
Aux 2 Output Control
4-04
– This option changes the behavior of the default auxiliary wire on
Connector 3. This is a small violet wire that is marked Dome Light output. The SF version makes
this wire an auxiliary output. With this option you can change the output to Dome Light or Defrost
output.
Secure Aux Output
4-05
– On the default setting, button 4 on the remote must be pressed first before
Aux 1 or Aux 2 can be triggered. This prevents accidental triggering of the outputs. Option setting
II turns this feature off.
Auxiliary Input 1
4-06
– This option changes the input of the grey/white wire on the green plug.
Please see the option table for settings.
Auxiliary Input 2
4-07
– This option changes the input of the black/white wire on the green plug.
Please see the option table for settings.
Glow Plug or Key Sense
4-09
– Default setting sets the wire as a glow plug input. Option setting 2
changes the wire to a key sense input. Key sense can be used to prevent reservation mode from
setting and the system from passive arming while the key is still in the ignition. Key sense also
turns off dome-light supervision when the key is inserted into the ignition.
Bypass Brand Through RS232 Port
4-11
– Default setting allows for compatibility with ADS Idatalink
modules. Setting 2 changes compatibility to Fortin bypass modules. This is only available on the
CM5000 and CM5200.
nd
2
4-12
Ignition Option – This option changes the behavior of previous POC3 or the green wire on
Connector 3. From negative 2
nd
ignition output you can change to negative 2
nd
accessory, starter
or a ground when armed (GWA).
nd
2
4-13
Accessory Option – This option changes the behavior of previous POC4 or the white/black
wire on Connector 3. From negative 2
nd nd
accessory output you can change to negative 2
accessory, starter or a horn honk output.
nd
2
4-14
Starter Option – This option changes the behavior of previous POC2 or the red/black
wire on Connector 3. From negative 2
nd nd
starter output you can change to negative 2
ignition, accessory, or a dome light output.
Option Programming
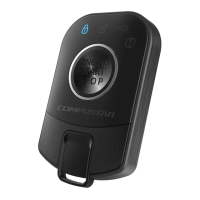
Option Programming Using the OP500
The OP500 can be used to program any available option.
STEP 1: Using the blue connector on the top of the OP500, connect it to the control module via the
antenna wire. (Use the included extension cable if necessary.) Once connected, the OP500 will power up
as long as the main ignition harness to the controller has been connected properly.
22
the 2 Way remote to display the vehicle’s interior temperature on the remote LCD (liquid crystal display).
IMPORTANT: New thermistor plugs are blue 2 pin connectors on the CM5 series but old white plug
thermistors will still work.
Hood Pin
The hood pin switch triggers the alarm in the event the hood is opened while the alarm is armed. The
hood pin also doubles as an important safety feature that prevents the remote start from engaging while
the hood is open.
Backup Battery
(CM5000 Only) The backup battery input on the control module / brain is for any optional battery backup
unit (sold separately). The red positive lead (+) acts both as an input and charging output for a 12 Volt
battery backup. A backup battery maintains basic alarm functionality when main vehicle power is lost.
See the “Wiring Schematics” section(s) for complete details.
Common Procedures
Jumper Settings
Caution: Jumper settings affect the polarity and use of certain outputs. If these jumpers are used
incorrectly, damage to the vehicle and /or control module may occur.
Jumper 1 (Door Trigger Polarity)
Determines the polarity of the door trigger input wire (red/white). In the default position the door trigger
registers negative (-) triggers. To change to a positive (+) trigger, move the jumper.
Jumper 2 (Glow Plug or Key Sense Polarity)
Determines the polarity of the glow plug or key sense input wire (brown/white). In the default position it
monitors a positive (+) glow plug input. To change to a negative (-) input move the jumper. To change
from the glow plug to the key sense setting, you must change Option 4-09.
Jumper 3 (Parking Light to Trunk Output)
Determines the output type (not polarity) of the green/white wire on connector one (CN1). In the default
position it provides a positive (+) parking light output. To change to a positive (+) trunk output move the
jumper. A negative (-) parking light output is found on connector three (CN3) and a negative (-) trunk
output is found on connector four (CN4).
Auxiliary Outputs on Connector 3
This version of the CM5 series comes with default auxiliary wires on pins 15 and 17. The small white wire
is Aux 1 and small violet wire is Aux 2. They can be changed with options 4-13 and 4-14.
Tach Sensing
The default engine sensing mode is tach. In cold weather climates we recommend using an injector wire
verses a coil wire for tachometer sense. There are new features that adjust tach reading methods on
option 2-01. IMPORTANT: The remotes must be coded prior to setting up tach sensing. Firstech
recommends using a digital multimeter to test for tach.
STEP 1: Start the vehicle with the key. Allow time for the engine to idle down.
STEP 2: Test wire and make connection. At idle the tach wire should test between 1 to 4 Volts AC. As
the vehicle RPM’s increase the voltage on the meter will also increase. Always solder tach connections.
7
 Loading...