OPERATING INSTRUCTIONS
Set Up
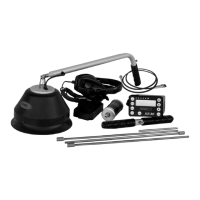
1. Assemble control housing, headset, and your choice of listening probe.
The headset must be plugged in for the XLT-30 to operate.
2. Press POWER pad to turn On the XLT-30. The XLT-30 goes through a ve
second warm up before the touch pads are functional. During this time,
the display screen gives information of battery level. A reading of 68 or
below will activate the “Low Battery” indicator. The XLT-30 does have a
usage buffer between the “Low Battery” indicator and complete system
shut down to allow you to complete a job.
3. The XLT-30 always turns on to the default settings. Volume is at the me-
dium setting, lter is in the All Pass (no lter) mode, and the notch control
is at the midway point. The display screen will show the sound intensity
in a bar graph form (Sound Graph) and two digit display.
4. Familiarize yourself where the mute buttons (and pad) are. Remember
to mute the XLT-30 when moving any probe.
5. Press the VOLUME pad to modify headset volume. Use the ARROW
pads to increase or decrease the volume. The display screen will show
the volume level in a graph form. Press the RESUME pad to exit volume
modication and return the display screen to the Sound Graph func-
tion. (Remember that the volume can be adjusted at the headphones
also.)
6. Begin your leak detection search.
Modications During Leak Search
Some leaks are small in size, and unrecognizable, or conditions are such
that very little leak sound can be recognized, so you may need to make
changes to the lter(s) in order to hear leaks. Depending upon the type
of pipe composition and soil (ground) type, different lter settings will
increase your ability to hear the leak sound.
Adjustment to the lter is done by pressing the FILTER pad which will
allow you to scroll through four different lter types. Frequency range
modications can be made to the HI, LO, and FC lters. As you are
choosing your lter, the display screen will give a visual display of the
lter type being used, and the frequency range of that lter. After your
selection and modication is made, depress the RESUME pad to return
to the Sound Graph function of the display screen.
8
Test Equipment Depot - 800.517.8431 - 99 Washington Street Melrose, MA 02176
TestEquipmentDepot.com

 Loading...