9
3.1 SYSTEM CONTROLS AND BUTTONS
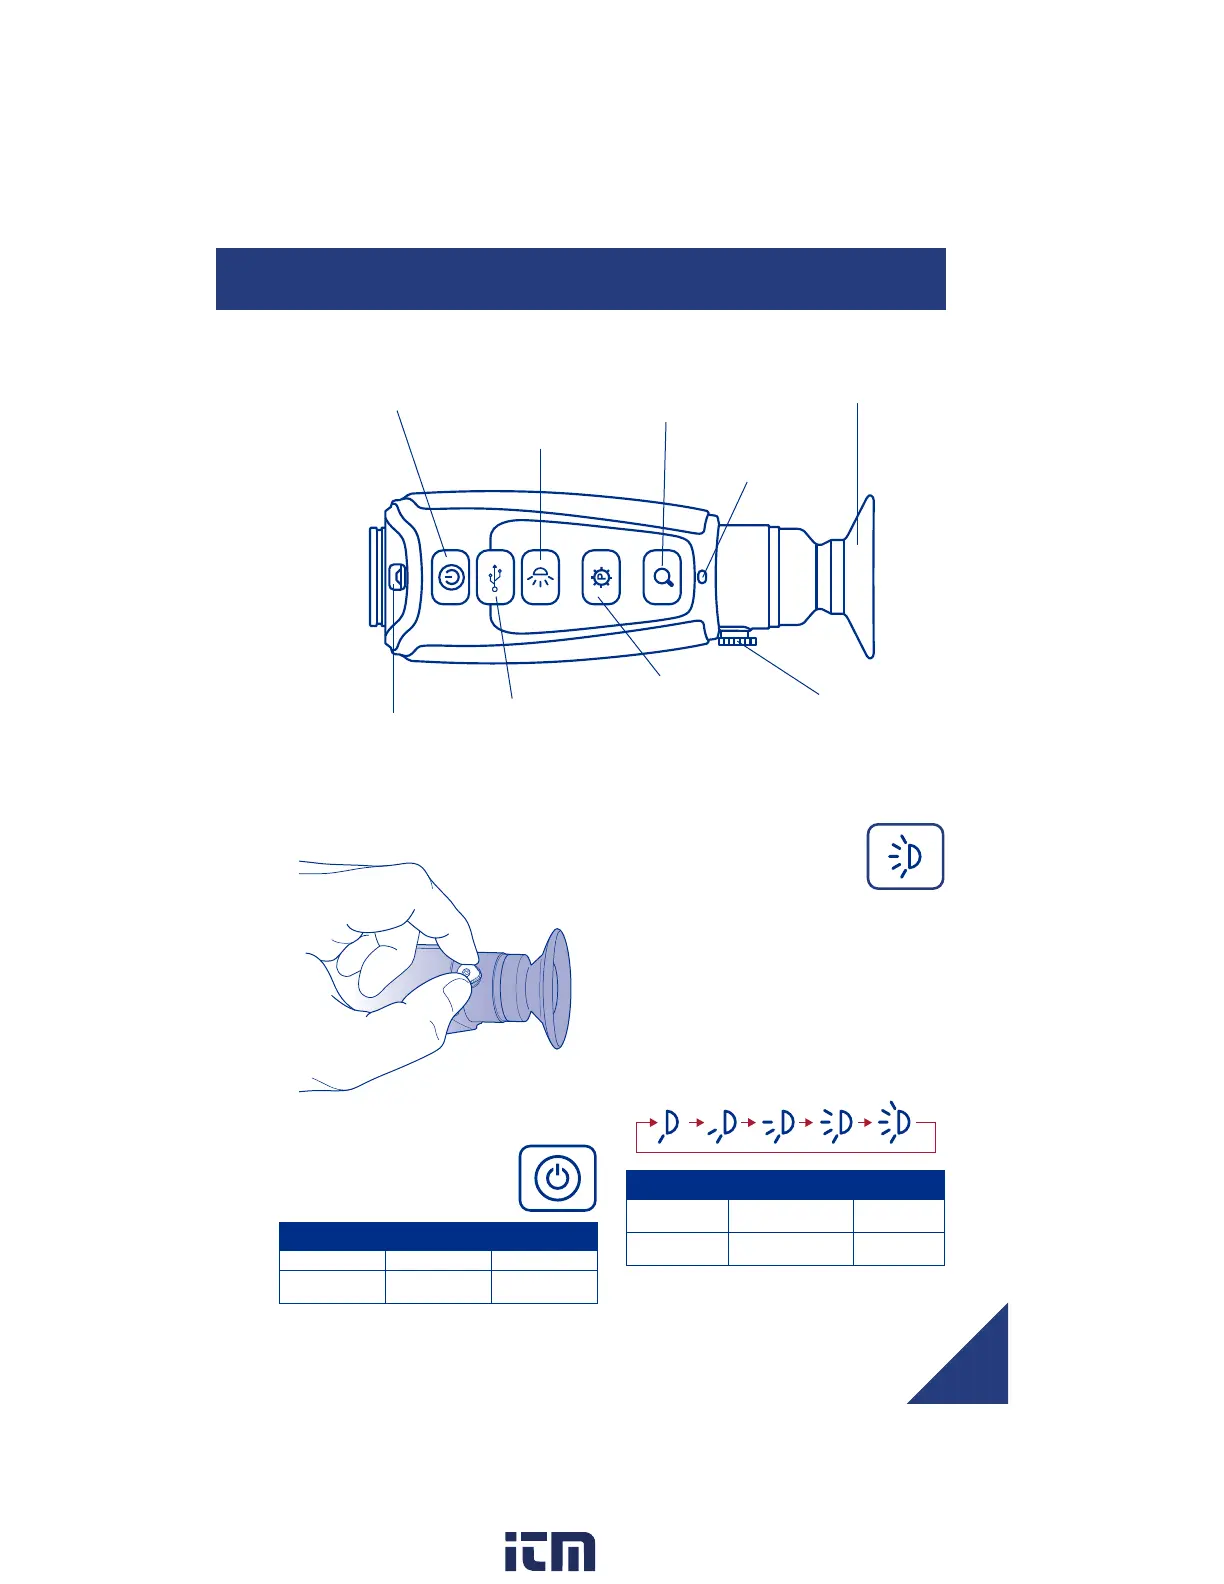
3.1.3 DISPLAY BRIGHTNESS
BUTTON
Use this button to cycle through the
five levels of display brightness.
Each press of the button advances
to the next level of brightness.
When the highest brightness level is reached,
subsequent button presses advance to the
next lower brightness levels. When the lowest
brightness level is reached, subsequent button
presses advance to the next higher brightness
level. One of the following icons is displayed
for approximately 3 seconds after the button is
pressed indicating the current brightness level:
Dim Bright
SYSTEM STATE SHORT PRESS LONG PRESS
System OFF Flashes LED Task
light
Turn on LED
Task Light
System ON Changes Current
Display Brightness
N/A
3.1.1 DIOPTER ADJUSTMENT
While looking through the eyepiece, adjust the
position of the diopter lever to optimize the
sharpness of the image in the viewfinder.
3.1.2 POWER BUTTON
The Power Button performs the
following functions:
SYSTEM STATE SHORT PRESS LONG PRESS
System OFF Turns Power ON N/A
System ON Access User
Menu
Turns Power
OFF
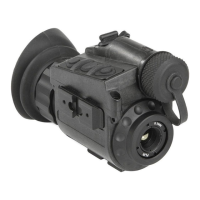
SECTION 3. OPERATING THE SYSTEM
Power
Laser Pointer
Mini-USB/Charging/Analog
video out
Display Brightness
Task Light On/Off
Palette Selection
Zoom
Charging
Indicator
Eyepiece
Adjustable Diopter
w ww. . com
information@itm.com1.800.561.8187
 Loading...