Suitable for age 8+
Scoot Cosmo Operation Manual
Safety Instructions:
1. This Operation Manual contains important product information, please keep
it for reference.
2. Please follow the instructions for proper assembly and operation. Adult
supervision is advised.
3. The product contains small parts that may be choking hazards.
4. Keep packaging materials away from children.
5. Check the charger, wires, plugs, housings, and other electronic components
before operation. If any damage is found, please contact customer support
for assistance.
6. Chargers, battery case, and other charging devices need to be inserted into
the designated locations.
7. Please use the included charger. The battery charger is not a toy.
8. Disconnect charger before cleaning the toy with a clean, damp cloth.
9. Adult supervision is advised when charging the battery.
10. Do not short circuit the battery, disassemble it, drop it from a high altitude,
or throw it into the re.
11. Do not touch the propellers to avoid injury.
12. It is the user’s responsibility to ensure that the product is used as intended
and not to cause harm to themselves or others. The manufacturer and
distributor shall not be liable for any physical or property damage caused by
improper use.
13. Tie back hair or wear a hat to avoid entanglement or injury.
14. Catch the scoot with care, grabbing it with too much force may cause injury.
Product Specications:
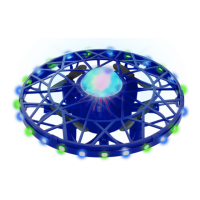
Includes: 1 x Scoot Cosmo hand operated drone, 1 x Built-in 3.7V 380 mAh
Li-Po rechargeable battery, 1 x USB charging cable, and 1 x Instructions
Manual
Flight Time: 5 Minutes | Charge Time: 60 Minutes
Drone Dimensions: 4.5” D x 2” H | Drone Weight: 1.6 Oz
Flight Directions:
1. Do not y in strong wind or light.
2. Do not y in narrow spaces.
3. Always y with fully charged batteries for optimum drone performance.
4. Do not y damaged drones.
5. In the event of a crash, place the drone on a at surface and allow it 2-3
seconds to reorient itself before ying again.
Lithium Battery Charging Instructions:
1. Plug the USB charging cable into the USB port with a 5V output and charging
current of 1-2a.
2. Charge with a computer, laptop, car charger, cell phone charger, or power
bank.
3. Charging light indicator will blink while charging.
4. Max charge time is 60 minutes. Do not overcharge the drone battery.
Battery Safety Warnings:
Do not charge the battery unattended. Adult supervision is highly recom-
mended.
Do not put the battery next to ammable or explosive materials.
Stop charging the battery when it gets deformed, discolored, becomes too
hot, or if other abnormal phenomena occur.
If the battery leaks, avoid contact with the skin and eyes. If battery leak comes
in contact with eyes or skin, immediately rinse with clean water and consult a
doctor.
Do not put the battery in a re, microwave, pressure tank, and the like.
Do not use solvents, industrial alcohol, or other ammable solvents to clean
the product and the charger.
The product contains plastics, electronic components, and a battery. Please
do not treat it as regular trash. Sort and dispose according to the local waste
recycling regulations.
Flight Preparations:
1. Turn on the switch to start. The LED light indicator will ash for a few
seconds, indicating that the drone is ready to y. Place the drone on a ight
surface for a small stable launch.
2. Put the drone on your palm then gently toss into the air to launch. The LEDs
will ash when taking o.
3. Motion sensor detectors around the drone will detect your hand and other
“obstacles” then y towards the opposite direction.
4. The LEDs will blink slowly to indicate low battery charge.
5. To stop the drone from ying, gently catch it “hamburger-style” then turn it
upside down to turn o the motor.
Calibration Instructions:
1. Turn o the drone then turn on again.
2. The center light will ash from red to green. When the center light turns
solid green, shake the drone back and forth 3 - 5 times.
3. After shaking, the center light will ash from red to green, indicating that
the drone is in calibration mode.
4. Place the drone on a at surface while it calibrates.
5. Calibration is complete when the center light turns solid green.
 Loading...