8
1. Ensure that you are properly grounded.
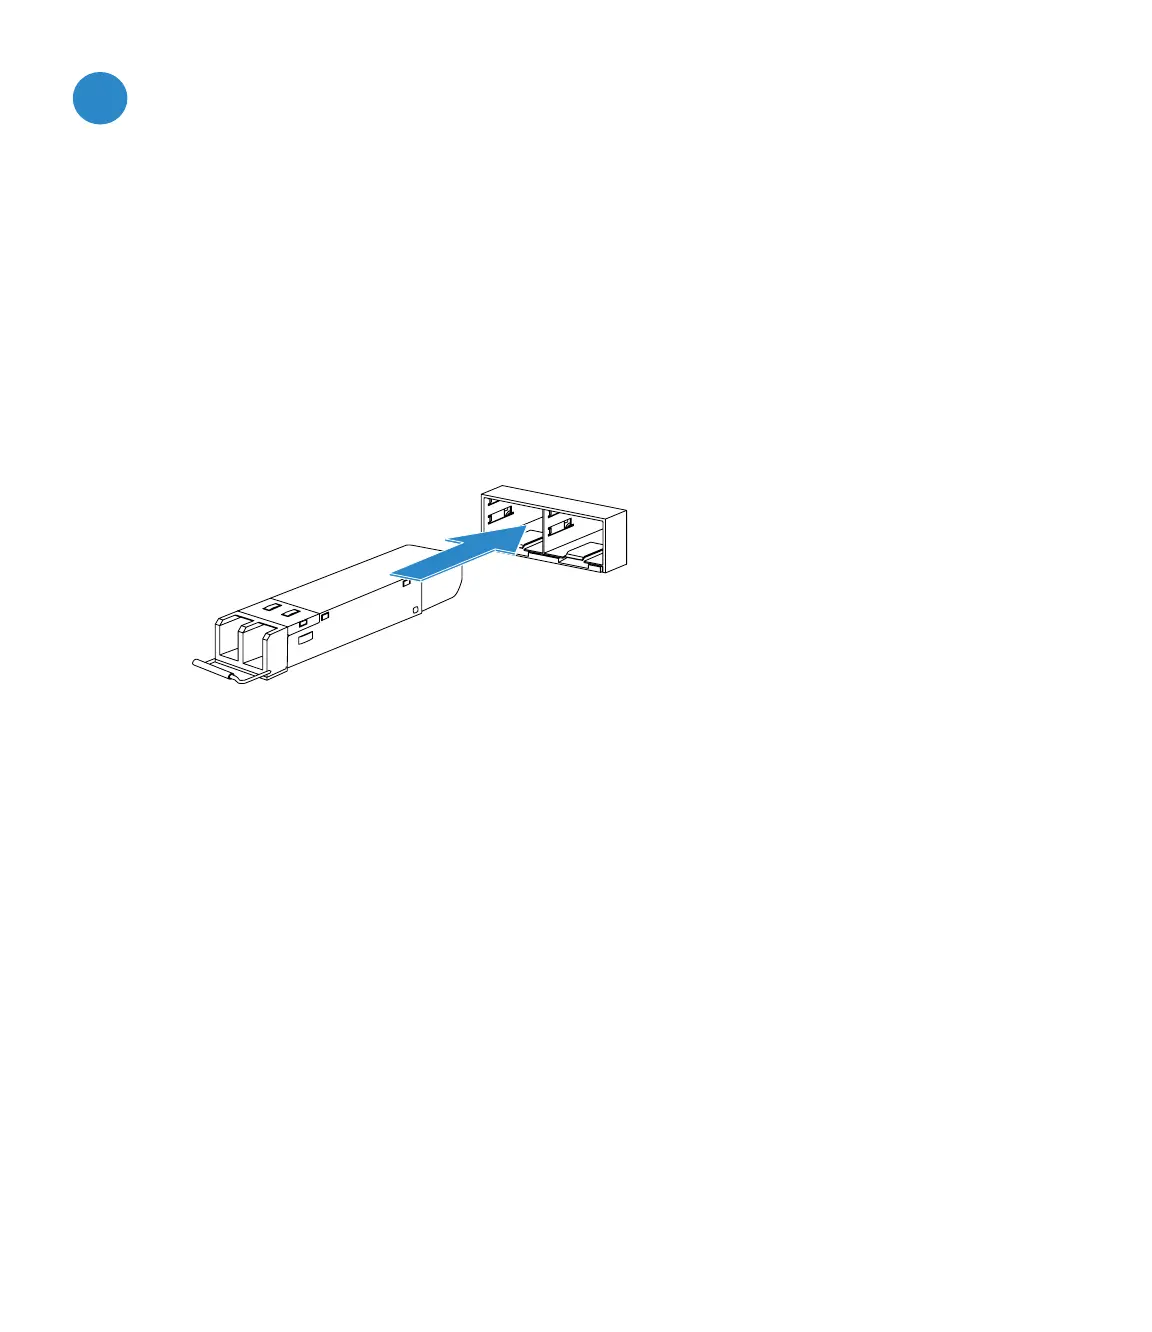
2. Remove the cap from the SFP cage socket on the front panel of the unit.
3. Position the SFP transceiver in front of the cage socket opening and ensure that the transceiver is
correctly oriented. When the transceiver is correctly oriented, the extraction lever will be level with
the socket latch.
Note: SFP cage socket orientation may vary. Ensure that the SFP transceiver is correctly oriented
each time that you are inserting a transceiver.
4. Hold the sides of the SFP transceiver and slide it into the cage socket until it clicks into place.
Installation
A
5. Press the transceiver firmly into the cage socket with your thumb.
6. Verify that the transceiver is latched correctly by grasping the sides of the transceiver and trying
to pull it out without lowering the extraction lever.
If the transceiver cannot be removed, it is installed and latched correctly.
If the transceiver can be removed, reinsert it and press harder with your thumb.
If necessary, repeat this process until the transceiver is securely latched into the cage socket.
 Loading...