OPM_NPE_19X_600_1K5_2GB_V030 3 GE DE NetPro 19” 600-1500: User manual 3.0 (GB)
g
GE Digital Energy
2.2 Installation Procedure
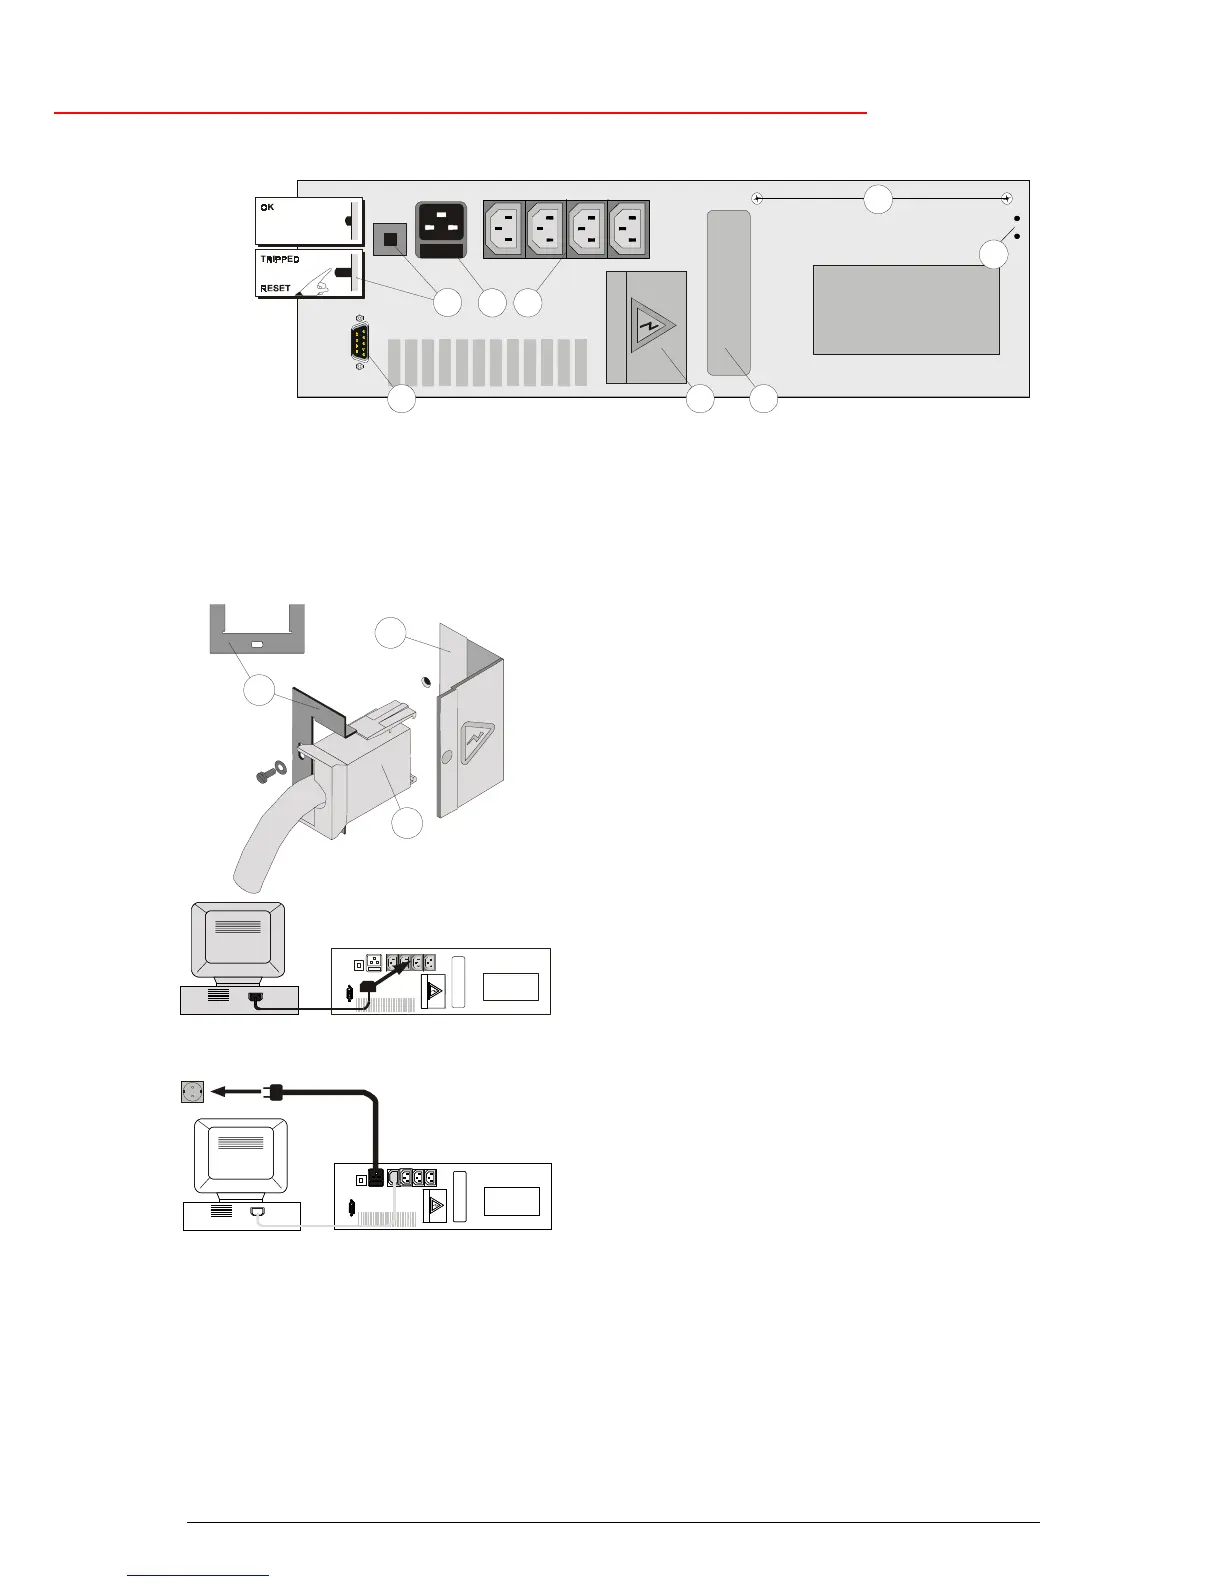
1. Remove the transport screws (A, fig. 1) and store them in the free holes (B, fig.1). Mount the
NetPro 19”
UPS in the 19” rack. The module must be supported by mounting rails, do not mount
it by using the front brackets only. The front brackets allow mounting of handles (not included).
2. Make sure that the air vents in the side panels of the module are not blocked by the mounting
rails or the side panels of the 19” rack.
3.
1000VA model only:
Battery extension module(s) can be installed to
increase the battery runtime. Connect the DC
connector of the battery module (7, fig. 2) to the DC
socket of the UPS (2, fig. 1/2). You will hear a click
when the cable is properly installed. Block the DC
connector: install the small locking plate (7a, fig. 2)
that came with the battery module, and fasten it with
the screw provided. Using the DC connector of the
battery module (not shown) you can install a second,
third, etc. module. See also section 5.1.
4. Switch off your computer, and unplug it from the
socket-outlet.
5. Disconnect the power cord from the computer
(rating 250Vac/10A) and connect this cord to the
mains input socket (5, fig. 1) of the UPS. See fig. 4.
6. Using the output cord(s) provided, connect the
computer(s) to the appliance outlet(s) (1, fig. 1) of
the UPS. Spread the loads over the appliance
outlets as equally as possible. If you use a
distribution box to connect more than one appliance
per outlet, please note that the maximum AC-current
rating of each appliance outlet is 10Amps. See fig. 3.
7. Connect the mains cord of the UPS to a working,
grounded AC wall socket outlet. See fig. 4. The
green LED 'on' (8, fig. 6) will blink now: mains power
is available and the batteries are charging. If the
LED does not blink but illuminates continuously
instead, press ‘0’ for one second.
8. For best results, allow the UPS to recharge the batteries during a period of approx. 2 hours. It is
acceptable to use the UPS without first charging the battery, but the runtime may be reduced.
9. For advanced communication possibilities, the RS232 interface port (6, fig. 1) can be connected
to a computer system and/or optional interface cards (3, fig. 1) can be added. See chapter 4.
7a
2
7
6
51
3
2
4
A
B
fig. 3
fig. 4
fig. 1
fig. 2
 Loading...