Controls-dipswitches. .ecorn
Controls-Dip Switches
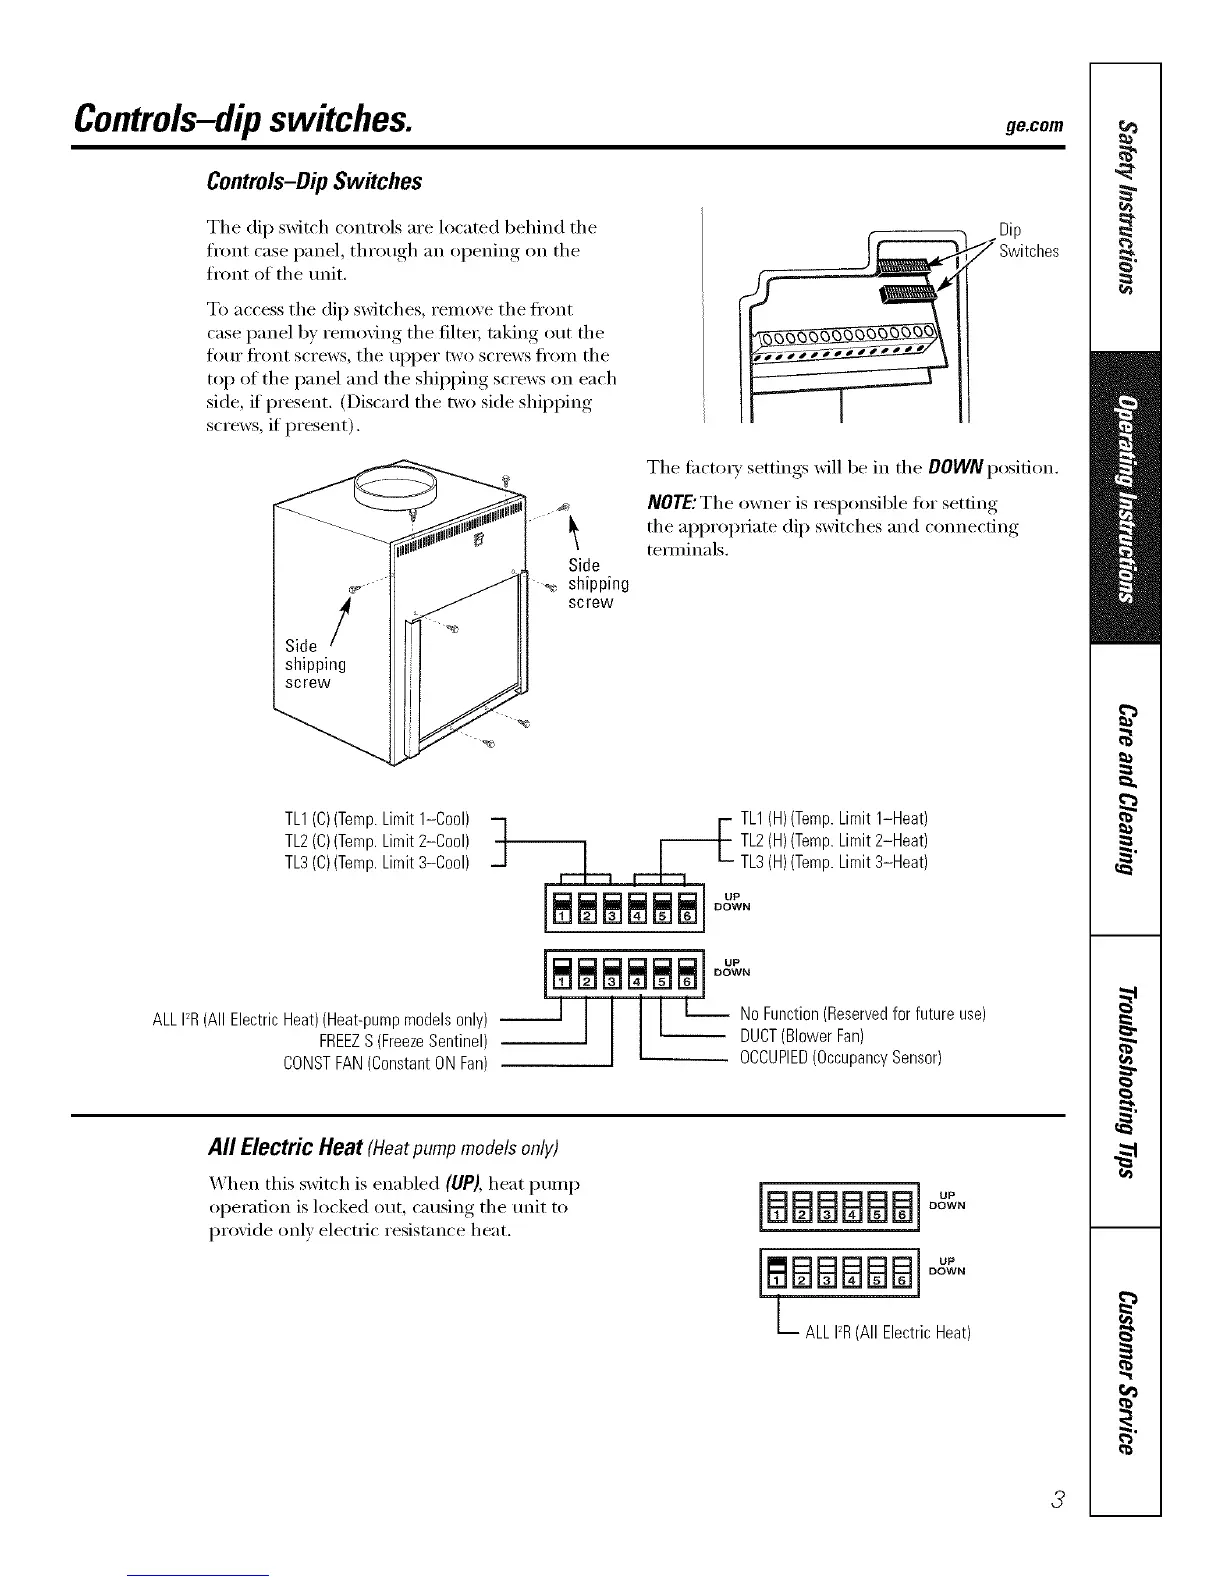
The dip sxfitch controls are located behind the
front case I)anel, through, an opening on the
front of the unit.
To access the dip sMtches, remove the front
case panel by removing the filtex, taking out the
ti)ur fl'ont screws, the upper two screws fl'om the
top of the panel and the shipping screws on each
side, if present. (Discard the two side shipping
screws, if present).
zDip
7 Switches
Side
• _, shipping
screw
The fi_ctoU settings will be in the DOWN position.
NOTE:The owner is responsible tot setting
the appropriate dip switches and connecting
temdnals.
TL1(C)(Temp.Limit1-Cool)
TL2(C)(Temp.Limit2-Cool)
TL3(C)(Temp.Limit3-Cool)
ALLI_R(All ElectricHeat)(Heat-pumpmodelsonly) --
FREEZS (FreezeSentinel)
CONSTFAN(ConstantONFan)
TL1(H)(Temp.Limit1-Heat)
TL2(H)(Temp.Limit2-Heat)
TL3(H)(Temp.Limit3-Heat)
[__ u_
DOWN
'Ill, No_.
All Electric Heat (Heat pump models only)
When this switch is enabled (UP), heat pump
operation is locked out, causing the unit to
provide only electric resistance heat.
[BE]E]BBB]°_
DOWN
[ BBBBB]°"
DOWN
L ALLI_R(All ElectricHeat)
3
 Loading...