Installation Instructions
PREPARE TO INSTALL THE RANGE
FOR YOUR SAFETY:
All rough-in and spacing dimensions must be
met for safe use of your range. Electricity to
the range can be disconnected at the outlet
without moving the range if the outlet is in
the preferred location (remove lower drawer).
To reduce the risk of burns or fire when
reaching over hot surface elements, cabinet
storage space above the cooktop should be
avoided. If cabinet storage space is to be
provided above the cooktop, the risk can
be reduced by installing a range hood that
sticks out at least 5" beyond the front of the
cabinets. Cabinets installed above a cooktop
must be no deeper than 13'.'
Be sure your appliance is properly installed
and grounded by a qualified technician.
Make sure the cabinets and wall coverings
around the range can withstand the temperatures
(up to 200°F.) generated by the range.
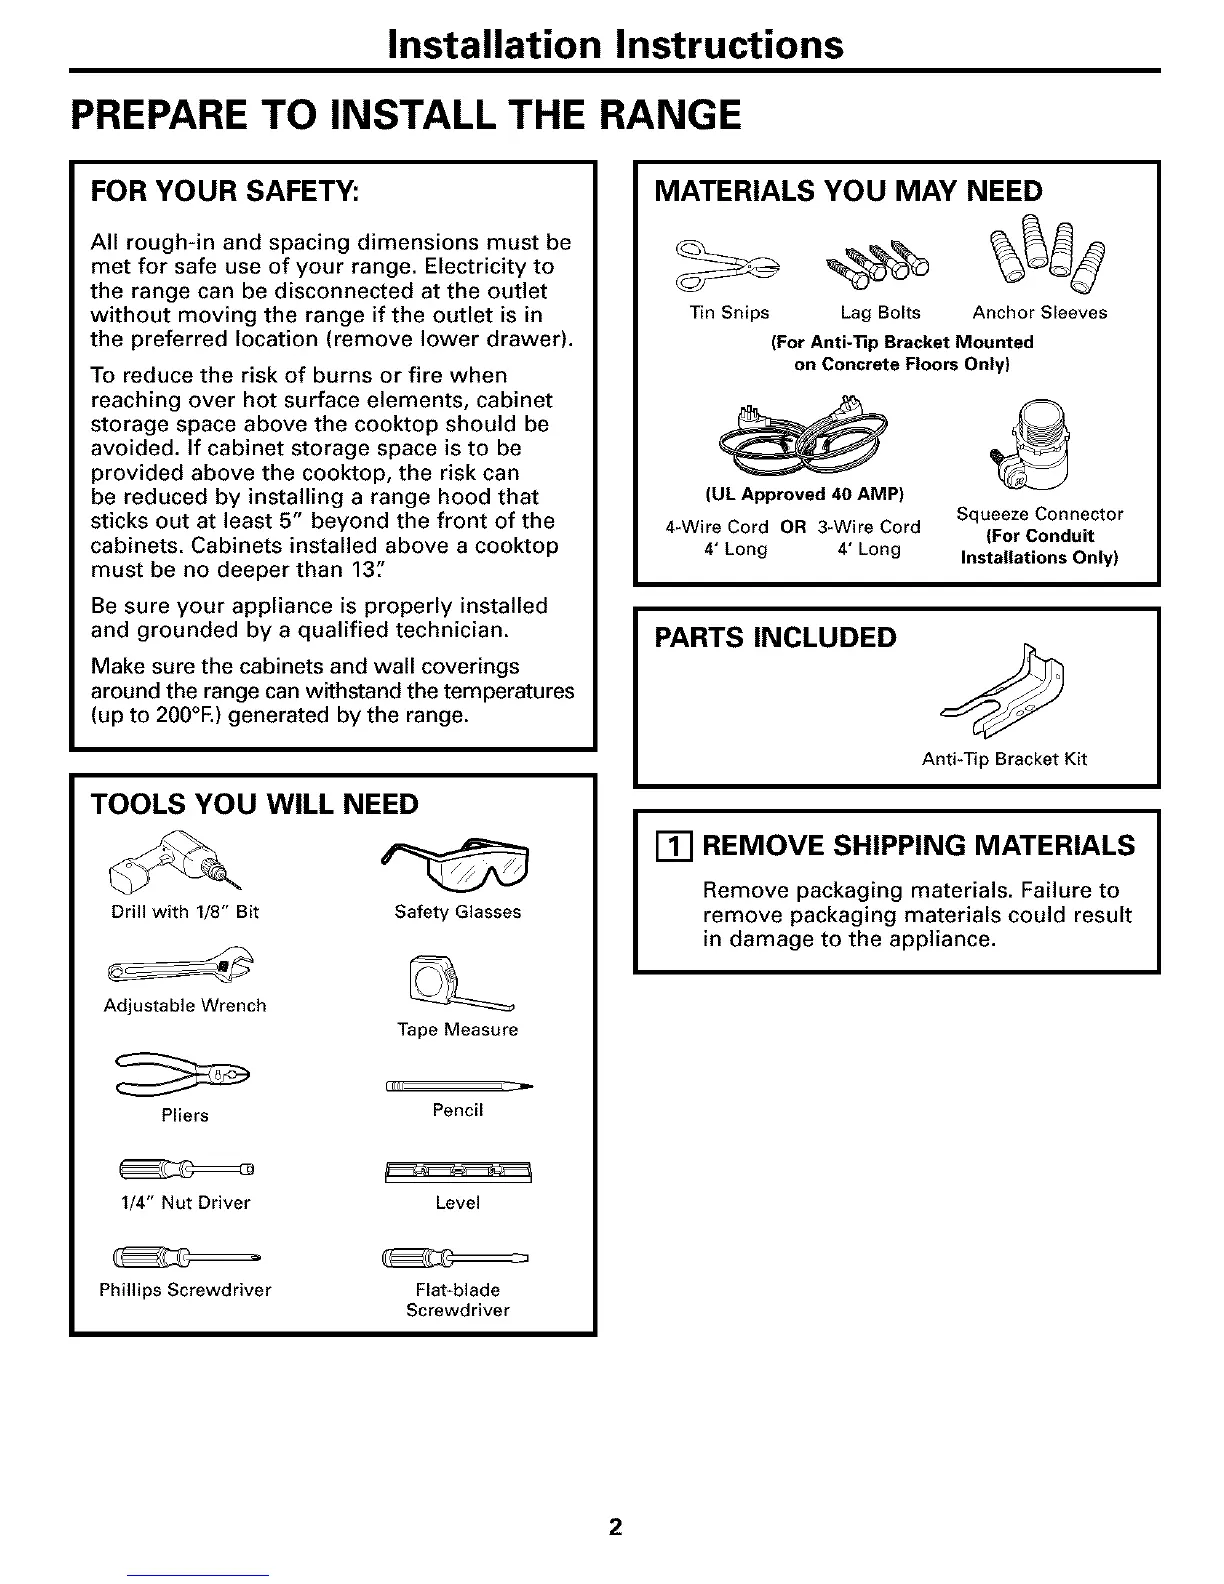
TOOLS YOU WILL NEED
Drill with 1/8" Bit Safety Glasses
Adjustable Wrench
Tape Measure
Pliers
Pencil
1/4" Nut Driver Level
Phillips Screwdriver
Flat-blade
Screwdriver
MATERIALS YOU MAY NEED
Tin Snips Lag Bolts Anchor Sleeves
(For Anti-'rip Bracket Mounted
on Concrete Floors Only)
(UL Approved 40 AMP)
4-Wire Cord OR 3-Wire Cord
4" Long 4' Long
Squeeze Connector
(For Conduit
Installations Only)
PARTS INCLUDED
Anti-Tip Bracket Kit
[] REMOVE SHIPPING MATERIALS
Remove packaging materials. Failure to
remove packaging materials could result
in damage to the appliance.
2
 Loading...