4
Installation Instructions
PREPARE TO INSTALL THE RANGE
(CONT.)
PREPARATION
• Remove all tape and packaging. Be sure to
remove clear plastic film that covers some
chrome parts (around glass oven doors,
side trim) and any tape and packaging from
inside the oven.
• Take the accessory pack out of the oven.
• Check to be sure that no range parts have
come loose during shipping.
REMOVING PACKAGING
MATERIAL
Any packaging materials must
be removed during installation.
This will include adhesive tape, wire ties,
cardboard and protective plastic. Failure
to remove these materials could result in
damage to the appliance once the appliance
has been turned on and surfaces have heated.
4
PREPARE THE COUNTER
If you have an existing 30″ wide cutout that
goes all the way to the wall, you have the
option to buy a 4″ Backguard, Model #JXS31
(white), JXS32 (chrome), JXS33 (almond),
JXS34 (black), or JXS35 (bisque) or a Main
Top Rear Filler Kit, Model # JXS62BB (black),
JXS63WW (white), JXS64AA (almond), or
JXS65CC (bisque). These kits are available
through your GE dealer, if the existing cutout
is in a counter that has a backsplash (post-
formed top) we recommend that you use the
4″ backguard kit.
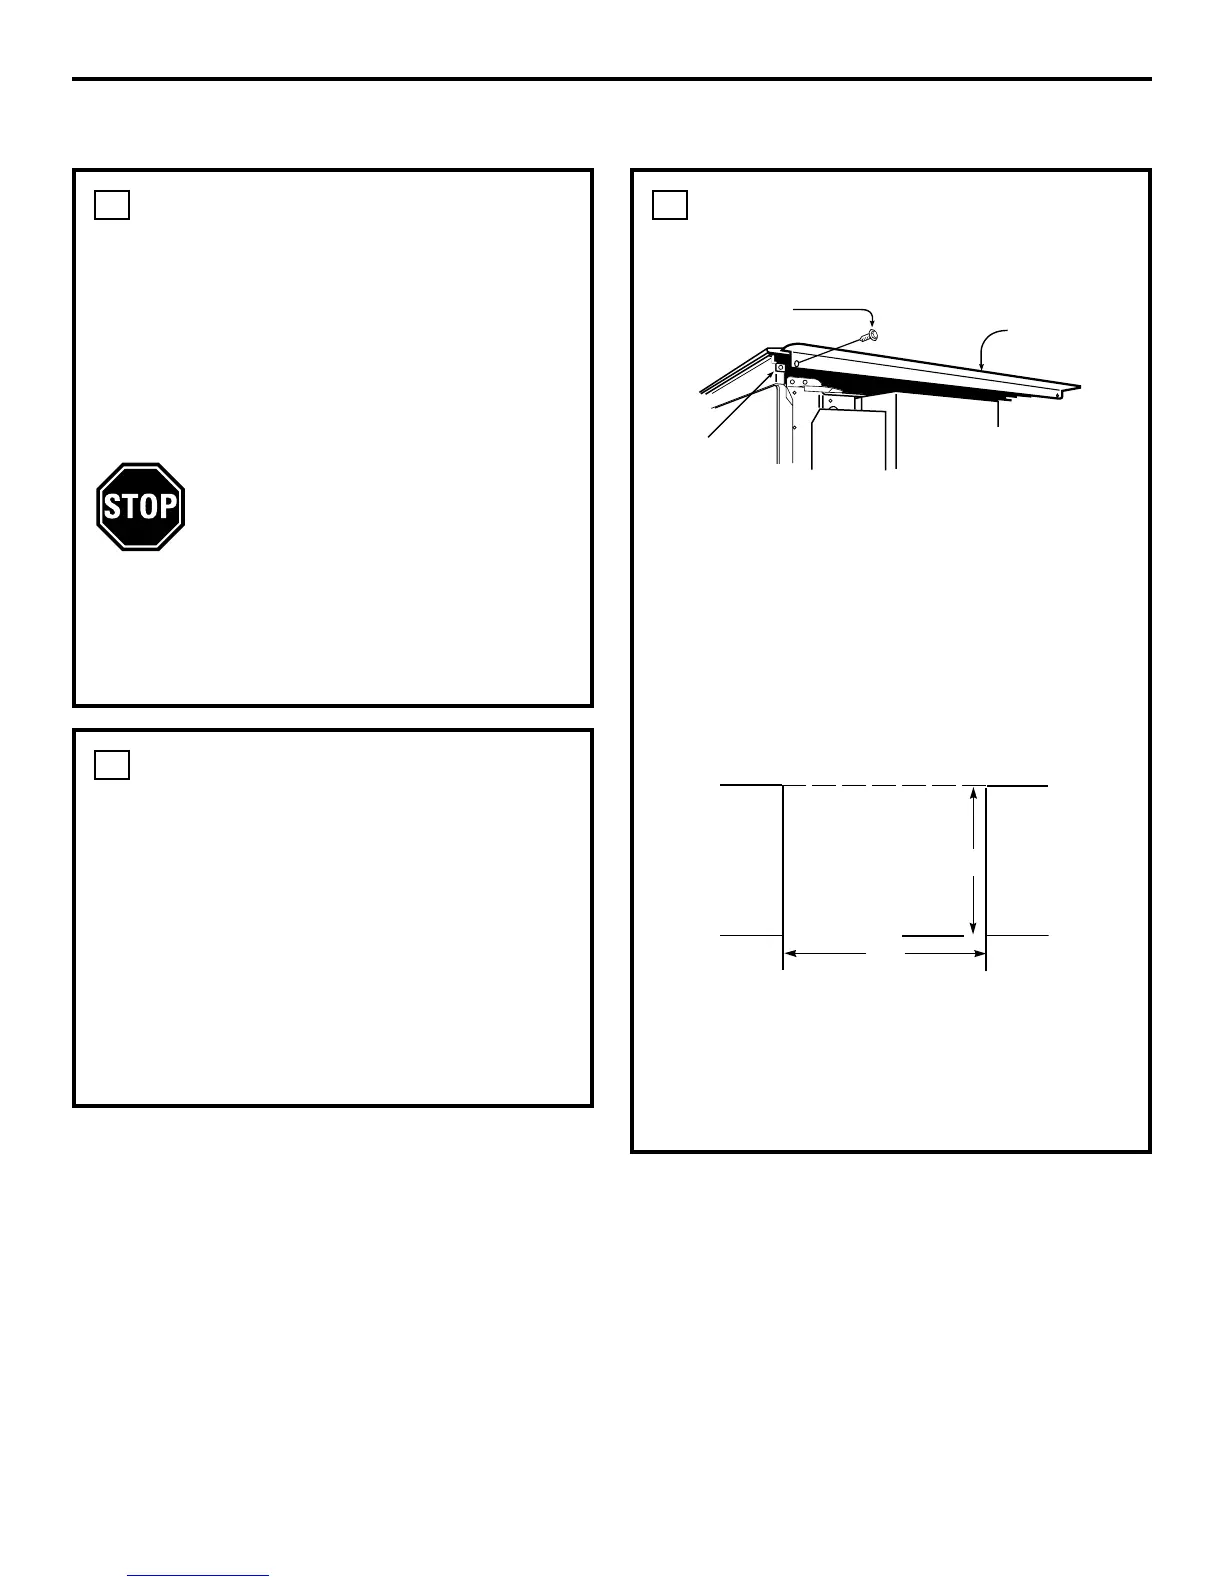
5
PREPARING THE COUNTER
(CONT.)
Determine the dimension of your cutout.
See Fig. 9 and Fig. 10. Dimensions given are
from front of counter and not from cabinet
face. To minimize chipping you may want
to apply masking tape to the counter and
mark the cut on top of the tape. Use a hand
or saber saw to make the cut. For best
appearance it is important that the cut be
smooth and straight.
If you are NOT using the Filler or Backguard:
If you have a countertop deeper than 25″
and you wish to set the range further back
into the counter, the cutout may be cut
deeper (up to 24-1/2″), but there must be
at least 24-1/2″ from the front edge of the
countertop and back wall.
5
Filler Strip
Screw
Speed Clip
23-3/16”
30”
Fig. 9
Fig. 8
 Loading...