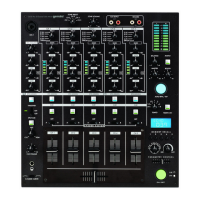
OUTPUTS (63).
30. M
ONO
OUTPUT SWITCH
(32): This switch toggles whether the
M
ASTER OUTPUTS (59, 60) will be in Mono or Stereo.
31. A
UTO BPM/TAP BUTTON (33): This button controls the BPM
detection engine. By pressing and holding this button for 1 sec-
onds, the unit will attempt to automatically detect the beats per
minute of the audio channel which is selected via the C
HANNEL EFX ASSIGN
BUTTON (13). If there is no channel selected, the unit will attempt to
detect the BPM of the Master signal. If the unit is not able to accurately
detect the BPM, you may tap the A
UTO BPM/TAP BUTTON in time to the
music until the correct BPM is displayed on the LCD P
ARAMETER
DISPLAY
(36). To show the BPM at any time, press the AUTO BPM/TAP
BUTTON
(33)
momentarily, and it will again be displayed on the LCD P
ARAMETER DISPLAY
(36). When the letters ‘A BPM’ are displayed with the beats per minute, it
indicates that the value displayed was automatically detected. When the
letters ‘T BPM’ are displayed with the beats per minute, it indicates that
the value displayed was calculated via the TAP function.
32. EFX-T
EMPO SYNC ON/OFF (34): When this feature is turned on,
any effects that can be synchronized to tempo will be linked to the
tempo that is set via the A
UTO BPM/TAP BUTTON (33).
33. T
EMPO RATIO SELECTOR (35): This selector controls the ratio of
the tempo that is set via the A
UTO BPM/TAP
BUTTON
(33). When
the control is set to any other value other than 1 (1:1 ratio), the
tempo will be multiplied by that value. For instance, if a track is 125 beats
per minute, then switching the T
EMPO RATIO SELECTOR to 2 would be a 2:1
ratio, and the effect would be applied at 250 beats per minute. If the
T
EMPO RATIO SELECTOR
is set to 1/2, it would be a 1:2 ratio, which means
the effect would be applied at 62.5 beats per minute.
34. LCD P
ARAMETER DISPLAY (36): This blue backlit display
shows the effect name and parameter that is relative to the
effect. It also shows the detected BPM, when applicable.
35. M
EMORY RECALL BANKS (37): These banks are useful
for memorizing effect settings during a performance. By
pressing and holding any one of the numbered buttons for 2 seconds,
you can memorize all of the effects settings that are currently in place,
including Channel, BPM, Tempo Ratio, Tempo Sync On/Off,
Parameter, and EFX On/Off. Once you have memorized settings into a
recall bank, it can be recalled by simply pressing the button momentarily.
36. EFX P
ROGRAM SELECTOR
(38): This rotary control selects the
DSP effect which will be applied to the audio, when engaged.
37. EFX P
ARAMETER CONTROL (39): This slide control allows
you to alter the parameter associated with the DSP effect.
38. EFX D
RY/WET CONTROL
(40): This rotary control allows you to
alter how much of the audio signal is sent through the DSP effects
section. For less intense effects, turn the control towards ‘Dry’. For more
intense effects, turn the control towards ‘Wet’.
39. EFX O
N/OFF BUTTON (41): By pressing this button, the DSP
effect that is selected is turned On or Off.
R
EPLACING THE X-FADER AND CHANNEL FADERS:
1. Remove the black brushed aluminum plate which outlines the Channel
and X-Fader section. The screws can be found at each corner of this plate.
2. To remove a channel fader, simply remove the two screws on the top and
bottom of the fader. Disconnect the connector which plugs into the bottom
of the fader, and replace it with a new fader. Verify that the fader is facing
the appropriate direction before screwing it back in.
3.To replace the X-Fader, first unscrew the two outermost screws from the
X-Fader, and disconnect the connector which plugs into the bottom of the
fader. Remove the two innermost screws on the front of the fader, to
remove the steel limiting plate. Attach the limiting plate to the new replace-
ment X-Fader (model RG-45 or RG-45PRO). Then, replace the connector
which plugs into the bottom of the fader, and replace the fader in the
appropriate direction before screwing it back in.
U
SER R
EPLACEABLE PARTS:
User replaceable parts are listed below, and may be obtained by calling
your nearest Gemini office, listed on the back cover page of this manual.
CROSSFADER: RG45 OR RG-45PRO
CHANNEL FADER: 072-127
CHANNEL AND X-FADER KNOB: 002-742
PARAMETER CONTROL FADER KNOB: 002-741
GROUND TERMINAL: 146-710
SPECIFICATIONS
Inputs:
Phono.....................................................................................3 mV, 47 KOhm
Line....................................................................................150 mV, 27 KOhm
MIC 1, MIC 2, MIC 3...…....................................1.5 mV, 1 K Ohm Balanced
MIC 1 High.........................................................................................± 12dB
MIC 1 Mid..........................................................................................± 12dB
MIC 1 Low..........................................................................................± 12dB
Talkover Attenuation.............................................................................-16dB
Outputs:
Master/Zone/Booth RCA....................................................0 dB 1V, 400 Ohm
Max......................................................................................20V Peak-to-Peak
Record..................................................................................225 mV, 5 KOhm
Balanced Master………………………................................2V, 400 Ohm
General:
Frequency Response.................................................20Hz - 20KHz +/- 2 dB
Distortion.........................................................................................< 0.02%
S/N Ratio...........................................................................Better Than 80 dB
Headphone Impedance.....................................................................16 Ohm
Power Source..........................................................115/230V, 60/50Hz, 20W
WEIGHTS AND DIMENSIONS:
Dimensions: 12.5 x 4.2 x 14” (318 x 107 x 356 mm)
Unit Weight: 12 lbs (5.44 kg)
Specifications and design are subject to change without notice for purpose
of improvement.
*The stated warranty does not affect statutory local warranties
OPTIONAL ACCESSORIES:
DJX-05 Professional Monitoring Headphones
GX-450 Powered ABS Loudspeakers
For more information on new and exciting Gemini products, visit our
website at http://www
.geminidj.com!
<7>
DJX-05
GX-450
NOTES:
____________________________________________________
____________________________________________________
____________________________________________________
____________________________________________________
____________________________________________________
____________________________________________________
____________________________________________________
____________________________________________________
____________________________________________________
____________________________________________________
____________________________________________________
____________________________________________________
____________________________________________________
____________________________________________________
____________________________________________________

 Loading...