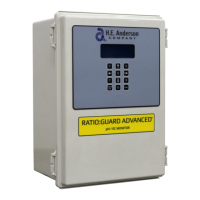
Installation
When the monitor is supplied as part of a pre-assembled system the monitor will often be totally or at least
partially wired and configured as received. If this unit is added to a new or existing system this manual will
guide you through the installation and wiring process.
Summary of installation steps:
1. Decide where to place all system components. Consult component specific HEA manuals for individual
components (Monitor Enclosure, Sensor Tees).
2. Install and leak check all plumbing including the manifold supply, water meter, injection point fittings
and blend tank.
3. Mount controller and make connections between the controller and all sensors ordered with your
system. This monitor is designed to connect to the following sensors:
Anderson digital EC transmitter with associated temperature transmitter or A toroidal EC sensor with 4-
20 ma current loop interface
Any combination of 1 or 2 pH transmitters consisting of any combination of Anderson pH electrodes
with digital converters for digital input or other sourced pH transmitters with 4-20 ma analog interface
4. Power up the monitor
5. Refer to Ratio:Guard
®
EP-2 Advanced pH & EC Monitor Set-Up instructions to configure the
monitor using the front panel keypad.
Do all wiring before connecting power. Use a surge suppressor on the incoming AC power line. Plug in the
power cord and watch the LCD display. If it does not come on, unplug the power and check the wiring.
Mounting
Ensure the installation location has all the following:
● Allow easy access to front panel
● Must have access to 120 VAC power outlet.R
● Close proximity to other injector components.
● Protect from direct spray
Mount the controller using the 4 metal tabs on the back of the controller enclosure.
Installing the Sensors
● The sensor tees should be installed in a bypass with isolation valves so they can be removed
without shutting off the water flow. All the sensors may be installed in a single bypass loop.
● The EC electrode and temperature sensor supply high level digital signals to the monitor. This
greatly reduces cable related problems and increases accuracy. Sensors come with fifteen feet of
cable. Cables may be extended if necessary, with no effect on performance.
● The monitor, sensors, and signal conditioners should be mounted out of direct sunlight and
protected from direct spray. The monitor enclosure and front panel are not UV resistant.
● The recommended installation is shown in Figure 1. It can be varied to suit your needs, but
remember the following:
● The bypass for the tees should always be below the main water line, especially if a pH electrode
is installed in the bypass.
● You must have some restriction in the main water line to insure water flow past the electrode.
● It is recommended that Anderson EC sensors be installed horizontally and pH electrodes be
installed vertically.
● A sample valve (a hose bib will do) installed as shown in Figure 1. is a great convenience. It can
also make electrode removal much easier by opening it to allow air to enter the line when
removing the electrode.
3
 Loading...