10 49-7835 Rev. 8
ENGLISH
B. Install the Mounting Plate
• Remove plastic bag, tape, and mounting plate
from the back of the indoor unit.
• Place the mounting plate on the wall in the
desired location taking into account the minimum
clearances necessary for proper operation.
• Using a level, verify that the mounting plate is
horizontal and mark the screw locations.
• Attach the mounting plate to the wall with the
supplied screws.
• Wall anchors are supplied if not able to align all
screw holes with studs.
• Be sure that the mounting plate has been
attached firmly and that applied weight is evenly
distributed by each screw. (At least one screw in
wall stud, others can use wall anchors.)
• The piping for the indoor unit may be routed to
and from the unit in one of several directions:
left, left rear, right, right rear, or right below. See
Illustration on page 7.
• Knockouts are provided on the unit case for Left,
Right, and Right Below usage.
Step 2 - Installation of the Indoor Unit
A. Select the Indoor location:
• Do not allow any heat or steam near the unit.
• Select a location where there are no obstacles in
front of the unit.
• Make sure that condensate drainage can be
conveniently routed away.
• Do not install near a doorway.
• Ensure that the space around the left and right of the
unit is more than 4”. The unit should be installed as
high on the wall as possible but allow a minimum of 4”
from the ceiling.
• Use a stud finder to locate and mark stud locations
for mounting and to prevent unnecessary damage to
the wall.
• Install in a location that is strong enough to withstand
the full weight and vibration of the unit.
• Leave enough space to allow access for routine
maintenance.
• Select a location that gives easy access to removing
and cleaning air filters.
• Install in a location that is 3 ft. or more away from
other electrical appliances, such as televisions and
audio devices.
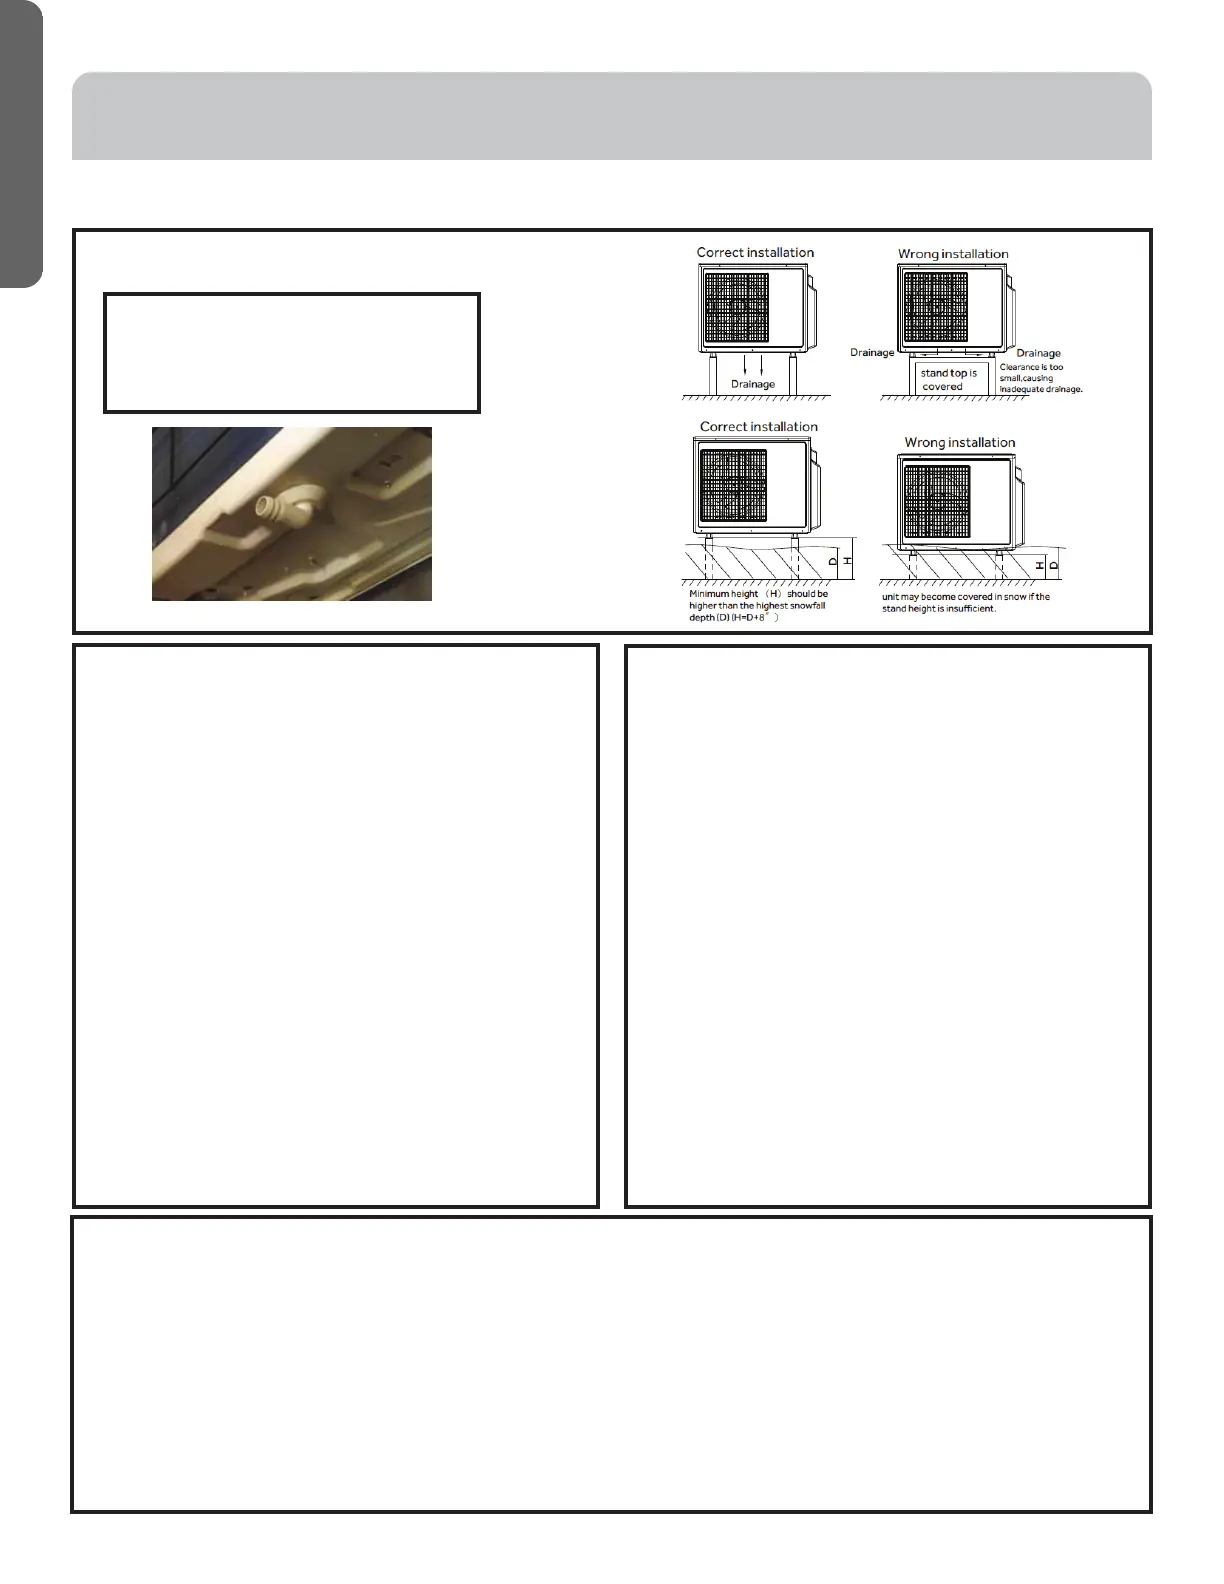
Proper Installation for Drainage
Set the unit on mount or pad using team lift.
Do not install the drain elbow if the unit is
located in an area where freezing can occur.
C. Install the Tubing
• Measure and mark the location where the piping hole is
to be drilled.
• Follow these steps to move the drain pipe if the pipe
location will be on the left side of the unit.
1. Remove the stopper in the left drain hole and knockout
the molded plug inside the port.
2. Transfer the corrugate drain hose from the right side to
the left side.
3. Insert stopper into right side drain port. Using soap as
a lubricant and a small screwdriver will allow for easier
seating of the stopper.
• Drill the lineset hole using a 2 1/4” hole saw. Angle the
drill with a downward pitch to the outside wall so that the
outside wall hole will be at least a ¼” lower than the inside
hole. This allows for proper drainage of condensate.
• Install the lineset hole flange at the hole opening on the
inside wall.
NOTE: The flange is prescored. It may be necessary to
modify the flange to fit properly behind the wall unit housing.
INSTALLATION INSTRUCTIONS
 Loading...