EasyManua.ls Logo

Haier 1U12TE2VHA User Manual

Haier 1U12TE2VHA
52 pages
To Next Page IconTo Next Page
To Previous Page IconTo Previous Page
Page #8 background imageLoading...
Page #8 background image
8 49-7835 Rev. 8
ENGLISH
MINIMUM CLEARANCES
(Appearance may vary)
Mounting the outdoor unit:
The distance between
the indoor unit and the
or should be more
than 6 feet.
more than
4in.
more than 4in.
more than 4in.
more than 4in.
more than 6in.
more than 24in.
more than 6in.
Attention must be paid to
the pitch of drain hose
Z
1 2
Refer to the table below for mounting feet
positions and submittal for unit dimensions.
Mounting feet positions for the outdoor unit.
Securely attach the unit to a mounting pad
or brackets with 7/16" (10mm) bolts.
Use the mounting feet pads or vibration mats
where noise transmission may be a concern.
Follow local code when mounting the unit

strong winds or earthquakes.
This picture is for reference only. Your product may look different. Read your manual before installation. Explain
the operation of the unit to the user according to this manual.
Piping Exit Options
Rear left
Left
Rear
right
Right
Below
Marketing Model Number X1(inch) X2(inch) Y(inch) Z(inch)
1U09EH2VHA 4.53 4.53 23.23 12.95
1U12EH2VHA
1U18EH2VHA 5.12 5.12 25.98 15.75
1U24TE2VHA
1U24AP2VHA
1U18EH2VHD
1U18LC2VHA 4.53 4.53 22.95 12.60
1U12LC2VHA 5.47 5.51 19.69 10.20
1U09TE1VHA
1U12TE1VHA
1U18TE2VHA 5.16 5.16 24.72 14.53
1U15AP2VHA
1U18AP2VHA
1U09EH2VHD
1U12EH2VHD
1U09AP2VHA 5.12 5.91 19.69 12.20
1U12AP2VHA
1U09TE2VHA 5.12 6.30 20.08 12.32
1U12TE2VHA
INSTALLATION INSTRUCTIONS
Question and Answer IconNeed help?

Do you have a question about the Haier 1U12TE2VHA and is the answer not in the manual?

Haier 1U12TE2VHA Specifications

General IconGeneral
BrandHaier
Model1U12TE2VHA
CategoryAir Conditioner
LanguageEnglish

Summary

Record Keeping

Important Safety Information

Safety Warnings

Key warnings related to safe operation, electrical hazards, and fire risks.

Installation Instructions

Before You Begin Installation

Important preparatory steps, skill level requirements, and safety reminders before starting installation.

Required Tools for Installation

Comprehensive list of tools and materials needed for the installation process.

Minimum Clearances

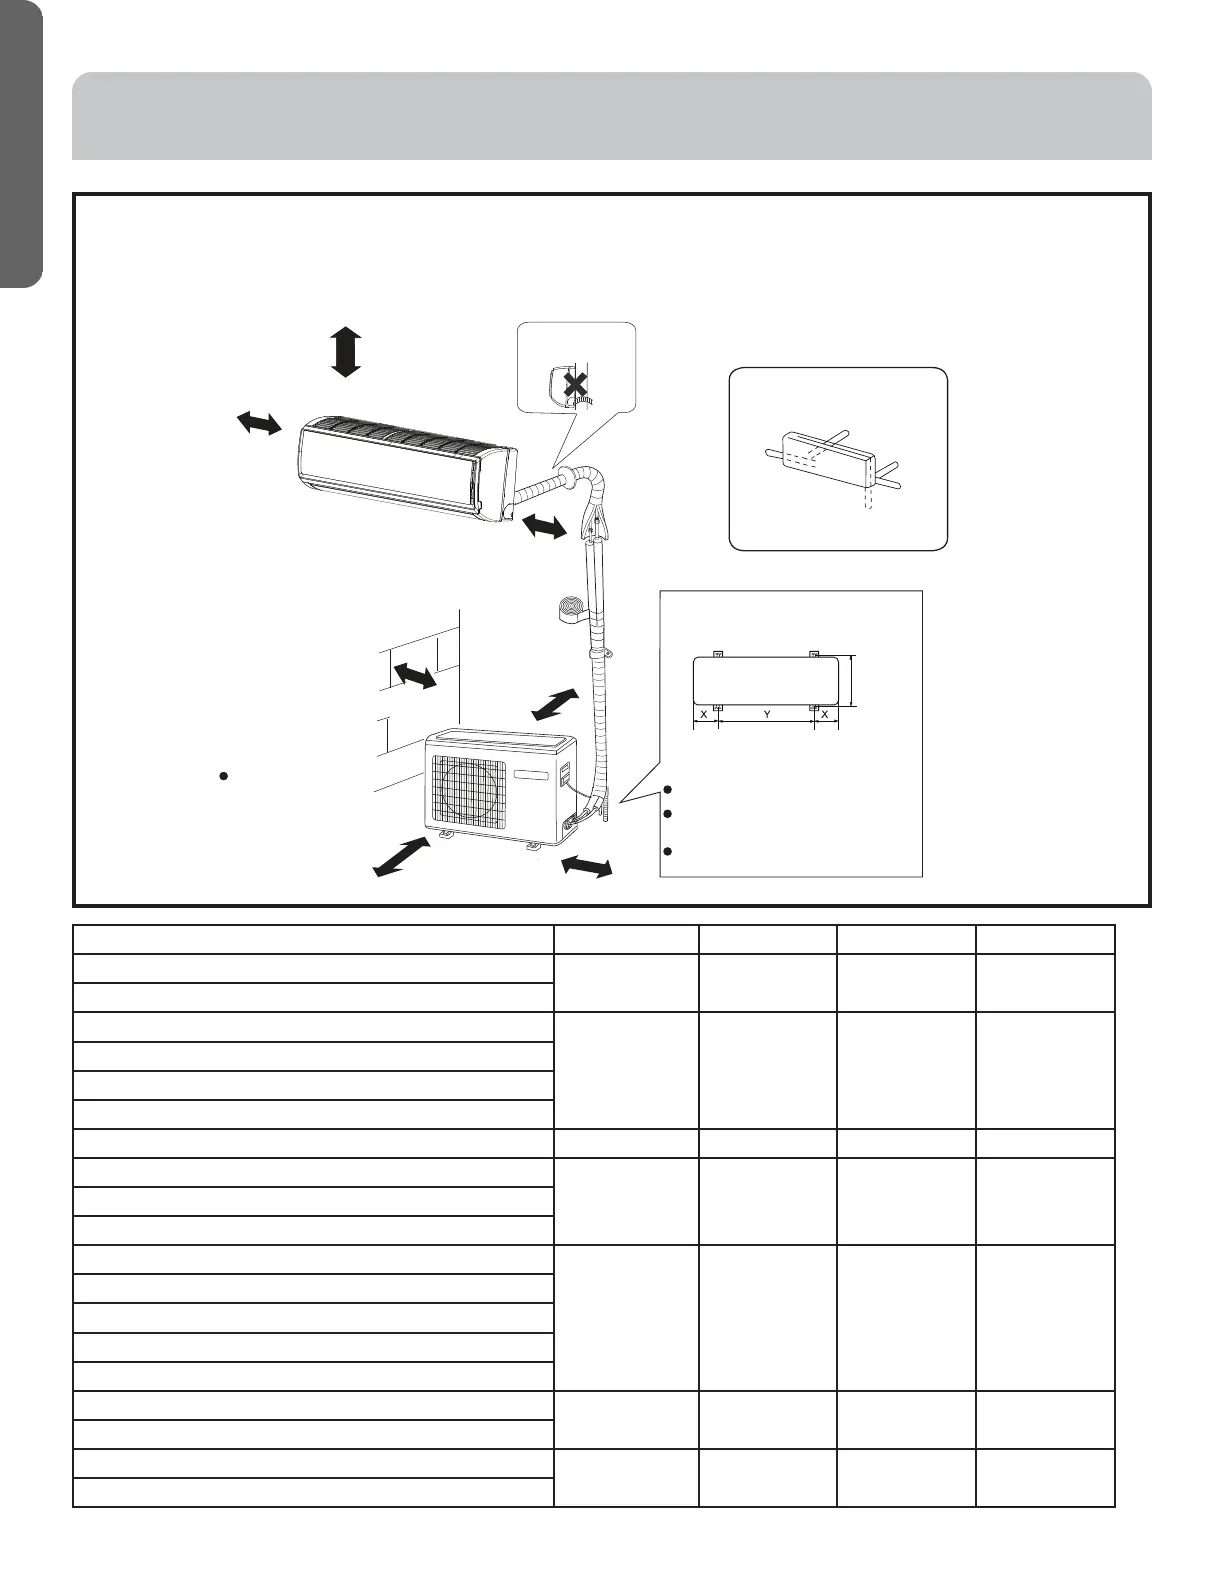
Specifies required clearances around the indoor and outdoor units for proper operation and ventilation.

Step 1 - Outdoor Unit Location

Guidelines for selecting an appropriate outdoor unit location considering clearances and environmental factors.

Step 2 - Indoor Unit Installation

Detailed instructions for mounting the indoor unit, installing tubing, and ensuring proper drainage.

Wall Brackets and Mounting Hardware

Information on various wall bracket styles, dimensions, and part numbers for unit mounting.

Step 3 - Outdoor Unit Installation

Procedures for preparing the outdoor unit, making electrical connections, and installing the drain elbow.

Step 4 - Final Checks and Operation Explanation

Final checks, test run items, and instructions for explaining unit operation to the end user.

Limited Warranty

Warranty Period and Coverage

Details the duration of parts and compressor warranties and what Haier will replace.

Date of Purchase Definition

Clarifies how the "Date of Purchase" is determined for warranty claims.

Warranty Coverage Details

Explains who is covered by the warranty and conditions for non-owner occupied properties.

Service and Exclusions

Outlines how to obtain service and lists items not covered by the limited warranty.

Registered Limited Warranty Terms

Details the 10-year registered warranty and its terms, superseding other warranties.

Related product manuals