22 HARDI
®
N-SERIES 3-PT SPRAYER DIAPHRAGM OPERATOR'S MANUAL
Operating the Spraygun (optional)
7. Set spraygun valve 4 (Fig. 12) "ON" and set Master On/Off boom
switch 5 (Fig. 12) "OFF".
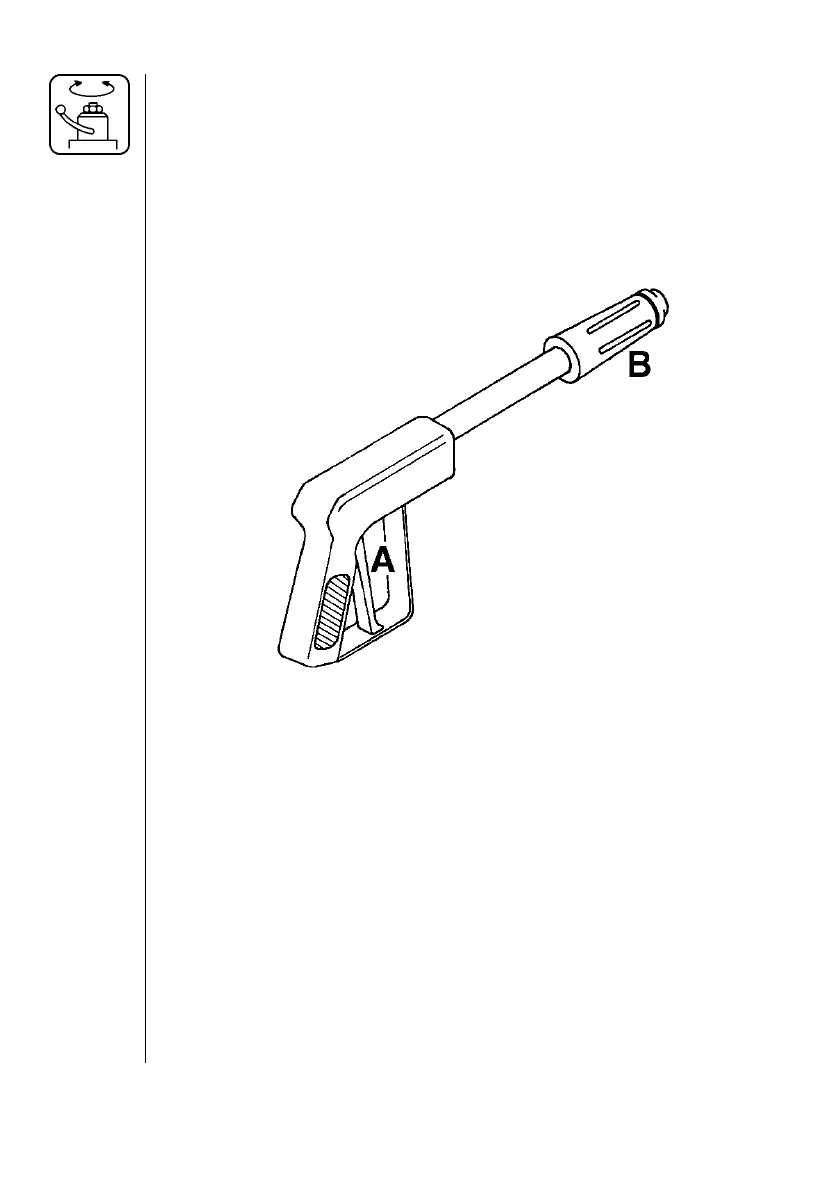
8. Then depress the red handle A (Fig. 13) to spray fl uid from the
spraygun. Check the pressure on the system pressure gauge 2 (Fig.
12) and follow step 6 to adjust.
9. To adjust the spray pattern, turn the black handle B (Fig. 13) OUT for
a narrow spray pattern for long distances and IN for a wide pattern
for more coverage at close distances.
Agitation Adjustment
Ag i ta tion is nec es sary to keep the so lu tion in your tank prop er ly mixed.
Con sult your chem i cal sup pli er for the rec om mend ed amount of ag i -
ta tion.
In gen er al, max i mum agitation is required but some products tend to
foam easily. To reduce foaming in some instances anti-foaming agents
may be added to the tank (Refer to chemical label). When running low
liquid levels in the tank, agitation may be reduced to fa cil i tate pump
priming and avoid pressure fl uc tu a tions. Make sure that you have ad-
just ed the agitation properly before sprayer calibration.
Turn the agitation valve 3 (Fig. 12) clockwise to reduce the agitation
fl ow. Turn the valve counter-clockwise to in crease the agitation fl ow.
Fig. 13
 Loading...